You have two real options here: physically build more patio, or redesign what you already have so it works and feels bigger. Most people actually need both. The good news is that even before you break ground on an expansion, smart layout choices, the right materials, and a few lighting tricks can make a cramped 10x10 slab feel twice as large. This guide walks you through sizing your patio correctly, making it look bigger without spending a dime on concrete, and then tackling an actual expansion the right way if you decide to go that route.
How to Make a Patio Bigger: Build and Design Tips

Nolan Carver
5 Jul 2026
Start here: how big should your patio actually be?
The most common mistake I see is people eyeballing a patio size without accounting for furniture clearance. A dining table might be 36 inches wide, but you need about 3 feet (36 inches) of clearance around all four sides so people can pull chairs in and out without bumping a wall or planting bed. That puts a simple 4-person dining setup at around 12x12 feet minimum, just for the dining zone alone. Add a seating lounge area, grill station, or path to the door and you are quickly looking at 16x20 feet or more for a family-friendly outdoor room.
For circulation between zones, keep at least 30 to 36 inches of clear walking path. If you have a main route that people use frequently, like the path from the back door to the yard, bump that up to 48 to 60 inches so two people can pass comfortably. These numbers are not opinions; they are the same clearances used in commercial outdoor dining and accessibility standards, and they translate directly to how usable your finished patio feels.
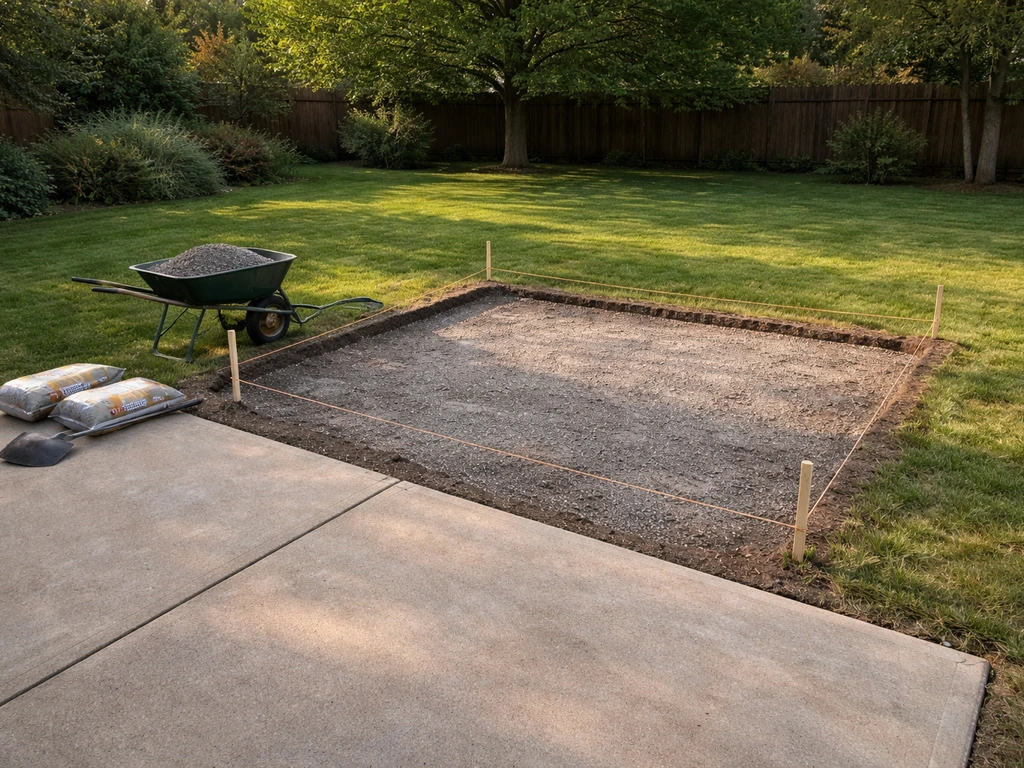
A practical way to size your patio before you build anything: tape out the footprint on your grass using marking spray or landscaping flags. Set up your actual furniture inside those boundaries. Walk around it. Open chairs. Carry a plate from the grill to the table. If anything feels tight, expand the tape before you ever touch a shovel. It takes 20 minutes and saves you from building something you will regret.
| Use Case | Minimum Size | Comfortable Size |
|---|---|---|
| 4-person dining only | 12 x 12 ft | 14 x 14 ft |
| 6-person dining + grill space | 14 x 16 ft | 16 x 20 ft |
| Lounge seating (sofa + chairs) | 12 x 14 ft | 14 x 18 ft |
| Combined dining + lounge | 16 x 20 ft | 20 x 24 ft |
| Small urban/courtyard patio | 8 x 10 ft | 10 x 14 ft |
One more thing to check before you size anything: setbacks. Most municipalities require patios to sit a certain distance from property lines, and that distance is measured perpendicular to the line. Pull your plot plan or call your local planning department to confirm the number for your zone. Getting surprised by a setback after you have already poured concrete is a bad day.
Quick wins that make a small patio look bigger right now
If your patio is too small but you are not ready to build yet, or if you just want to squeeze more out of what you have, these design moves work fast and most of them cost next to nothing.
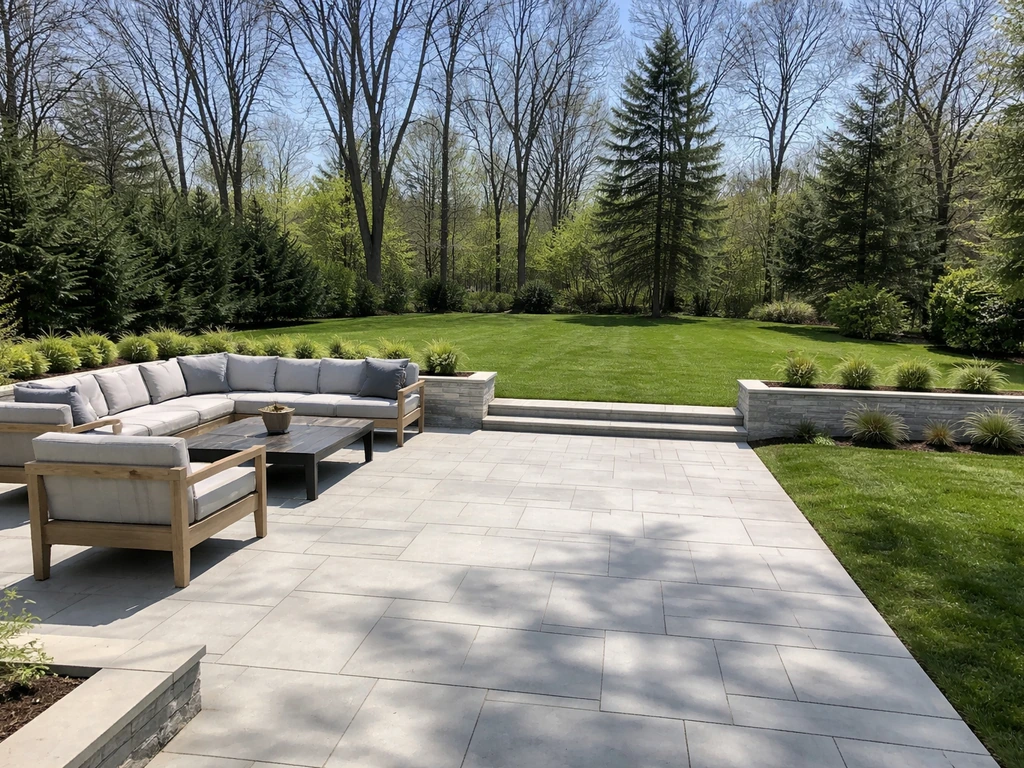
Zone it out instead of cramming everything in the middle
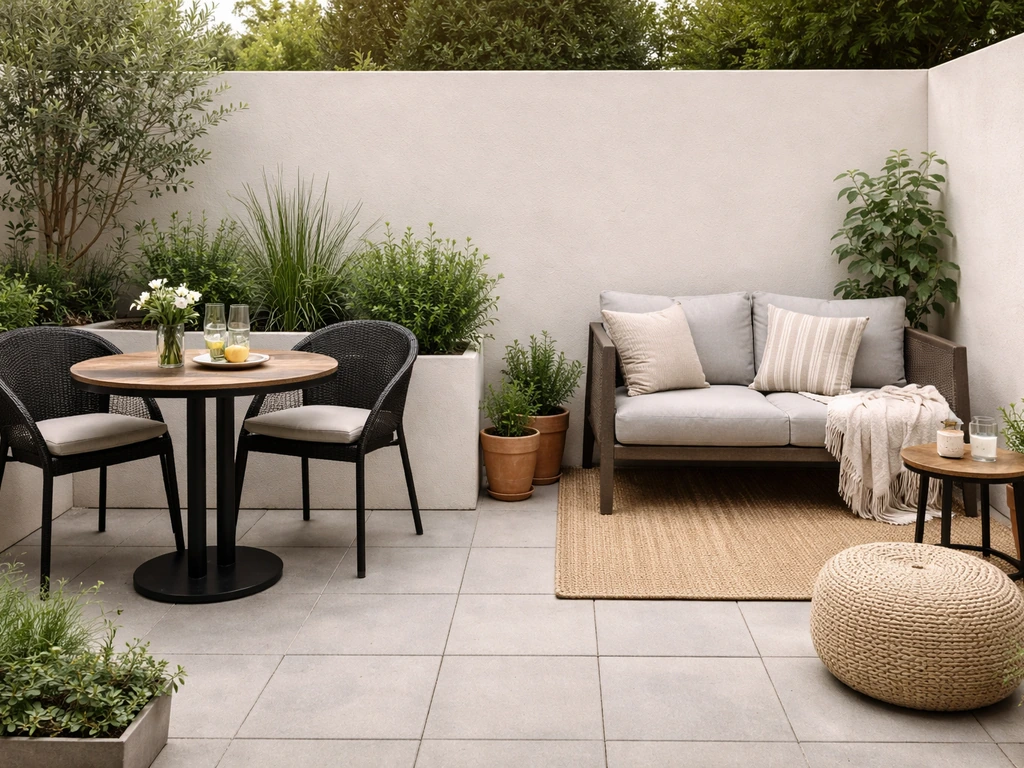
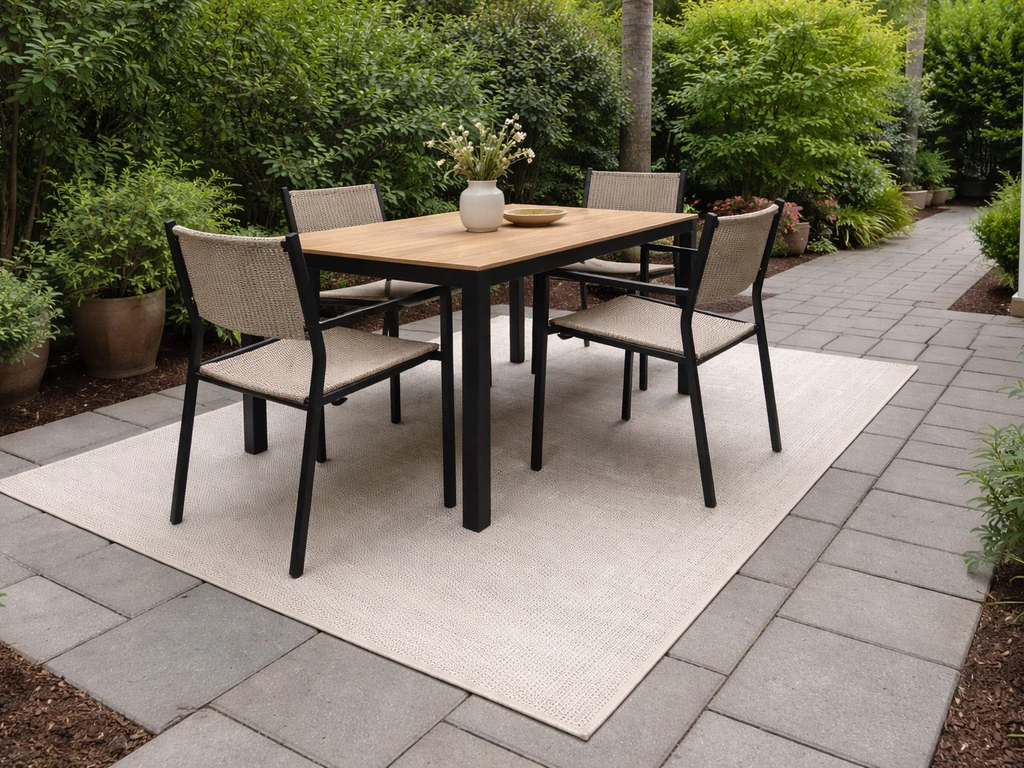
Counterintuitively, dividing a small patio into two or three defined zones makes it feel larger, not smaller. Instead of pushing everything to the center, create a dining corner, a small lounge nook, and a clear path between them. Each zone reads as its own room, and the eye reads the whole thing as a more expansive space. Use an outdoor rug, a change in furniture height, or even just a potted plant to define the boundary between zones.
Light outward, not downward
The default move is to hang a light over the center of the patio. That actually makes small patios feel smaller because it creates a bright circle in the middle and dark edges. Instead, layer lighting outward: string lights along a fence, uplights in a garden bed, path lights along the edge of the slab. When the light draws your eye toward the perimeter and beyond, the space feels deeper than it is. This is one of those tricks that genuinely works, and a set of solar stake lights costs less than $30.
Right-size the furniture
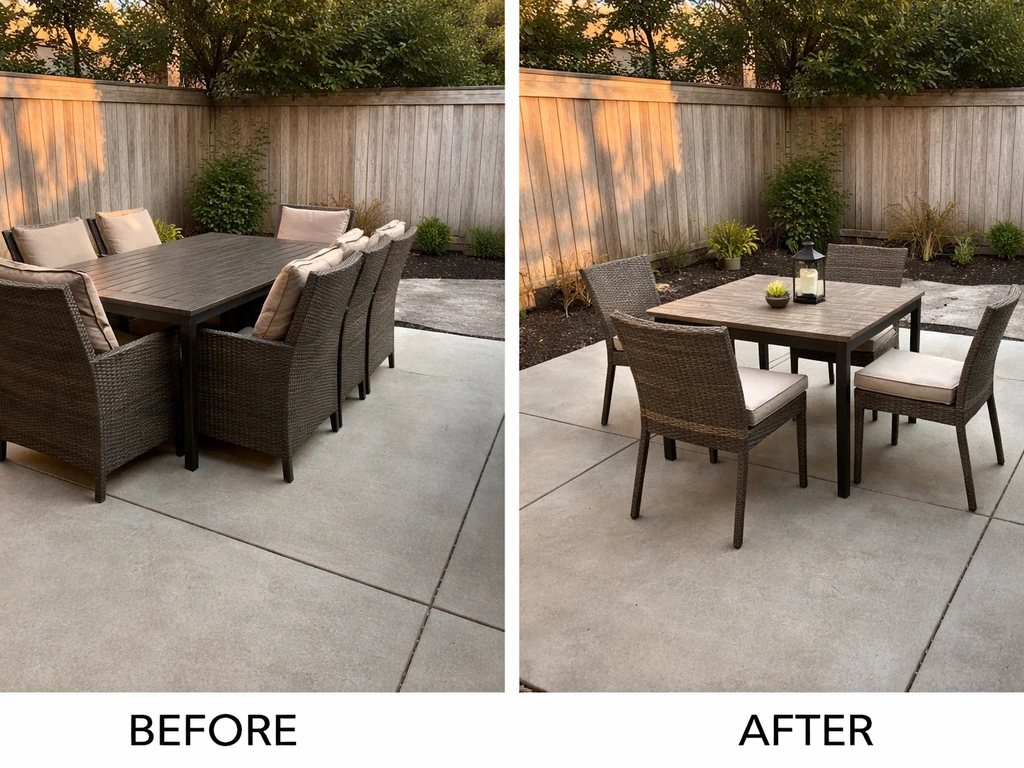
Oversized furniture is the single biggest reason small patios feel claustrophobic. A 7-piece dining set on a 10x12 slab looks like a furniture showroom explosion. Scale down: a round bistro table for two takes up far less floor space than a rectangular six-seater, and it still seats four in a pinch. Furniture with slim profiles and raised legs (so you can see floor underneath) keeps sightlines open and makes the whole surface area visible.
Keep the traffic path visible
If seating blocks the obvious route across the patio, the whole space feels like an obstacle course. Keep at least 30 to 36 inches clear from the back door to the yard. When people can see where they are going without mentally solving a puzzle, the patio reads as spacious and intentional.
Layout and shape ideas that give you more usable space
Shape matters more than most people realize. A perfect square is actually one of the least efficient layouts because the corners often go unused. Here are configurations worth considering.
- L-shape: wraps a corner of the house, creates two natural zones without a wall, and uses yard space that usually sits empty. Great for combining dining and lounge.
- Rectangle with a bump-out: extend one end of a rectangular slab by 4 to 6 feet to create a dedicated grill or bar zone. Feels intentional and adds real square footage without rebuilding from scratch.
- Curved or organic edge: a gentle curved border softens the boundary between patio and yard, making the transition feel gradual instead of abrupt. The eye reads this as a larger space.
- Multi-level layout: if your yard slopes, a stepped or raised section does double duty as a retaining solution and a way to visually separate dining from lounge without walls.
- Wraparound: if you have the yard space, extending the patio along two sides of the house connects outdoor zones and eliminates the bottleneck of a single small rectangle.
When you are sketching layout options, draw them to scale on grid paper (one square = one foot) before committing to anything. It takes ten minutes and it is the cheapest design tool you have.
Materials, colors, and patterns that make the space feel larger
The surface finish you choose has a real impact on how big the patio looks and feels. These are the rules that actually hold up in practice.
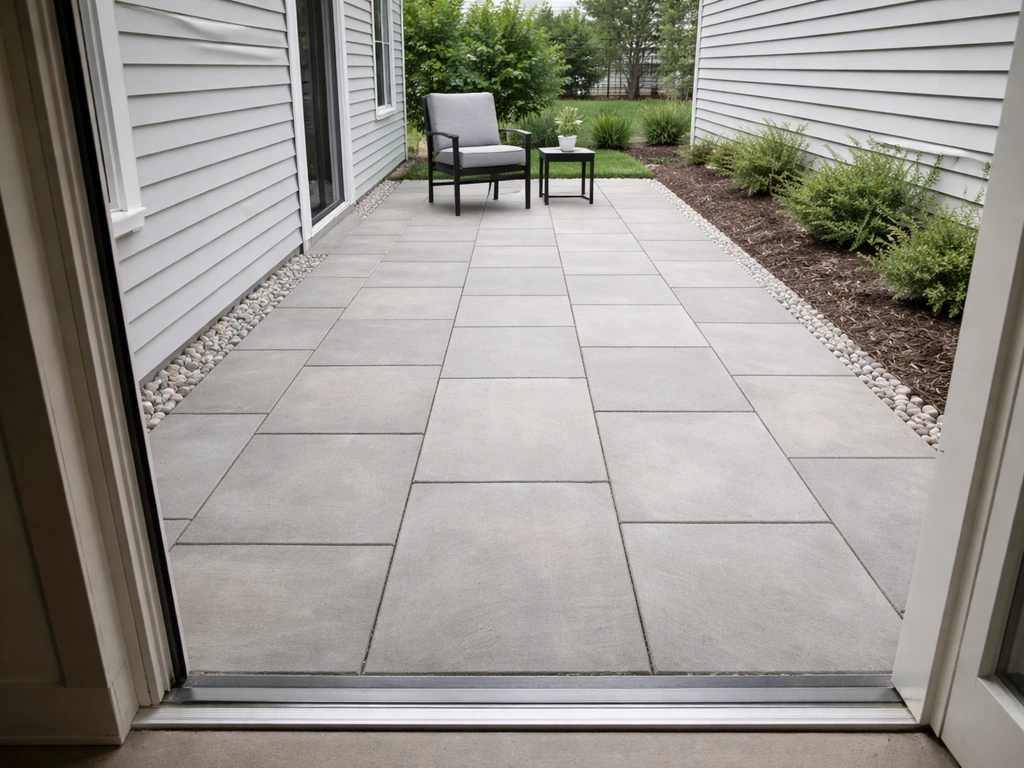
Go large-format and low-joint
Small pavers or tiles with lots of grout lines visually chop up the floor plane and make a patio look busier and tighter. Large-format pavers or slabs (18x18 inches or bigger) reduce the number of visible joints, and the surface reads as one continuous plane. A running bond or stack bond pattern in a rectangular format gives an especially clean, expansive look because the long lines pull the eye across the surface.
Lay the pattern diagonally or parallel to the longest view
If you orient a running bond pattern parallel to your longest sightline (say, running toward the yard rather than across it), the lines draw the eye deeper into the space. A 45-degree diagonal pattern is even more effective on a small square patio because it makes both dimensions look longer simultaneously. It does use about 10 to 15 percent more material due to cuts at the edge, so budget for that.
Light, consistent colors work harder than dark or high-contrast finishes
Light-toned concrete, limestone, or buff-colored pavers reflect more light and make the surface feel open. Dark surfaces absorb light and visually shrink. High-contrast borders (like a dark soldier course around a light field) can add definition, but they also visually frame and contain the space, which can make it feel smaller. If you want a border, keep the color contrast subtle.
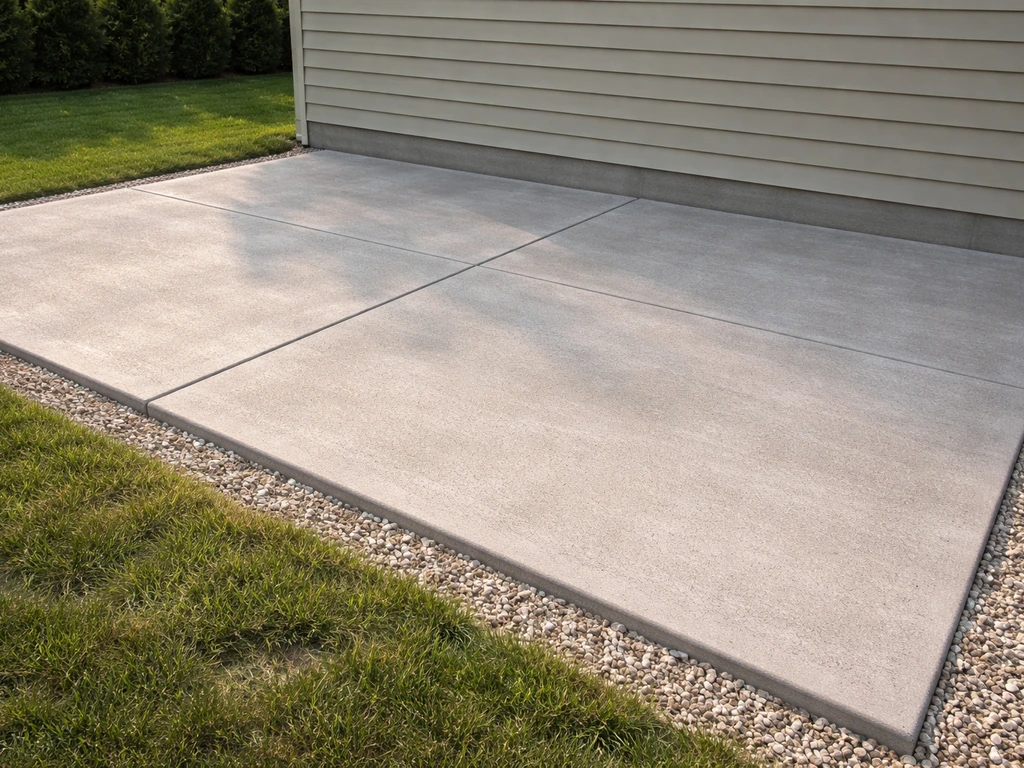
Carry the material beyond the patio edge
One of the most effective tricks is extending the same material or a complementary material into an adjacent path, stepping stone run, or garden border. When the patio surface does not have a hard stop at the edge, the eye does not register a boundary and the whole outdoor area reads as one larger space. Even a 2-foot apron of matching gravel around the perimeter achieves this effect.
How to actually make your patio bigger: expansion options
If you have done the layout tricks and the patio is still genuinely too small for how you want to use it, it is time to build more. If you are wondering how to build extended patio space, the next steps will help you choose the right expansion option and prep work for a clean, long-lasting result build more patio. Here are your main options, from least to most involved.
Option 1: Add a paver or gravel extension alongside the existing slab
This is the most DIY-friendly approach. You excavate a new section adjacent to the existing patio, prep the base, and lay pavers or compacted gravel to match or complement the existing surface. The key is matching base depth and slope so the new section drains in the same direction as the existing one. If you are building on top of a raised patio, you will also want to plan the height transitions, base support, and drainage so the extension performs the same over time. Use a different but complementary material if matching the existing surface exactly is not possible, and define the transition with an edge restraint or a narrow band of contrasting pavers.
Option 2: Extend an existing concrete slab with a new pour
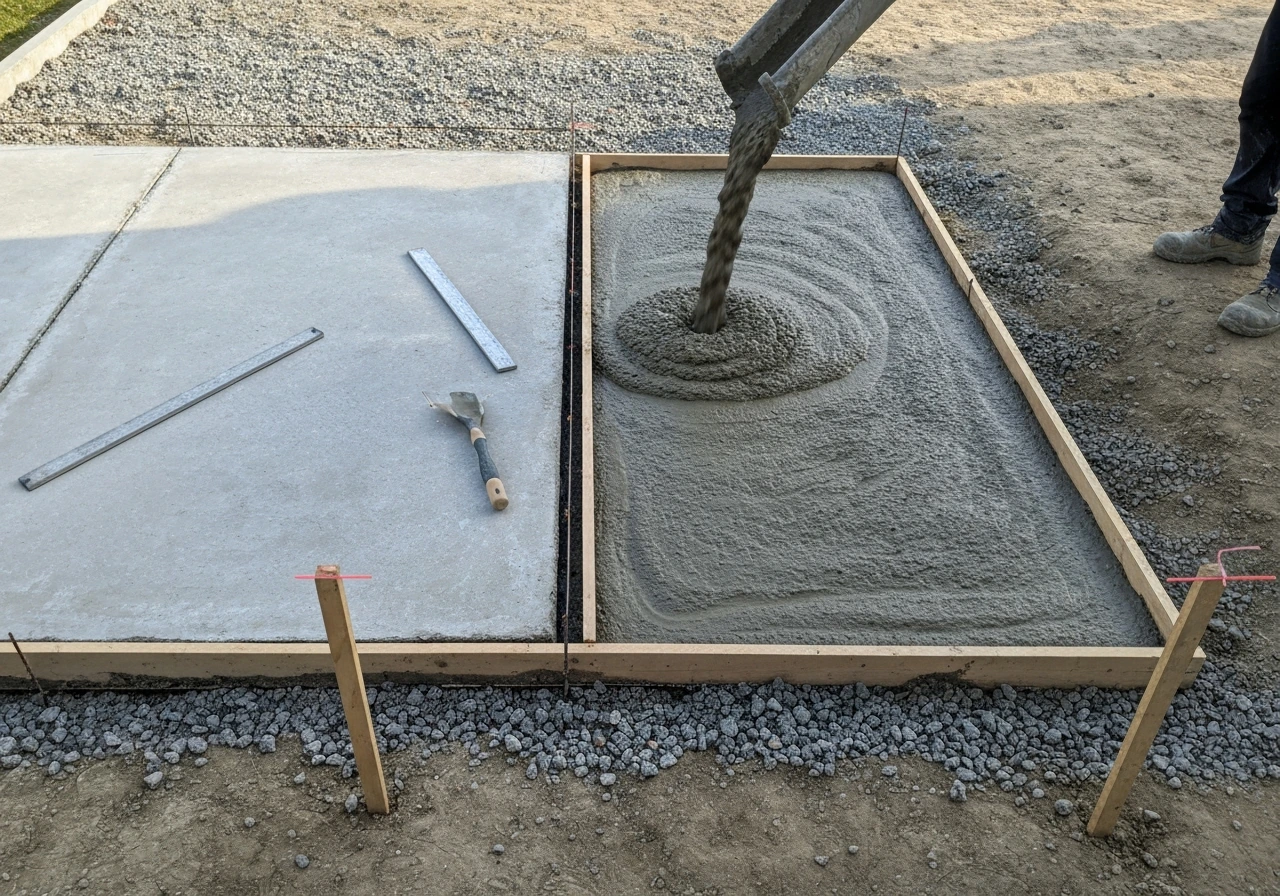
Pouring new concrete next to existing concrete requires an isolation joint (also called an expansion joint) between the two slabs. If you are trying to extend a small patio, this option is one of the most straightforward ways to add space while keeping the finish consistent how to extend a small patio. Do not try to bond the new pour to the old one with adhesive or tie it with rebar pins across the joint. Concrete moves independently as it cures and with temperature changes, and a bond will crack. Instead, place a strip of preformed expansion joint material (a compressible foam backer) against the edge of the existing slab before pouring. This lets both slabs move independently while staying flush.
Option 3: Reconfigure the shape entirely
If your existing patio is an awkward shape or the wrong size in the wrong direction, sometimes the right move is to remove a portion and rebuild it differently. Cutting away a narrow strip and rebuilding as a wider L-shape can give you far more usable area than simply adding square footage to the existing footprint. This is more work, but if the existing layout is the problem, adding more of the same shape does not fix it.
Option 4: Build a floating deck or composite platform adjacent to the patio
If the ground drops away from your patio or the slope makes grading a new section complicated, a low floating deck or composite platform can bridge the gap. It sits on its own footings, butts up against the patio edge, and gives you a level surface that visually reads as one continuous outdoor floor. This approach is especially useful when dealing with grade changes you do not want to regrade.
If you are weighing between a full expansion and a simpler extension, topics like how to extend a patio, how to add on to existing patio, or how to build a patio extension cover each of those paths in more depth. If you are planning a true patio expansion, use the steps below to size the extension correctly and keep it draining properly how to extend a patio. For sloped yards specifically, how to extend a raised patio walks through the unique challenges of multi-level builds.
Drainage, slope, and prep: the stuff that actually determines whether it lasts
This is the section most people skip, and it is why so many DIY patios end up with puddles, heaving, or cracked edges within a few years. Get this right and everything else is easy.
Call 811 before you dig a single shovel
I cannot stress this enough. Call 811 (the national utility locate line in the US) at least two business days before any excavation. In some states, like Washington, this is required by law. Utilities will come out and mark underground lines for free. It takes two minutes to make the call and it could save your life, or at minimum save you from a very expensive repair bill.
Slope every surface away from the house
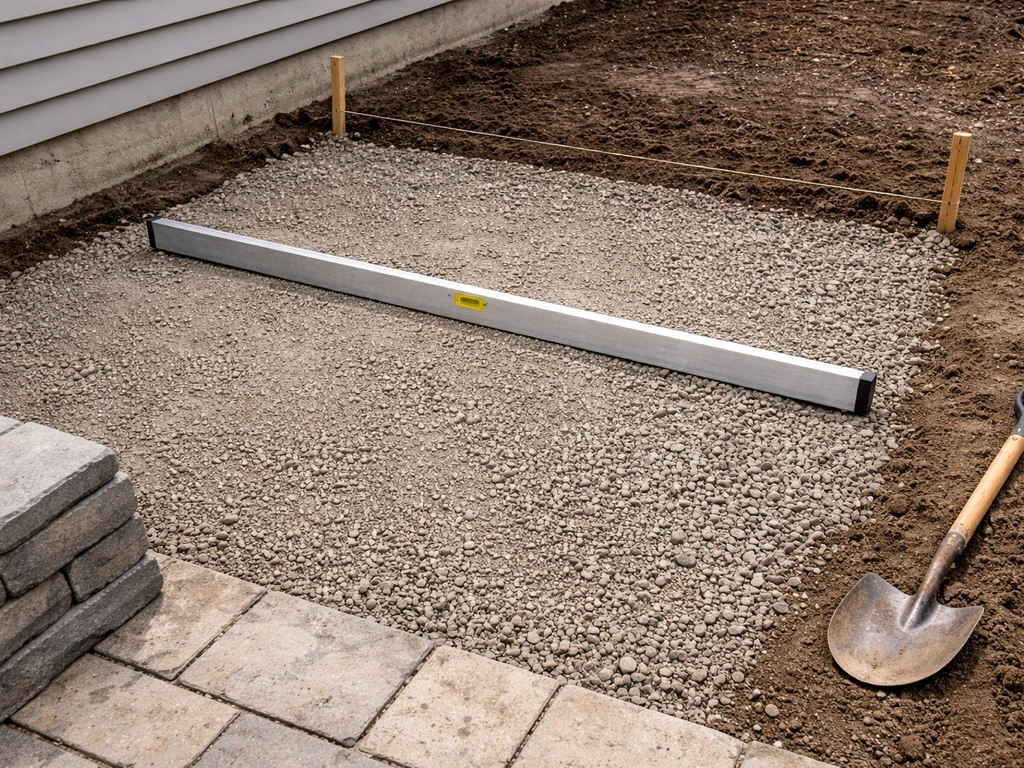
The minimum drainage slope for any patio surface is 2 percent, which works out to 1/4 inch of drop for every 1 foot of distance away from the house. Home Depot’s patio and walkway installation guidance also notes a slope of about 1/4 inch per foot. On a 12-foot-deep patio, that is 3 inches of total drop from the house edge to the outer edge. Use a string line and line level to check your grade as you build. Set the string at the house, pull it taut to a stake at the far edge of the patio, and measure the drop at the far end. Adjust your base depth across the width until the slope is consistent. This is the single most important prep step for long-term performance.
Build the right base depth
For a pedestrian patio, you need at least 4 inches of compacted crushed stone base, plus a 1-inch layer of bedding sand, plus the paver or slab on top. Skimp on the base and you will get settling, heaving, and cracked edges, especially through freeze-thaw cycles. Compact the base in 2-inch lifts with a plate compactor, not just foot traffic. If you are expanding an existing patio, the new section needs the same base depth as the original, and both sections need to slope in the same direction.
Edge restraints are not optional
Pavers without edge restraints will creep outward over time as people walk on them and as the ground moves. Edge restraints are plastic or aluminum channels that stake into the base material along the outer perimeter of the patio. They must sit on the same compacted base as the pavers, not on loose soil. If you are expanding a paver patio, pull the existing edge restraint, extend the base to the new perimeter, and install new restraints before you lay a single paver in the expansion zone.
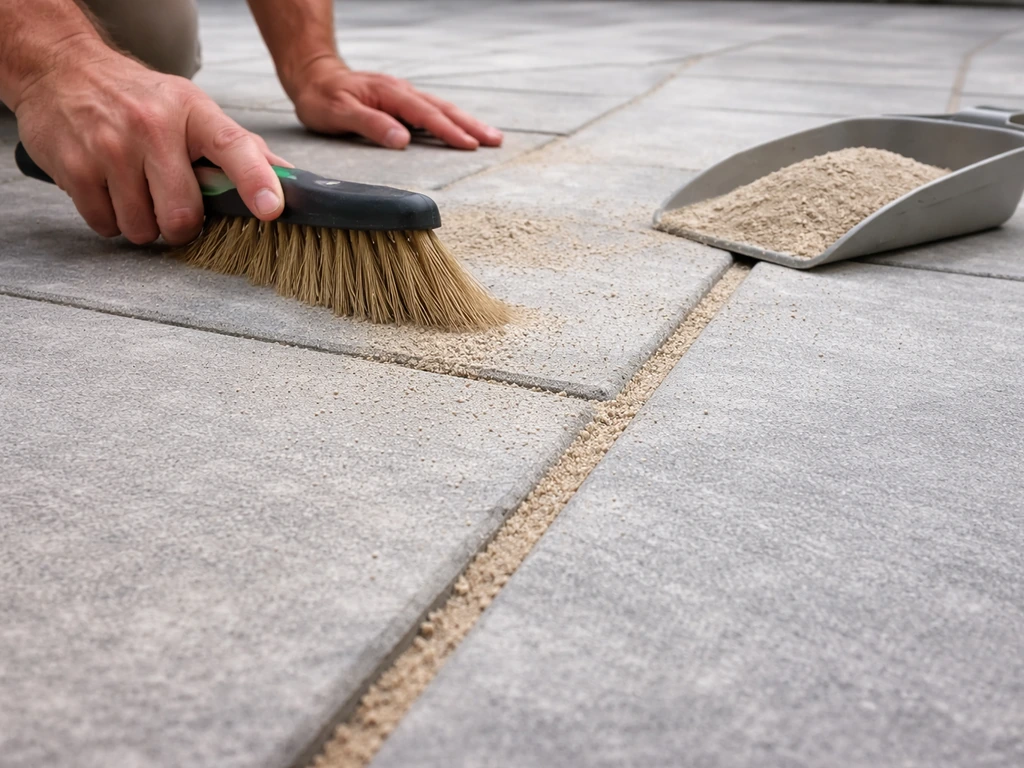
Jointing sand and the final finish
Once pavers are laid and edge restraints are in place, sweep polymeric jointing sand into the joints. Most polymer-modified jointing sands are spec'd to fill joints up to about 1/2 inch wide. Compact the pavers with a plate compactor over a protective pad, then sweep in a second round of sand and compact again. This locks the pavers together and resists weed growth and ant intrusion. If your expansion section meets the existing section, fill that transition joint with the same polymeric sand so it moves with the rest of the surface.
Build bigger vs. make it look bigger: which path makes sense for you?
Here is the honest breakdown. If your patio is genuinely too small for the activities you want to do, no amount of design tricks will fix it. A 10x10 slab that needs to seat six people for dinner needs more square footage, full stop. But if your patio is in the right size range and just feels cramped because of poor furniture choices, bad lighting, or a cluttered layout, you can make dramatic improvements without breaking ground. If you do decide to extend your backyard patio, plan around drainage, base depth, and setbacks so the expansion lasts extend backyard patio.
| Situation | Best Approach | Approximate DIY Cost |
|---|---|---|
| Patio is right size but feels cramped | Layout + design changes | $0 to $300 |
| Need 20-30% more square footage | Paver or gravel extension | $500 to $2,000 |
| Need to add a whole new zone | Full expansion or L-shape rebuild | $1,500 to $5,000+ |
| Ground slopes away from house | Floating deck platform adjacent to patio | $2,000 to $6,000+ |
| Existing shape is wrong, not size | Reconfigure and rebuild | $1,000 to $4,000 |
Start with the tape-out exercise described at the top of this article. If you mark out your ideal size and it is only 2 to 4 feet larger than what you have, a simple paver extension is a weekend project well within beginner skill level. If the gap is larger or you are dealing with significant slope or drainage issues, take the time to plan the base prep carefully because that is where patio expansions succeed or fail. If you are figuring out how to add a patio to your house, these base-prep details are what keep the finished surface from shifting or holding water plan the base prep carefully.
FAQ
How do I know if design changes are enough, or if I need to physically expand my patio?
Yes. If you are only trying to “feel” bigger, start by making sure your main walkway has 30 to 36 inches clear, then reduce furniture mass (smaller set, fewer pieces). If you want actual extra function, use the tape-out method and measure how many steps you need from the door to the grill and from the grill to the table, if that path is not comfortable, that is usually the point where an extension is the real fix.
When I measure furniture, what clearance should I plan for around the dining table?
A quick rule of thumb is that a dining area wants about a 36-inch clearance around the table for chairs to slide in and out. If your patio cannot support that clearance on at least three sides (or all four, ideally), you will keep feeling cramped even with good lighting and color. Use your exact dining set dimensions, then check the clearances with chairs pulled out, not pushed in.
Do outdoor rugs help make a patio bigger, or can they make it feel smaller?
For a dining space you want to sit and maneuver, avoid oversized rugs that extend under chairs unless the rug is anchored and sized so chairs still move without snagging edges. If you use an outdoor rug to define zones, choose one large enough that at least the front chair legs remain on the rug when chairs are pulled out (usually the rug needs to be several inches wider than the table footprint).
What is the best lighting approach if I have a small patio and already have a single ceiling light?
Yes, but only if the lighting stays “directional.” Instead of one overhead center light, consider perimeter lighting (string lights along a fence, path lights, or low uplights) so brightness increases toward the edges. Also, aim to keep glare low by mounting fixtures under eaves or using diffusers, because harsh glare makes small spaces feel even tighter.
My patio looks like it drains poorly. How can I tell if the slope is wrong versus the base is settling?
There are two common problems: incorrect slope and incomplete base depth. Even if you set a 2 percent slope, you can still get puddles if drainage has a dead spot (for example, compacted base that is higher in the middle, or sand that washes into low areas). Verify the finish grade by checking several points across the width with a string line, not just the far edge.
Do I need an expansion joint if I pour new concrete next to existing concrete?
Avoid building the extension flush without thinking about movement. For concrete extensions, use a true isolation or expansion joint with a compressible foam backer, and keep an appropriate joint width so the slabs can move independently. If you skip this or try to bond slabs together, the joint area is where cracking and heaving usually show up first.
Can I extend a paver patio and keep it flush with the existing surface, without creating a noticeable seam?
Yes, but match compatibility. If your existing patio is pavers and you add a new paver zone, the extension needs the same base depth and slope direction, and you should carry edge restraints into the new perimeter before laying pavers. Also plan for transitions, because a tiny lip at the join can catch chair legs and cause water to collect right at the seam.
What changes if I live in a freeze-thaw climate and my patio keeps heaving or cracking?
If you are on freeze-thaw ground, the base and compaction matter more than the top material. Confirm you use enough compacted crushed stone base, compact in 2-inch lifts with a plate compactor, and do not rely on walking on the base. Once the base is right, larger-format pavers can still be a good choice because they reduce joint count, but they cannot compensate for an underbuilt base.
When should I choose a low floating deck instead of a ground-level patio expansion?
Before you decide between a deck-style addition and a ground-level extension, compare how much height change you are trying to solve. A low floating deck can be a lifesaver when regrading the yard is impractical, but it may require additional attention to ventilation and posts/footings to avoid movement. If you already have manageable slope and accessible drainage, a ground-level paver extension is often simpler and lower maintenance.
Can I expand toward my property line to make the patio bigger, or will setbacks and drainage stop me?
You can, but check two constraints: setbacks and drainage paths. Setbacks are measured perpendicular to your property line, and drainage needs to carry water away from the house, not toward it or into neighboring areas. If your ideal “bigger patio” location pushes you closer to the line or into a low spot, you might need to reconfigure zones instead of adding straight square footage.