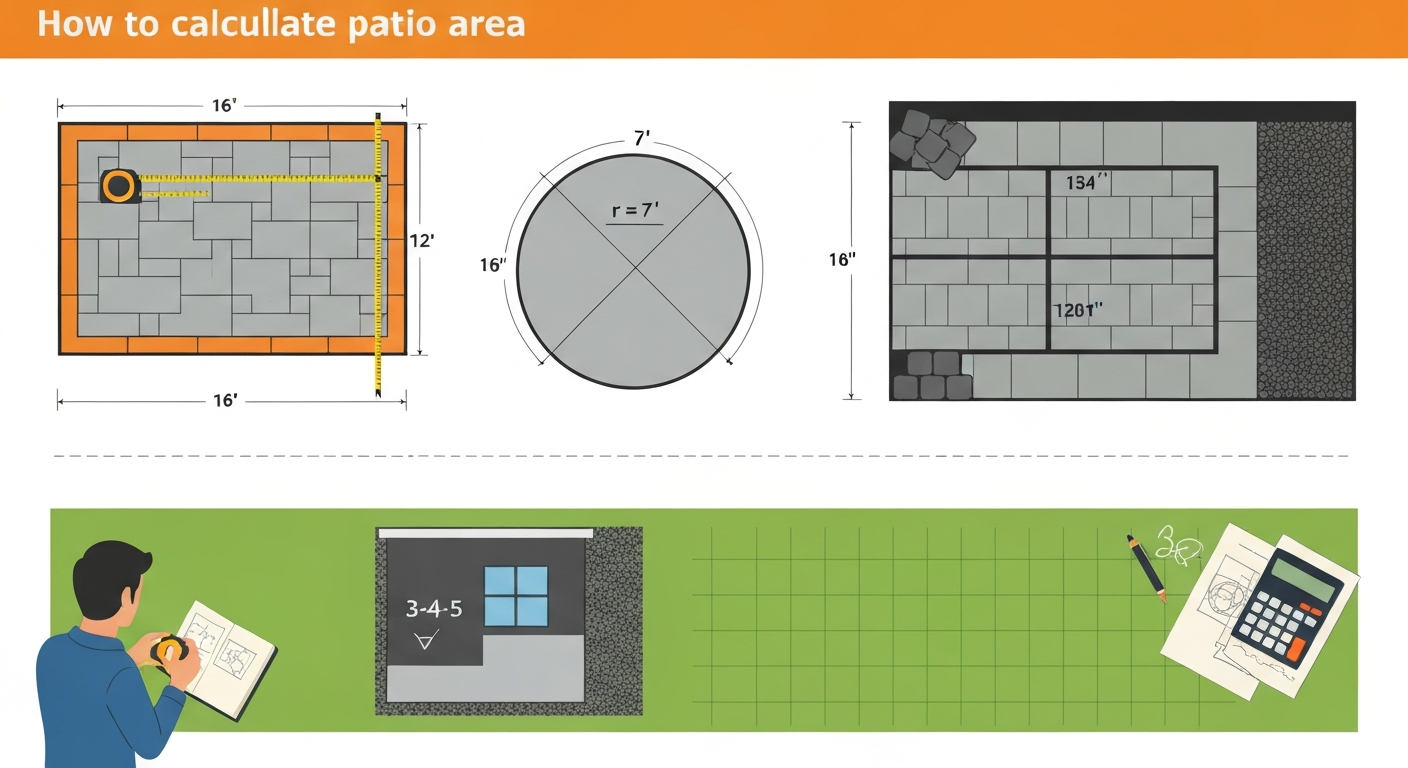
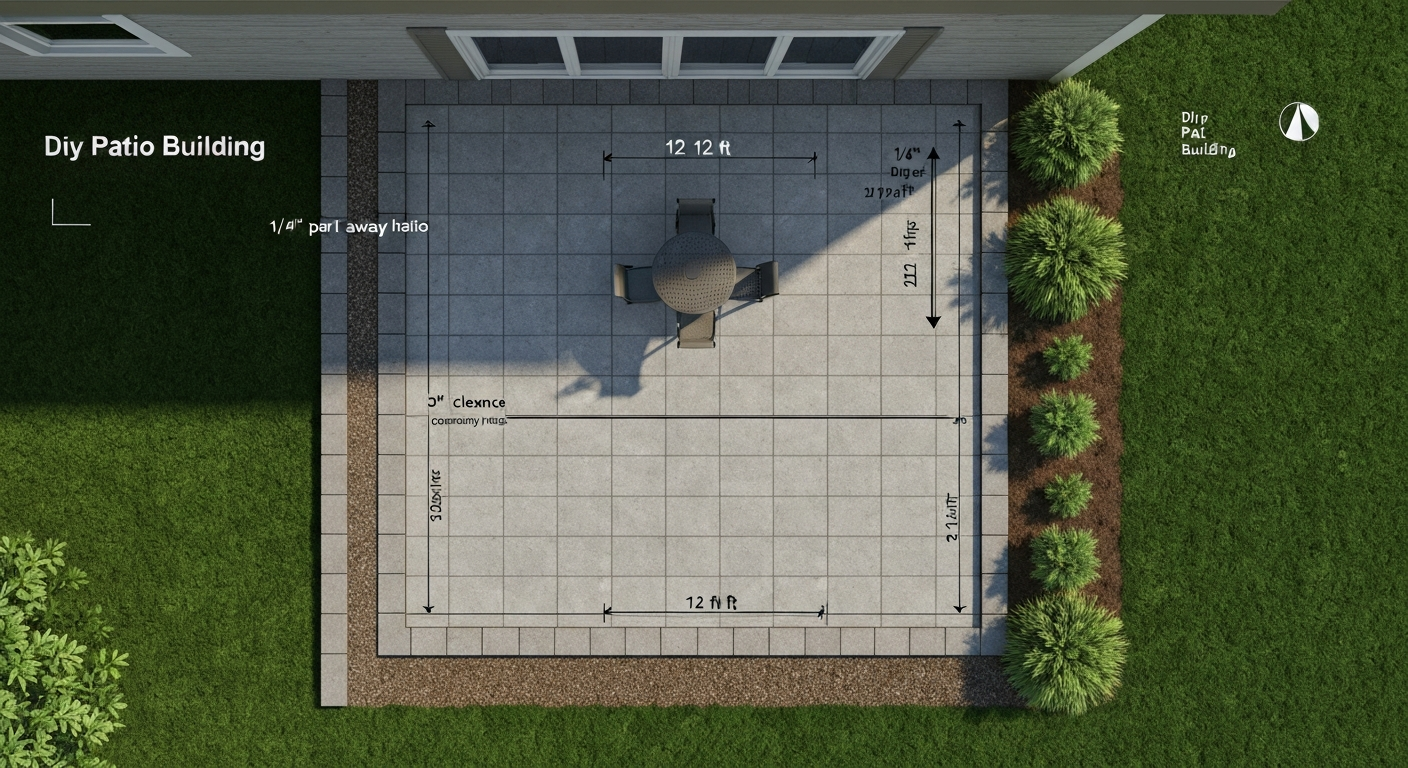
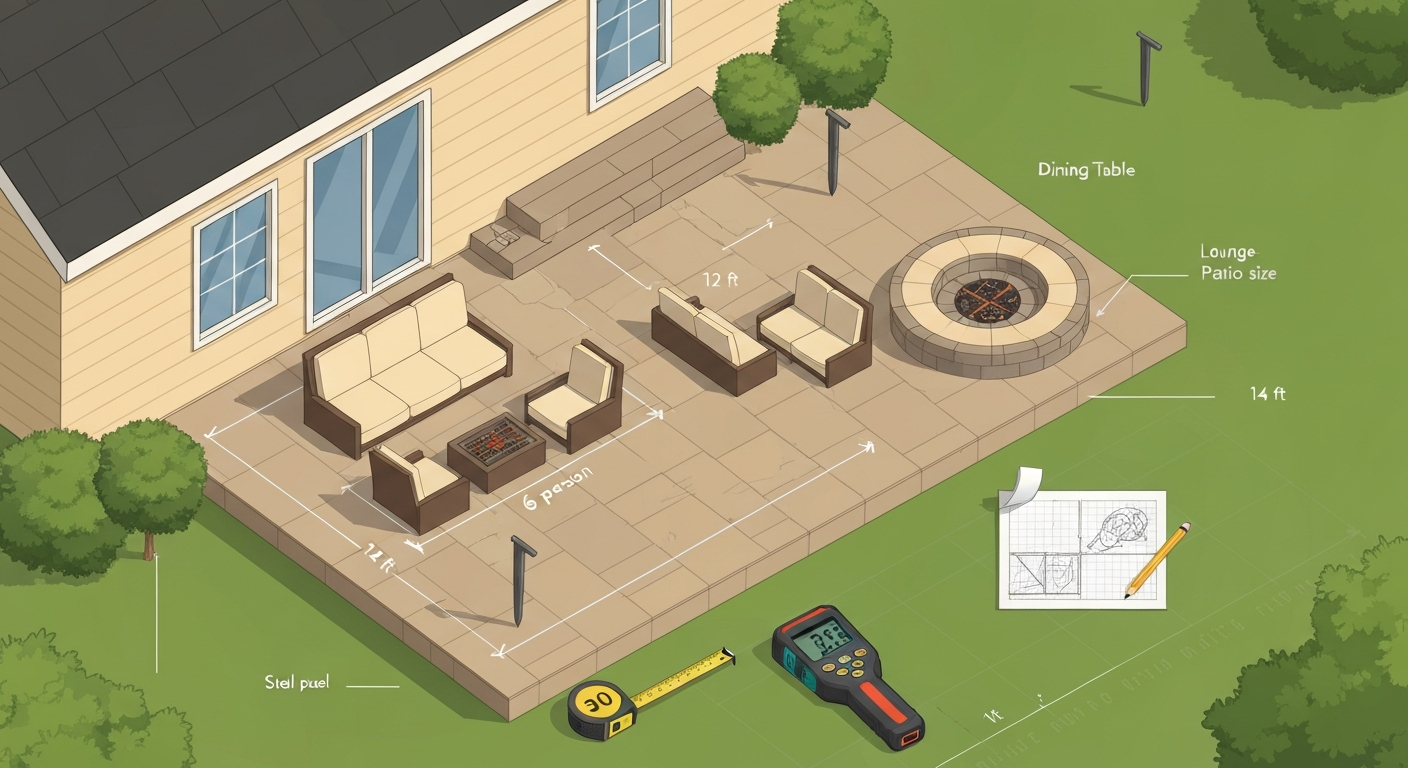
To work out patio size, measure the length and width of the space you want to use, multiply them together to get the area in square feet or square metres, then check that number against what your furniture and activities actually need. A dining table for four people needs at least 10 ft × 12 ft (120 sq ft), a six-person setup needs closer to 12 ft × 14 ft (168 sq ft), and a fire pit seating circle typically wants a 12–16 ft diameter zone. If you already have a rough shape in mind, the sections below walk you through measuring it accurately, checking it squares up, calculating the area, and converting that number into materials and a budget.
How to Work Out Patio Size: Measure, Calculate & Plan

Nolan Carver
12 Aug 2026
Who this guide is for and what you will come away with
This guide is written for DIY homeowners planning, designing, or building a patio without hiring a contractor. Whether you are sketching on paper for the first time or you are ready to drive stakes into the ground, the same core problem applies: you need to know the right size before you order a single paver or bag of concrete. Get it wrong and you either run out of materials mid-build or end up with a patio that swallows your whole yard and leaves no room to walk around comfortably. By the time you reach the end of this article, you will know how to measure any patio shape (rectangle, circle, or irregular), calculate its area, square the layout off your house, convert the numbers into materials quantities, and flag site issues that can change the plan before you dig. Every step includes real numbers you can use directly.
Decide what you need the patio to do before you pick a size
The single biggest sizing mistake I see is measuring the available space and calling that the patio size. That approach ignores how the space actually gets used. Before you grab a tape measure, spend ten minutes listing every activity the patio needs to support: outdoor dining, a seating lounge, a grill station, a fire pit, kids playing, or all of the above. Each activity has a minimum footprint, and combining them means adding those footprints together, then adding circulation paths between zones.
Minimum size guidelines for common activities
| Activity / Setup | Minimum Size | Comfortable Size | Notes |
|---|---|---|---|
| Dining table for 4 | 10 ft × 10 ft (100 sq ft) | 10 ft × 12 ft (120 sq ft) | Allows chair pull-out on all sides |
| Dining table for 6 | 10 ft × 14 ft (140 sq ft) | 12 ft × 14 ft (168 sq ft) | Standard 6-person rectangular table |
| Seating area (sofa + chairs) | 10 ft × 12 ft (120 sq ft) | 12 ft × 16 ft (192 sq ft) | Accounts for coffee table clearance |
| Fire pit seating circle | 12 ft diameter (113 sq ft) | 16 ft diameter (201 sq ft) | Keeps chairs ≥3 ft from pit edge |
| Grill station (standalone) | 4 ft × 6 ft (24 sq ft) | 6 ft × 8 ft (48 sq ft) | Add 3 ft clearance from structures |
| Combined dining + lounging | 16 ft × 20 ft (320 sq ft) | 20 ft × 24 ft (480 sq ft) | Allows defined zone separation |
These figures assume standard residential furniture. If you have oversized outdoor sofas or a large dining table, scale up by 2 ft in each relevant direction. For clearance and traffic flow, allow at least 3 ft of walkway between any piece of furniture and the patio edge or a structure. A 2 ft gap feels fine when you are standing still but becomes tight when carrying plates or moving chairs. I usually target 3–4 ft for main circulation paths and 2 ft minimum for secondary squeeze-through areas.
Once you have a target activity layout on paper, add any fixed constraints: the house wall setback, property boundary setbacks (check your local codes, as many areas require 3–10 ft from the boundary for hard surfaces), and any gates or doorways that traffic must pass through. That final number is your target patio size. Now you can go measure. For step-by-step instructions on how to measure for a patio, see how to measure for a patio.
Tools you need for measuring
You do not need expensive gear to measure a patio accurately. Two core tools cover nearly every situation, and a few extras make the job faster.
- 25 ft or 30 ft steel tape measure: the workhorse for all short dimensions. A good quality tape gives reliable repeat measurements to about 1/16 inch over short runs, but common errors (end-hook play, tape sag, worn markings) can introduce ±1/8 to ±1/4 inch on longer runs. Always do a two-person check on critical dimensions.
- Laser distance meter (LDM): mid-range consumer models typically deliver ±1/16 inch (1–2 mm) accuracy at patio distances and let one person work alone. Particularly useful for diagonals and for validating batter-board setups. Budget around $40–$80 for a reliable unit.
- Graph paper or a scaled site sketch: draw your house outline and yard at a consistent scale (1 square = 1 ft works well) and sketch measurements directly onto it as you take them. This is your field note template.
- Marking tools: marking paint, chalk line, or wooden stakes and string line for transferring measurements to the ground.
- Calculator or phone: for area formulas and material conversions on the spot.
Record every measurement to the nearest 1/8 inch on your field sketch with a label (for example: 'North edge: 14.00 ft; East offset to tree: 3.25 ft; return to house: 2.50 ft'). This level of detail costs nothing and prevents the frustrating trip back outside to re-measure something you thought you remembered.
Measuring a rectangular patio: tape and laser methods
Rectangular patios are the most common shape and the easiest to measure. The goal is to capture two accurate perpendicular dimensions: length and width.
Tape measure method (step by step)
- Snap a baseline along the house wall or the longest fixed edge. Measure from one corner to the other and record it as your length (L). Example: 14.00 ft.
- From one end of that baseline, measure out at a right angle to where you want the patio edge to finish. That is your width (W). Example: 12.00 ft. (Use the 3-4-5 rule explained in the squaring section below to confirm the angle is truly 90 degrees.)
- Mark both far corners with stakes.
- Run the tape across the two far stakes to confirm the front edge matches the back length. If it does not, adjust until both parallel edges are equal.
- Record L and W in your field notes.
Laser distance meter method
- Rest the LDM against the house wall at one corner, aim along the baseline, and shoot to the far corner or a target. Record the reading.
- Rotate 90 degrees, shoot the width dimension. The LDM does the arithmetic if you use its area function.
- Use the LDM to shoot both diagonals. On a true rectangle, the two diagonals must be equal. Any difference greater than 1/4 inch means the corners are not square.
Worked example: rectangular patio
Length = 14 ft, Width = 12 ft. Area = 14 × 12 = 168 sq ft (15.61 sq m, using 1 sq m = 10.7639 sq ft). Diagonal = √(14² + 12²) = √(196 + 144) = √340 = 18.44 ft. Both diagonals measured with the LDM should read 18.44 ft ± 1/4 inch. If one reads 18.44 ft and the other reads 18.75 ft, one corner is out of square and needs correcting before you lay a single paver.
Measuring a circular patio: center-point and radius method
Circles are trickier on the ground than on paper, but the math is simple. The key measurement is the radius (distance from center to edge).
- Drive a stake at the center point of the circle (often the center of a fire pit or a focal tree).
- Tie a string line or tape to the stake and pull it taut to the intended patio edge. That distance is your radius (r).
- Walk the tape around the perimeter, keeping tension, to mark the edge. For a clean circle on the ground, a string tied to a stake and a can of marking paint gives you a perfect arc.
- Record the radius. If you are working from an existing circle, measure the diameter across the widest point in two or three directions and average the readings. Divide by 2 to get the radius.
Worked example: circular fire pit patio
Target diameter = 14 ft, so radius = 7 ft. Area = π × r² = 3.14159 × 7² = 3.14159 × 49 = 153.94 sq ft (approximately 14.30 sq m). For a 16 ft diameter circle (r = 8 ft): Area = π × 64 = 201.06 sq ft (18.68 sq m). These numbers confirm that a 16 ft fire pit zone gives you the comfortable seating clearance mentioned in the size guidelines table above.
Measuring irregular and angled patios
An L-shaped, T-shaped, or angled patio looks complicated but is really just two or more simple shapes stuck together. The approach is to break the overall outline into rectangles and triangles, measure each section separately, calculate each area, and add them up. This is called the decomposition method and it is the most reliable approach for DIY field measurement.
Step-by-step decomposition for an L-shaped patio
- Draw the outline on your graph paper. Identify the logical split: draw a straight line that divides the L into two rectangles.
- Measure and record the length and width of Rectangle A (example: 12 ft × 10 ft = 120 sq ft).
- Measure and record the length and width of Rectangle B (example: 6 ft × 8 ft = 48 sq ft).
- Add the two areas: 120 + 48 = 168 sq ft total.
- If there is a triangle in the mix (a cut corner or angled section), measure the base and height of that triangle and use 0.5 × base × height.
Grid method for very irregular shapes
When the boundary curves or has many odd angles, overlay a 1 ft or 0. Grid/graph/point-count method for irregular areas (DIY-friendly): overlay a 1 ft or 0.5 ft grid on a site sketch or scaled photo, count full squares and estimate partials (point-count); for higher accuracy use coordinate/planimeter methods, see Topographic Surveying Field Manual (field-grid/plan methods, guidance for point/grid area methods) Topographic Surveying Field Manual (field-grid/plan methods — guidance for point/grid area methods). 5 ft grid on your site sketch (or on a scaled photo). Count every complete grid square that falls inside the patio boundary, then estimate the partial squares along the edge (typically count a partial as 0.5 or judge by eye). Multiply full squares by your grid cell area and add the partials. For a 200 sq ft irregular patio, expect this process to take 15–60 minutes including sketching and counting. It is not as precise as decomposition but it is perfectly adequate for material ordering when you add the standard waste margin.
Practical tips for irregular shapes
- Measure from a fixed baseline (house wall or property line) to every kink point in the boundary. These offsets give you enough data to reconstruct the shape accurately.
- For angled edges, measure the length of the angled side and then drop a perpendicular to create a right triangle. Measure the perpendicular drop. Now you have base and height for the triangle formula.
- Take photos from above (stand on a stepladder or use a phone drone mode if available) and print to scale. This is a surprisingly fast cross-check.
- When in doubt, overestimate slightly. Ordering 5% extra materials costs far less than running short and dealing with a discontinued paver batch.
Area formulas and worked examples
Here are the four formulas you will actually use for patio planning. For a step-by-step walkthrough of how to calculate patio area, see resource 24fc81c8-7ec9-476a-a4c2-543e286ba294. All dimensions must be in the same unit before you calculate.
| Shape | Formula | Worked Example (ft) | Result (sq ft) | Result (sq m) |
|---|---|---|---|---|
| Rectangle | A = L × W | 12 ft × 14 ft | 168 sq ft | 15.61 sq m |
| Circle | A = π × r² | Diameter 10 ft → r = 5 ft → π × 25 | 78.54 sq ft | 7.30 sq m |
| Triangle | A = 0.5 × base × height | Base 8 ft × height 6 ft × 0.5 | 24 sq ft | 2.23 sq m |
| Trapezoid | A = ((b1 + b2) ÷ 2) × height | b1=10 ft, b2=14 ft, h=8 ft → (24÷2)×8 | 96 sq ft | 8.92 sq m |
Converting between square feet and square metres
Use these constants, which are exact per NIST standards: 1 foot = 0.3048 metres exactly, and 1 square metre = 10.7639 square feet (rounded to 4 decimal places for planning accuracy). To convert square feet to square metres, divide by 10.7639. To convert square metres to square feet, multiply by 10.7639. For example, 168 sq ft ÷ 10.7639 = 15.61 sq m. If your patio area comes out at 20 sq m, that is 20 × 10.7639 = 215.28 sq ft.
Squaring the layout and setting it out on the ground
Knowing the size on paper is only half the job. You also need to transfer that size onto the ground accurately. A patio that is 1 inch out of square at the house wall will be 3–4 inches out by the time it reaches the far edge, and that gap will haunt you when you try to lay the last row of pavers. Here is how to prevent it.
The 3-4-5 rule for right angles
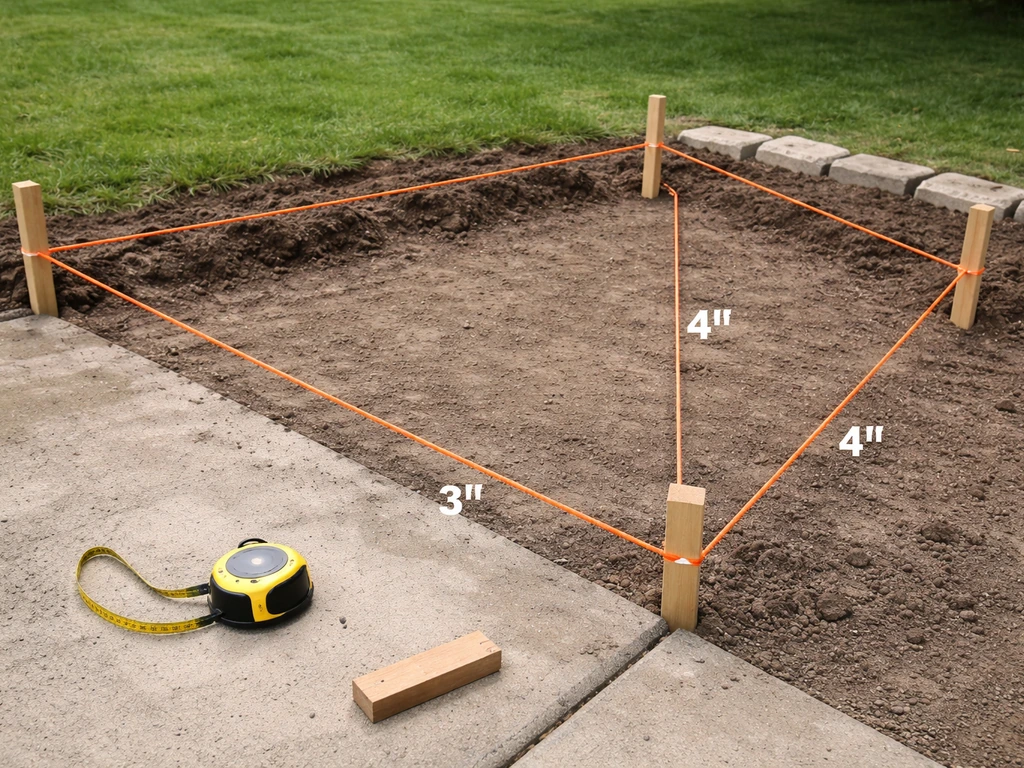
The 3-4-5 rule uses the Pythagorean theorem to create a perfect 90-degree corner without any special equipment. From your corner point, measure 3 ft along one edge and mark it. Measure 4 ft along the perpendicular edge and mark it. The diagonal between those two marks must be exactly 5 ft if the corner is square. For larger patios, scale up: use 6-8-10 or 9-12-15. Any multiple of 3-4-5 works. I use the 6-8-10 version for most patios because the longer legs reduce the proportional error of any small measurement inaccuracy. For a step-by-step walkthrough with diagrams and measurements, see our guide on how to square a patio.
Diagonal check
After you have set your four corner stakes, measure both diagonals of the rectangle. They must be equal. If they differ by more than 1/4 inch, adjust one pair of stakes sideways (keeping them on the same baseline) until the diagonals match. This is the fastest final verification of square. The LDM makes this check a 30-second job.
Squaring off the house wall
Most patios attach to a house wall, and the wall is usually the best starting reference. The challenge is that house walls are rarely perfectly straight over a 14–20 ft run. Measure the wall at both ends and at the midpoint before trusting it as your baseline. If the wall bows by more than 1/4 inch, use a chalk line snapped taut between the two end points as your true baseline instead of the wall surface itself. From that chalk line, project your perpendicular using the 3-4-5 rule or an LDM set to measure at 90 degrees. The related squaring-off-a-house technique deserves its own detailed treatment but the core principle is: use the chalk-line baseline, not the physical wall. For step-by-step instructions on transferring a square layout from paper to the ground, see how to layout a square patio. For step-by-step instructions on laying out and building a square patio, see how to build a square patio.
Batter boards and string lines
Batter boards are simple L-shaped frames made from 2×4 lumber, set in the ground about 2–3 ft outside each corner of the planned patio. String lines are stretched between the boards to mark the edges of the patio above the ground surface. The big advantage of batter boards is that you can adjust the string position by moving the string on the board crosspiece without pulling up stakes, and you can remove the strings while digging and replace them to exactly the same position. Drive the stakes at least 18 inches into the ground so they do not shift. Mark the exact string position on each board with a saw kerf or a pencil line so it is repeatable. Once your strings are set, hang a plumb bob from each intersection to mark the exact corner on the ground and drive a nail or stake there.
From area to materials: pavers, concrete, and base
Once you have your area figured out, converting it to materials quantities is straightforward arithmetic. Here is how to do it for the three most common patio build types.
Paver quantities
The formula is: pavers per square foot = 144 ÷ (paver length in inches × paver width in inches). For a standard 4 inch × 8 inch paver: 144 ÷ (4 × 8) = 144 ÷ 32 = 4.5 pavers per sq ft. For a 168 sq ft patio: 168 × 4.5 = 756 pavers for the field area before waste. Add a waste margin based on your laying pattern: straight/running bond or stacked grid needs 5–10% extra; basketweave needs 10–12%; herringbone at 90 degrees needs 10–15%; herringbone at 45 degrees or circular/fan patterns need 15–25%. For our 168 sq ft example with 90-degree herringbone: 756 × 1.12 = 847 pavers to order (rounding up to the nearest full pallet).
Concrete slab quantities
Cubic yards of concrete = (area in sq ft × slab thickness in inches) ÷ 324. For a 12 ft × 16 ft slab (192 sq ft) at 4 inches thick: (192 × 4) ÷ 324 = 768 ÷ 324 = 2.37 cubic yards. Always add 10% for waste, uneven subgrade, and small depth variations: 2.37 × 1.10 = 2.61 cubic yards. Order 2.7 cubic yards to be safe. National average ready-mix delivery prices run approximately $160–$190 per cubic yard in 2025–2026 (check local quotes, as short-load fees for orders under truck minimums can add significantly to the cost per yard on small pours).
Base and bedding for pavers
Standard practice for pedestrian paver patios calls for 4–6 inches of compacted crushed stone base (Class II or No. 57 gravel) plus 1 inch of screeded C-33 concrete sand bedding on top. For a 168 sq ft patio at 4 inches of base depth: 168 sq ft × (4 ÷ 12) ft = 56 cubic feet = 2.07 cubic yards. At approximately 1.35 short tons per cubic yard, that is about 2.80 tons of crushed stone. For the 1 inch sand bedding layer: 168 × (1 ÷ 12) = 14 cubic feet = 0.52 cubic yards. Interlocking concrete pavers typically cost $3–$8 per sq ft for materials alone; full installed costs (including labor and base) range from roughly $8 to $28 per sq ft depending on pattern complexity, site conditions, and your region.
Quick material reference table for common patio sizes
| Patio Size | Area (sq ft) | 4"×8" Pavers (10% waste) | 4" Concrete Base (yd³) | Crushed Stone Base at 4" (tons) | Sand Bedding 1" (yd³) |
|---|---|---|---|---|---|
| 10 × 10 ft | 100 sq ft | 495 pavers | 1.23 yd³ + 10% | 1.66 tons | 0.31 yd³ |
| 10 × 12 ft | 120 sq ft | 594 pavers | 1.48 yd³ + 10% | 2.00 tons | 0.37 yd³ |
| 12 × 14 ft | 168 sq ft | 832 pavers | 2.07 yd³ + 10% | 2.80 tons | 0.52 yd³ |
| 12 × 16 ft | 192 sq ft | 950 pavers | 2.37 yd³ + 10% | 3.20 tons | 0.59 yd³ |
| 16 × 20 ft | 320 sq ft | 1,584 pavers | 3.95 yd³ + 10% | 5.33 tons | 0.99 yd³ |
Site issues that can change your size plan
The flat, square, level patio is the easy case. Real yards throw complications at you, and it is much better to find them at the planning stage than after you have ordered materials.
- Slope and drainage: patios must drain away from the house at a minimum fall of 1/8 inch per foot (about 1%). Measure the existing ground slope with a level and tape or a digital slope finder. If the slope is toward the house or more than 1 inch per foot away from it, plan on regrading or a raised patio section.
- Raised patios and retaining walls: if your yard drops away from the house, a raised patio keeps the surface level but requires retaining walls on the outer edges. These walls add cost and require footings, which can push the patio size outward to allow for wall thickness. Factor in at least 8–12 inches of extra space on retained edges.
- Setbacks and permits: most municipalities require permits for patios over a certain size (commonly 200 sq ft) or for any raised patio over 30 inches above grade. Check your local building department before finalizing dimensions. Setback rules typically require 3–10 ft clearance from side and rear property lines for hard surfaces.
- Utilities and easements: call your local utility notification service (811 in the US) before digging. Underground utilities can force a reroute or size change. Easements on your deed can also prohibit permanent hard surfaces in certain zones.
- Access and gates: confirm your planned patio size does not block an existing gate or service access. A patio that seals off the side gate to the backyard creates a problem every time you need to move something large.
- Tree roots: large trees close to the patio can lift pavers within 5–10 years. Allow at least 8–10 ft clearance from the trunk of any mature tree, or plan a gravel or decomposed granite surface in that zone instead of rigid pavers.
Planning checklist and next steps
Before you move from planning to building, run through this checklist. Each item is a potential problem you want to resolve on paper rather than on the ground.
- Activity list complete: write down every activity and how many people it needs to serve simultaneously.
- Target dimensions confirmed: length, width (and radius if circular), verified against the minimum size guidelines above.
- Scaled drawing done: house outline, patio outline, furniture positions, and clearance paths all sketched at scale.
- Area calculated: square footage and square metres both recorded.
- Setbacks and permit check: confirmed with local building department or online planning portal.
- Utility locate requested: 811 called (US) or local equivalent; results noted on sketch.
- Slope assessed: existing fall direction and grade percentage noted; drainage plan in place.
- Squaring method chosen: 3-4-5 rule or diagonal check, batter boards prepped or planned.
- Materials list drafted: pavers (with waste factor for chosen pattern), base stone, sand bedding, and edge restraints quantified.
- Budget estimate complete: paver material cost + base + sand + any concrete or rental equipment. Add 10–15% contingency for surprises.
- Build sequence planned: excavation depth calculated (paver thickness + 1 in sand + 4–6 in base + 2 in extra for compaction settlement).
From here, the logical next step is laying out the patio on the ground using the batter board and string line method, then squaring it precisely off the house wall. After that, it is excavation, base compaction, sand screeding, and laying your first row. The measuring and planning work you do now is what makes every step after it go smoothly. If you also want layout and styling ideas for a square patio, see a short guide on how to decorate a square patio for practical finishing touches and furniture arrangements. Get the size right on paper, transfer it cleanly to the ground, and the build itself becomes much more straightforward, even on your first patio project.
FAQ
How do I measure a simple rectangular patio area using a tape measure?
Measure the length (L) and width (W) along two perpendicular baseline lines from the house or fixed features. Record to the nearest 1/8" if possible. Use the rectangle area formula A = L × W. Example: 12 ft × 14 ft → A = 168 sq ft. Convert to square metres using 1 sq m = 10.7639 sq ft → 168 ÷ 10.7639 ≈ 15.61 m².
How do I measure a circular patio and calculate its area?
Measure the diameter (D) across the circle, then radius r = D/2. Use A = π × r². Example: 10 ft diameter → r = 5 ft → A = π×5² = 78.54 sq ft ≈ 78.54 ÷ 10.7639 = 7.30 m².
What is the best approach for irregular or L-shaped patios?
Decompose the shape into rectangles, triangles or trapezoids, measure each piece, compute areas with standard formulas and sum them. Example L-shape: a 12×10 ft rectangle (120 sq ft) plus a 6×8 ft rectangle (48 sq ft) → total 168 sq ft. Keep a labeled sketch with each sub-measurement for ordering and layout.
What measuring tools and methods should I use (tape, laser, grid)?
Tape measure: reliable for short runs; two-person checks reduce end-hook and sag error (expect ±1/8"–1/4" on long runs). Laser distance meters (LDM): faster, typical consumer accuracy ~±1–2 mm; great for diagonals and validation. Grid/point-count: overlay a 1 ft or 0.5 ft grid on a sketch or photo for irregular shapes and count full/partial squares (good for detailed plan areas). Use a measurement log and at least two independent reads of critical dimensions.
What are the area formulas I should memorize and use?
Rectangle: A = L × W. Circle: A = π × r². Triangle: A = 0.5 × base × height. Trapezoid: A = ((b1 + b2) / 2) × height. Always keep units consistent (feet or metres) and convert square units using 1 sq m = 10.7639 sq ft or length using 1 ft = 0.3048 m.
How do I square a patio layout on site?
Common DIY methods: 3-4-5 right triangle (scaleable) or measure diagonals between opposite corners and adjust until diagonals are equal. Use batter boards and stringlines anchored outside the footprint to hold permanent reference lines while digging. A laser level or LDM helps set and verify right angles and diagonals quickly.