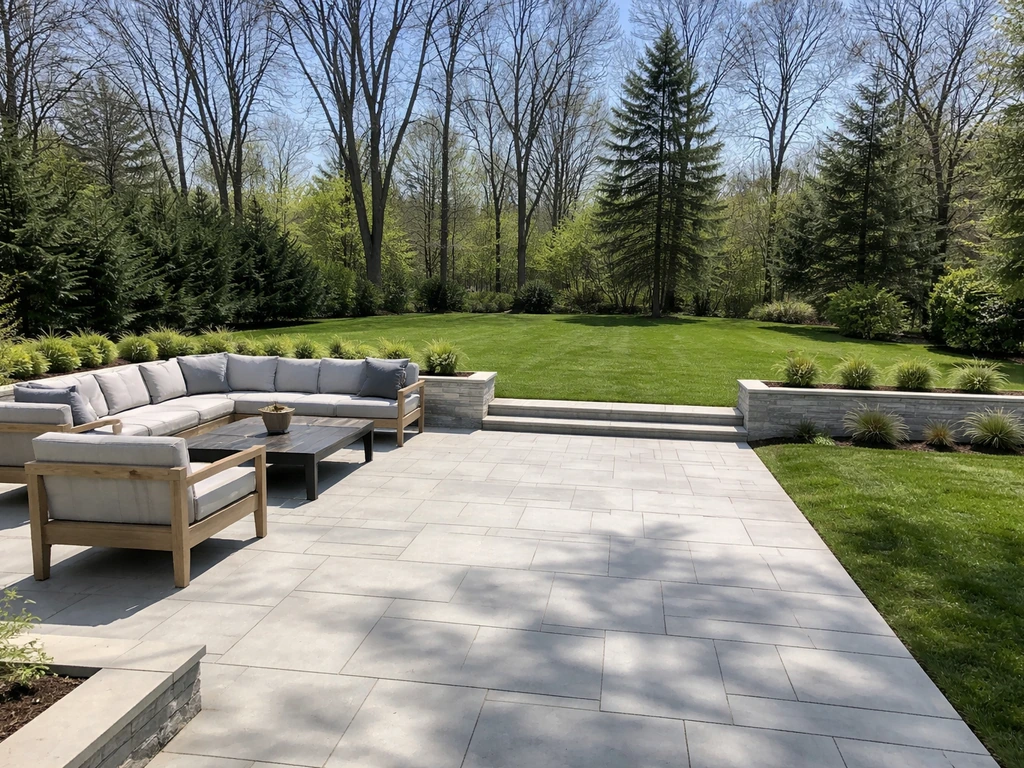
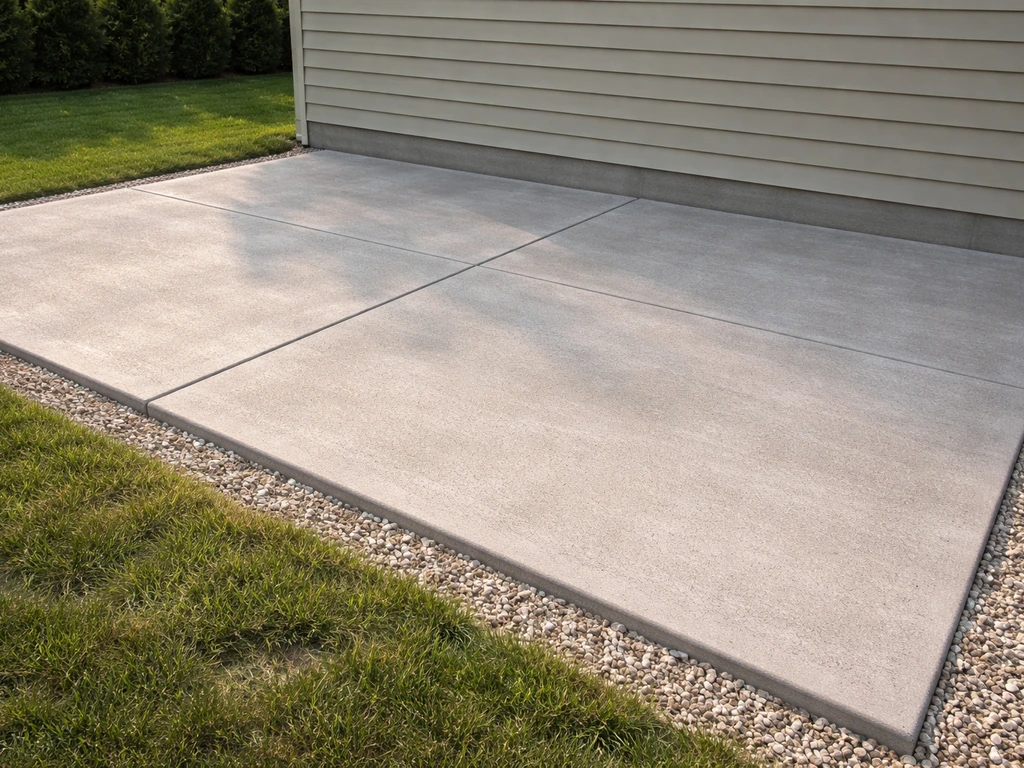
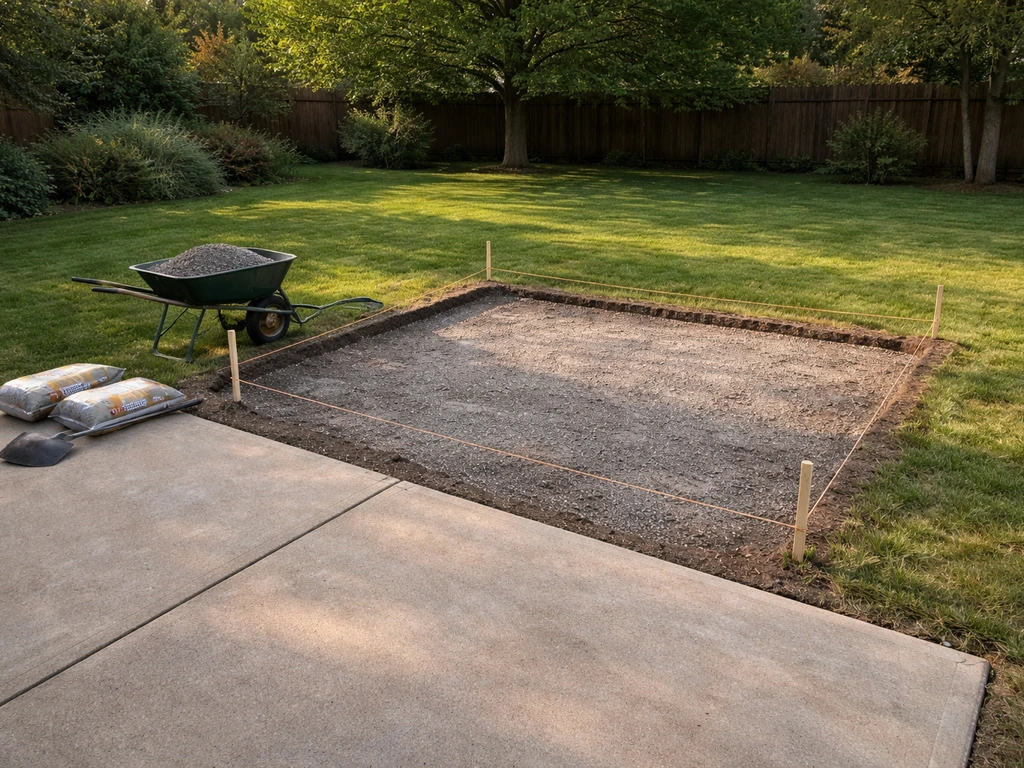
You can add on to an existing patio by extending the same surface material outward, tying in a new section at the same elevation, or stepping up or down with a complementary material. The basic process is the same across most methods: plan your layout, pull any required permits, prepare the subgrade, compact a gravel base, and install your chosen surface. The tricky parts are matching the existing height, keeping water flowing away from the house, and connecting the new section to the old one cleanly. This guide walks you through every stage, from measuring your yard to the final surface, with specific numbers, tool lists, and troubleshooting for concrete, pavers, flagstone, and wood decking. For a step-by-step walkthrough on how to build an extended patio, see the detailed project guide that covers measurement, materials, and troubleshooting. For a step-by-step walkthrough on how to build a patio extension, including planning, base construction, and finishing details, see this dedicated guide. For a focused step-by-step resource on planning and building an addition, see our full guide on how to add a patio to your house. For a step-by-step how to extend patio guide (plans, tools, and checklists), see how to extend patio.
How to Add on to Existing Patio: Step-by-Step DIY Guide

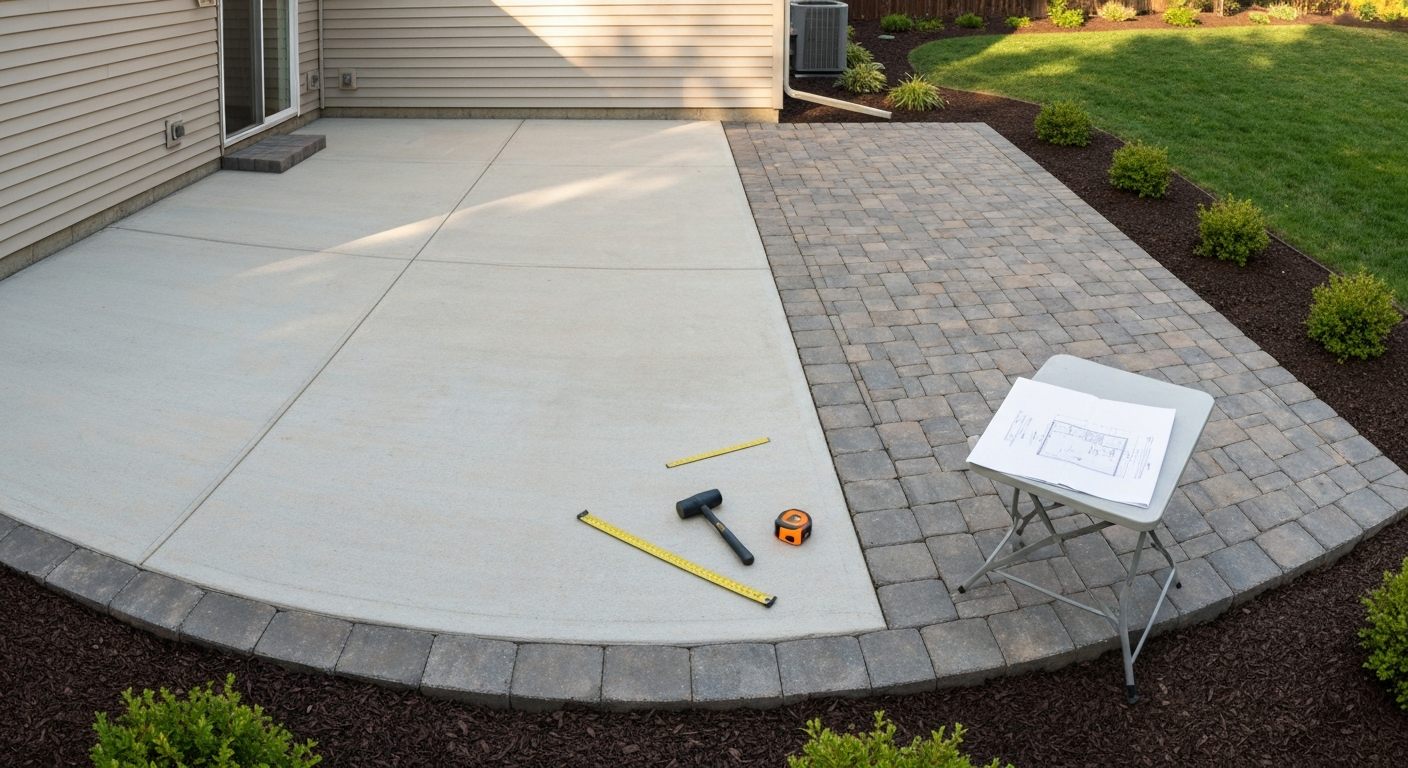
Is a patio add-on the right move? Scope and when it makes sense
A patio addition is worth doing when your current space is too small for how you actually use it. Maybe your existing slab barely fits a table and four chairs, or you want a dedicated grill zone that is not right next to where guests sit. An add-on is also a smart solution when you want to connect the patio to a new door you have added, wrap around a corner of the house, or step down a slope to create a lower terrace. Where it gets more complicated is when the existing patio is in bad shape: major cracking, settled sections, or poor drainage. If the original slab has heaved, cracked through, or is draining toward the house, fix those problems first. Slapping new material next to a failing base just spreads the problem.
This guide covers adding a ground-level section to an existing patio, extending a raised patio, and tying a new section to the house. The core steps apply whether you are making a small patio bigger, extending a backyard patio, or building a fully separate zone that blends with the original. For step-by-step instructions on expanding an existing area, see our guide on how to make patio bigger. If you are tying a wood deck directly to your house with a ledger board, that is a structural attachment covered by IRC R507, and the permit and engineering requirements become more significant. That scenario gets its own callout below.
Planning checklist before you dig anything
A few hours of planning prevents most of the expensive problems. Work through this checklist before you buy a single bag of gravel.
- Size and layout: Measure your current patio and mark out the proposed addition with stakes and string. A 10x12 ft extension is a comfortable weekend-scale project. Anything over 200 sq ft starts requiring more equipment and time.
- Access for materials: How does concrete, gravel, or stone get back there? A 3-yard concrete pour needs a truck with a chute, or you are mixing and wheeling by hand. If your side gate is narrow, measure it (standard gates are 36–48 inches; a loaded wheelbarrow is about 26 inches wide).
- Elevation of existing patio: Measure the height of the current slab or deck surface above the adjacent grade. Your new section needs to match or transition cleanly. A height mismatch of more than about 0.5 inches becomes a trip hazard.
- Slope direction: Patios should slope away from the house at roughly 1/8 to 1/4 inch per foot (that is about 1–2%). Check your existing patio's slope with a level. If it drains toward the house, you already have a problem to solve.
- Utilities: Before you dig, call 811 (the national Dig Safe line in the U.S.) at least 3 business days before excavating. Gas, electric, water, and cable lines can be shallower than you expect.
- Underground obstructions: Look for tree roots, old pipes, irrigation lines, and buried downspout extensions that run under the area you plan to dig.
- Easements and setbacks: Check your property survey for utility easements and confirm local setbacks from property lines (commonly 5 ft, but it varies significantly by municipality).
- HOA rules: If you are in an HOA, check the CC&Rs for patio materials, colors, and size restrictions before planning.
- Soil type: Sandy or well-draining soil is ideal. Clay soil drains poorly and can shift seasonally, which matters a lot for base depth and drainage design.
- Budget reality check: Set a realistic budget before choosing materials. A 100 sq ft concrete extension typically runs $600–$1,500 in materials (DIY); pavers run $400–$900 in materials; flagstone dry-laid runs $500–$1,200; a wood deck section runs $700–$1,800 depending on lumber species.
Permits, codes, and how to check what your project needs
Permit requirements for patio additions vary a lot by city and county, and there is no universal rule. A simple concrete slab-on-grade extension that is not attached to the house and does not change drainage patterns is often exempt in many jurisdictions. But several common triggers will require a permit almost everywhere.
- The new structure attaches to the house (ledger board, flashing, or structural connection)
- The project involves a covered patio, pergola, or roof structure
- Footings extend below the local frost depth (varies by region, from 6 inches in the deep south to 60+ inches in northern states)
- A retaining wall is needed (most jurisdictions require permits for walls over 3–4 ft in exposed height)
- New stairs or guardrails are involved
- Electrical, gas, or water lines are extended or relocated
- The project significantly changes site drainage or impervious surface coverage
To check your specific requirements, go directly to your city or county building department website and search for 'patio permit' or 'deck permit.' Many departments post their intake checklists and exemption thresholds online. Cities like Austin and Seattle, for example, publish detailed permit application forms and exemption lists that spell out exactly what triggers a required submittal. If you cannot find it online, a 10-minute phone call to the permit counter will usually get you a direct answer. Do not skip this step: unpermitted work can create problems when you sell your home and may require costly demolition if a neighbor or inspector flags it.
When a permit is required, you will typically submit a site plan (a simple sketch of your property showing the house footprint, existing patio, and proposed addition), a construction drawing with dimensions and materials, and sometimes a grading plan if drainage is affected. Permit fees vary widely, from $50–$75 for simple projects in small jurisdictions to $300 or more in larger cities. Processing times range from same-day over-the-counter approvals for simple projects to 4–8 weeks in busier departments. Factor this into your project timeline.
If your project triggers structural attachment to the house (for a wood deck extension), look up the American Wood Council's DCA-6 prescriptive deck guide, which provides fastener tables, ledger attachment details, and footing sizing. IRC Section R507 covers deck construction requirements including ledger connections and guardrails. Most inspectors will reference one or both of these when reviewing your plans.
Choosing your material: concrete, pavers, flagstone, or wood
The best material for your addition depends on your existing patio, your skill level, your budget, and how the new section will be used. Matching the original material gives the cleanest look, but mixing materials deliberately (like pavers next to a concrete slab) can look intentional and great when done with a clear transition. Here is how the main options compare.
| Material | Durability | Appearance | DIY Difficulty | Installed Cost (DIY materials) | Best Match For |
|---|---|---|---|---|---|
| Poured concrete | 25–50 years with proper joints and curing | Clean, modern; can be stamped or stained | Moderate-hard (mixing, forming, finishing is time-sensitive) | $4–$10 per sq ft in materials | Extending an existing concrete slab |
| Concrete pavers | 20–40+ years; individual units replaceable | Wide style range; very versatile | Moderate (more forgiving, no time pressure) | $4–$9 per sq ft in materials | Any existing surface; great for uneven grade |
| Flagstone (dry-laid) | 15–30+ years; can shift over time | Natural, rustic, high-end look | Moderate (heavy lifting, puzzle-fitting stones) | $5–$12 per sq ft in materials | Informal spaces, garden-adjacent patios |
| Flagstone (mortar-set on slab) | 25–40+ years; more stable than dry-laid | Same as dry-laid but tighter joints | Hard (requires concrete base and mortar skills) | $7–$15 per sq ft in materials | Formal spaces, existing concrete base nearby |
| Wood/composite deck | 15–25 years (wood); 25–40 years (composite) | Warm, natural; great for elevated sections | Moderate-hard (framing, footings, ledger if attached) | $8–$18 per sq ft in materials | Raised additions, grade transitions, house attachments |
My honest recommendation: if your existing patio is poured concrete and you want the cleanest match, extend it with poured concrete. The joint will be visible but can be made nearly invisible with careful saw-cutting and doweling. If the original is in bad shape or you want more flexibility, pavers are the most forgiving option for DIYers. They can be laid next to concrete or flagstone with a simple edge restraint transition, and if a section settles, you can pull and reset individual pavers without breaking out a whole slab. Flagstone looks the most upscale but requires heavy lifting and patience. For detailed methods and trade‑offs between dry‑laid and mortar/set-on-concrete approaches, see How to Lay Flagstone Installation Guide - Landscaping Network. Wood or composite decking is the right call when there is a significant elevation change you need to bridge.
Tools and materials you will need
General tools for any patio add-on
- Tape measure and 100-ft string line
- Wooden stakes (2x2, 18 inches long) and marking paint or flour
- Line level or laser level
- Shovel, mattock, and/or flat spade
- Wheelbarrow
- Plate compactor (rent this; do not skip it)
- Hand tamper (for edges and tight spots)
- Safety glasses, work gloves, steel-toe boots
- Knee pads
- 4-ft level and 2-ft level
- Rubber mallet
Additional tools and materials for poured concrete
- Concrete forms (2x4 or 2x6 lumber for form boards, stakes to hold them)
- Rebar (3/8 inch, grade 40 or 60) or wire mesh (6x6 W1.4xW1.4)
- Rebar chairs or dobies (to hold rebar at mid-slab, about 2 inches up)
- Concrete mixer (rent for small pours) or ready-mix truck for anything over 0.5 yards
- Bull float and hand float
- Concrete edger and groover
- Broom (for texture finish)
- Concrete curing compound or plastic sheeting
- Expansion joint material (1/2-inch premolded foam board)
- Hammer drill and carbide-tipped bits for drilling dowel holes into existing slab
- Rebar dowels (3/8-inch, 12 inches long) and two-part epoxy adhesive (DOT-grade)
- Concrete mix: minimum 3,000 psi (use 3,500–4,000 psi in freeze-thaw climates)
Additional tools and materials for concrete pavers
- Concrete pavers of your choice (order 10% extra for cuts and breakage)
- Polymeric sand (for jointing)
- Plastic or aluminum paver edge restraint with spikes (12-inch ground spikes)
- Bedding sand (concrete sand, also called coarse sand, not play sand): 1 inch deep
- Screed rails (1-inch diameter pipes or EMT conduit)
- Straight 2x4 for screeding
- Circular saw with diamond blade or angle grinder for paver cuts
- Plate compactor with a paver pad (rubber pad to protect paver surface)
Additional tools and materials for flagstone
- Flagstone pieces (1.5–2.5 inches thick for dry-laid; 1–1.5 inches for mortar-set)
- For dry-laid: coarse sand or crusher fines (decomposed granite) bedding, 1–2 inches deep
- For mortar-set: Type S mortar mix and a notched trowel
- Angle grinder with diamond blade for shaping irregular pieces
- Masonry chisel and 3-lb hammer for rough shaping
- Sand for joint filling (dry-laid) or mortar (for mortared joints)
- Polymeric sand works well for dry-laid flagstone joints too
Additional tools and materials for wood or composite decking
- Pressure-treated lumber for framing (2x8 or 2x10 joists, 2x10 or 2x12 beams per span tables)
- Decking boards: pressure-treated pine, cedar, redwood, or composite
- Post anchors or concrete tube forms for footings
- Concrete for footings (60-lb bags or ready-mix)
- Post-to-beam hardware, joist hangers, hurricane ties
- Structural screws (3-inch and 3.5-inch) and joist hanger nails
- Ledger board (if attaching to house): same species/dimension as rim joist
- Flashing (Z-flashing or self-adhering membrane) for ledger
- Circular saw, miter saw, drill/driver
- Post hole digger or rented power auger
- String lines and batter boards for squaring the layout
Site prep: clearing, utility marking, and excavation
Good site prep is the difference between a patio that lasts 30 years and one that shifts and cracks in five. This is not the glamorous part of the job, but it is where most DIY patio projects succeed or fail.
- Call 811 at least 3 business days before you dig. This is free and required by law in all U.S. states. A locator will mark underground utilities with color-coded flags. Respect the marked buffer zones (typically 18–24 inches on each side of the mark).
- Clear the area of sod, plants, roots, and debris. Use a flat spade to cut through sod in manageable sections (roughly 12x18 inches) and peel it back. Sod can be composted or relocated.
- Mark your layout. Drive stakes at the four corners of the new section and run string lines to define the edges. Use a level on the strings to project your finished slope (aim for 1/8 to 1/4 inch drop per foot away from the house). Mark the perimeter with upside-down marking paint.
- Calculate your excavation depth. Add up: finished surface thickness + bedding layer + base gravel depth. For pavers: 3.125-inch paver + 1-inch sand + 4–6 inches gravel = roughly 8–10 inches of excavation. For a 4-inch concrete slab: 4 inches slab + 4–6 inches gravel = 8–10 inches. For wood decking: you are digging footing holes, not a broad excavation — footing depth must reach below frost line.
- Excavate to the calculated depth. For small areas (under 100 sq ft), a good mattock and shovel are enough. For anything larger, rent a mini excavator for a day ($250–$400) or hire a bobcat operator for a few hours. Check your excavation depth frequently with a measuring tape from your string line.
- Remove all organic material (sod, roots, topsoil with organic content). Organic material compresses over time and causes settling. You want to be working in subsoil or undisturbed native soil.
- If you hit soft or wet soil, or if the soil is clay-heavy, you may need to over-excavate by 2–4 additional inches and replace with compacted gravel. Clay does not compact well and holds water.
Building your base: gravel types, depth, and compaction
The base is everything. A properly compacted gravel base distributes weight, resists frost heave, and drains water away from your surface. For site‑specific soil properties that affect bearing and drainage (bearing capacity, seasonal high water table, drainage class), check the USDA NRCS Web Soil Survey as a starting reference used by permit reviewers and geotechnical engineers. Skimping on base depth or skipping compaction is the number-one reason DIY patios fail.
Choosing the right gravel
Use crushed stone (angular, not rounded) for your base. Rounded river rock does not interlock and will not compact properly. The best options are crushed limestone, trap rock, or quarry process (also called QP, dense-graded aggregate, or road base). Quarry process is a mix of crushed stone and stone dust that compacts into an almost concrete-like layer when properly wetted and tamped. It is ideal under pavers and flagstone. For under a concrete slab, clean crushed stone (3/4-inch clean) is fine and provides better drainage.
Base depth guidelines
| Surface Material | Minimum Base Depth (good soil, no frost) | Recommended Base Depth (clay soil or freeze-thaw climate) | Bedding Layer |
|---|---|---|---|
| Poured concrete (4-inch slab) | 4 inches compacted gravel | 6 inches compacted gravel | None (pour directly on compacted base) |
| Concrete pavers | 4 inches compacted base | 6–8 inches compacted base | 1 inch screeded concrete sand |
| Flagstone (dry-laid) | 4 inches compacted base | 6 inches compacted base | 1–2 inches coarse sand or crusher fines |
| Flagstone (mortar-set) | 4-inch concrete slab required below | 6-inch concrete slab required below | 1/2–3/4 inch mortar bed |
| Wood/composite deck | Footings to frost depth (not a broad base) | Footings to frost depth (code minimum) | N/A |
Compaction tips that actually work
Rent a plate compactor. A hand tamper is acceptable for edges and around obstacles, but it is not sufficient for the main base area. Plate compactors weigh 150–200 lbs and deliver far more force than any hand tamping can. Compact gravel in lifts no deeper than 3–4 inches at a time. Dump in 3 inches, compact, check your grade, add another 3 inches, compact again. Lightly mist each lift with water before compacting if the material is dry (quarry process especially benefits from this). Make two passes with the plate compactor in perpendicular directions. When the surface stops deflecting visibly under the machine and sounds solid rather than hollow, it is adequately compacted. Geotechnical field tests (like ASTM D6938 nuclear density gauge) are used on commercial projects, but for residential patios the sound/feel method combined with proper lifts and a plate compactor is standard practice.
Drainage, grading, and keeping water where it belongs
Water management is the one thing I see DIYers under-plan the most. A patio that drains poorly will heave, crack, stain, and eventually damage your foundation. Get the grading right from the start and you will not regret it.
The positive slope rule
The standard rule is to slope your patio surface away from the house at a minimum of 1/8 inch per foot, though 1/4 inch per foot is better in high-rain areas. Over a 12-foot-wide patio, that is 1.5 to 3 inches of total drop from the house edge to the outer edge. Building science guidance (including Building America/PNNL resources) goes a step further and recommends the final grade around the foundation slope at roughly 1/2 inch per foot (about 4–5%) for the first 10 feet out. Your patio slope and the surrounding grade should work together, not against each other.
What to do when the existing patio drains the wrong way
If your current patio slopes toward the house, your addition gives you an opportunity to fix the downstream drainage even if you cannot easily re-slope the existing slab. Options include: installing a channel drain (trench drain) along the joint between old and new sections to intercept water before it reaches the house, reshaping the grading of the surrounding yard so water has a clear path around the patio, or adding a French drain along the downhill edge of the addition to capture and redirect water below grade.
French drains and subsurface drainage
A French drain is a trench (typically 6–12 inches wide and 12–18 inches deep) filled with washed gravel, a 4-inch perforated pipe, and wrapped in filter fabric to keep soil from clogging the stone. You dig the trench, line it with filter fabric, lay the perforated pipe (perforations down or at the 4 and 8 o'clock positions depending on the instruction source), fill with clean washed gravel, and fold the fabric over the top before backfilling. The pipe needs a positive slope to a discharge point (minimum 1% slope, ideally 1–2%). The discharge can be a pop-up emitter in the yard, a dry well (legal in many areas), a storm drain connection (check local codes), or a daylight outlet at a lower grade elevation.
Downspout relocation and surface swales
If your planned patio addition sits under or near a downspout discharge point, relocate or extend the downspout before you build. Burying a solid PVC pipe (4-inch diameter, glued joints) from the downspout to a pop-up emitter 8–10 feet out into the yard is a straightforward DIY fix. Surface swales, which are shallow grass-lined channels cut into the yard grade, are another effective and low-cost option for redirecting sheet flow around the patio. A swale only needs to be 4–6 inches deep with gently sloped sides (3:1 or flatter) to move water effectively without eroding.
How to tie the new section into the existing patio
The connection between old and new is where most patio additions show their age if done poorly. Here is how to handle each material.
Connecting new concrete to an existing slab
You cannot pour new concrete directly against existing concrete and expect a seamless bond without mechanical help. Concrete does not naturally bond to cured concrete. The standard approach is to drill and epoxy-grout rebar dowels across the joint. Use a hammer drill with a 3/8-inch carbide-tipped bit to drill holes 4–5 inches deep into the edge of the existing slab, every 18–24 inches along the joint. Blow out the dust with compressed air, inject two-part epoxy (a DOT-grade or structural epoxy, not a hardware-store 5-minute type), and immediately insert a 3/8-inch x 12-inch rebar dowel. Leave about 6 inches protruding into the new pour. Let the epoxy cure per the manufacturer instructions (typically 24–48 hours before loading) before forming and pouring. This mechanical connection helps prevent differential settling and keeps the two slabs from separating.
At the joint itself, install a strip of 1/2-inch premolded expansion joint material before the pour. This allows for slight independent movement between old and new concrete as temperatures change, rather than cracking unpredictably. For the new slab, use minimum 3,000 psi concrete mix (3,500–4,000 psi in freeze-thaw climates). Reinforce with 3/8-inch rebar on 18-inch centers or 6x6 welded wire mesh. Support rebar on chairs so it sits at roughly mid-slab height, about 2 inches up from the base.
Matching height between old and new concrete
Set your forms so the new slab surface is at the same elevation as the existing slab. The existing slab edge is your reference point. Measure up or down from it with a level and a straight 2x4 to set form board height. If the existing slab has settled slightly, decide whether to match the settled surface (seamless appearance but potential low spot) or set the new section at the original design grade (creates a small step at the joint). A transition of 1/4 inch or less is generally acceptable as a control joint. Anything more becomes a trip hazard and should be beveled or addressed with a transition strip.
Connecting pavers to an existing patio
Pavers are the most forgiving material for transitions because you can precisely dial in the height of the bedding sand to match whatever surface you are connecting to. Install a paver edge restraint directly against the edge of the existing concrete, brick, or stone surface. Secure it with 12-inch spikes. Then build your base and bedding behind it, set your pavers, and the edge restraint holds both surfaces together at the transition. A 1/4-inch polymeric sand joint between the last paver row and the existing surface looks clean and allows for slight movement.
Connecting a wood deck addition to the house
If your wood deck extension attaches to the house with a ledger board, this is the most code-critical connection in the whole project. The ledger must be fastened through the house sheathing into the rim joist or band joist of the floor framing, not just to siding. The fastener pattern and bolt sizes are prescribed in the AWC DCA-6 guide and IRC R507. Flashing is non-negotiable: water infiltration behind an unflashed ledger is the leading cause of deck collapses. Use Z-flashing or a self-adhering membrane flashing system that integrates with your house wrap and directs water out and away. This is a situation where I strongly recommend pulling a permit and getting an inspection, because the inspector will check the ledger-to-house connection specifically. If the connection fails, the whole deck can pull away from the house.
Elevation transitions: steps, retaining walls, and raised extensions
If your addition involves a grade change, you have two main tools: steps and retaining walls. Steps work when the elevation change is less than about 24 inches and you want to move between levels. Retaining walls work when you need to hold back soil to create a level platform at a different elevation than the surrounding grade.
For steps between a raised patio and a new lower section, standard residential stair geometry applies: risers of 6–7.75 inches and treads of 10–11 inches (per IRC). Concrete block, poured concrete, or natural stone are all workable step materials. For a raised patio extension where the new section sits at a different level, you may need to build a segmental retaining wall (SRW) to create the lower platform. Most jurisdictions exempt retaining walls under 3–4 feet in exposed height from engineered design requirements, but walls above that threshold (and walls that retain fill above a footing or structure) typically require a stamped engineering plan. The Concrete Masonry and Hardscapes Association (CMHA/NCMA) publishes retaining wall design manuals that define when geogrid reinforcement is needed and how to detail drainage behind the wall with gravel and perforated pipe.
Drainage behind any retaining wall is critical. Without a gravel drainage zone and a perforated drain pipe at the base of the wall, hydrostatic pressure builds behind the blocks and walls fail. Even for short walls (18–24 inches), install a 6-inch-wide zone of clean 3/4-inch washed gravel directly behind the block and a 4-inch perforated pipe at the footing level that daylights at the end of the wall.
How to build the extension: step-by-step by material
Poured concrete addition
- Complete site prep and compacted gravel base per depth guidelines above.
- Drill and epoxy-grout 3/8-inch rebar dowels into the existing slab edge at 18–24 inch spacing. Let epoxy cure fully before pouring.
- Install expansion joint material along the full existing slab edge.
- Set and stake form boards at the correct height and slope (1/8 to 1/4 inch per foot away from house). Forms are typically 2x4 or 2x6 lumber.
- Place rebar grid on chairs (2 inches off base) and tie intersections with wire. Connect rebar to the protruding dowels with wire ties.
- Order or mix concrete at 3,000 psi minimum (3,500 psi+ for freeze-thaw). For slabs under about 0.5 cubic yards, a rented mixer is fine. For anything larger, order a ready-mix truck.
- Pour concrete and work it into corners with a shovel. Do not add water to concrete once mixed — it weakens the final strength.
- Screed the surface flat using a straight 2x4 dragged across the top of the forms.
- Bull float the surface to embed aggregate and close voids.
- Edge the perimeter with a concrete edger tool. Cut control joints every 8–10 feet with a groover or circular saw with a diamond blade (cut 1/4 of slab depth).
- Finish the surface with a soft broom dragged perpendicular to the main traffic direction for texture.
- Cover with plastic sheeting or apply curing compound immediately. Keep moist and covered for at least 7 days. Do not walk on it for 24 hours; avoid heavy loads for 7 days; full strength develops at 28 days.
- Remove forms after 24–48 hours.
Concrete paver addition
- Complete site prep and compacted gravel base. For pavers, use quarry process (dense-graded) for the base, not clean stone.
- Install edge restraint along all outer perimeter edges (not the existing patio edge — that is your border). Stake with 12-inch spikes at 12-inch intervals.
- Lay screed pipes (1-inch diameter) on the compacted base, parallel to each other and roughly 4–5 feet apart. These set your bedding sand depth.
- Spread concrete (coarse) sand over the base and screed to a uniform 1-inch depth. Pull the screed board across the rails. Remove rails and fill voids with sand.
- Do not compact or disturb the screeded sand. Lay pavers immediately.
- Start laying pavers from the most visible corner or from the existing patio edge. Keep joints tight (1/8 inch). Use string lines to maintain straight courses.
- Cut pavers as needed for edges and borders using an angle grinder with diamond blade or a rented paver saw.
- Once all pavers are laid, run a plate compactor (with rubber pad attached) over the entire surface to seat pavers into the sand bed. Make two to three passes.
- Sweep polymeric sand into the joints. Compact again lightly. Sweep more sand. Repeat until joints are full to within 1/8 inch of the paver surface.
- Mist the surface with water to activate the polymeric sand binder. Follow manufacturer timing instructions.
- Install a small bead of polyurethane caulk in the joint between the last paver row and the existing patio surface for a clean, weather-resistant finish.
Flagstone (dry-laid) addition
- Complete site prep and compacted gravel base (quarry process or crushed limestone works well).
- Add 1–2 inches of coarse sand or crusher fines on top of the compacted base. This is your setting bed.
- Lay out flagstones dry first to puzzle-fit the pieces before committing. Aim for joints of 1–2 inches and avoid long continuous joint lines (like brickwork in staggered pattern).
- Set each stone, press firmly, and check for wobble. Add or remove sand under individual stones to level them. A stone that rocks on two points needs material added under the low corners.
- Check cross-slopes frequently. You want the same 1/8–1/4 inch per foot slope as a concrete surface.
- Once all stones are set and level, sweep coarse sand, polymeric sand, or crushed stone fines into the joints. Sweep, compact lightly with a hand tamper or rubber mallet, sweep more material in. Repeat until joints are full.
- Mist with water if using polymeric sand.
- Transition to existing patio with a metal or plastic edge restraint, or mortared stones at the joint edge for a cleaner look.
Wood or composite deck addition
- Lay out footing locations with batter boards and string lines. Space footings per your span table (a 2x8 joist can span about 12 feet with correct spacing; consult AWC DCA-6 tables for your specific situation).
- Dig footing holes to below the local frost depth. In cold climates this can be 36–48 inches. Use a power auger (rent or hire) for anything deeper than 24 inches.
- Pour concrete into tube forms (Sonotubes). Set post anchors in the wet concrete, aligned to your layout strings. Let cure for 48 hours minimum before loading.
- If attaching to house: remove siding in the ledger area, install flashing per code (self-adhering membrane behind and Z-flashing on top), then fasten ledger with appropriate lag screws or bolts per AWC DCA-6 fastener table. Get this inspected before covering.
- Install posts in anchors, then beams on posts, then joists on hangers. Use structural screws or nails per code (joist hanger nails, not drywall screws).
- Install blocking between joists at mid-span for spans over 8 feet to prevent rotation.
- Lay decking boards perpendicular to joists with a 1/8-inch gap between boards for drainage. Use a framing nail or dedicated spacer to maintain consistent gaps.
- For composite decking, follow manufacturer installation instructions exactly — hidden fastener systems, required end gaps, and temperature-specific installation gap recommendations all vary by brand.
- Install rim boards, fascia, and any required guardrails (42 inches tall for decks more than 30 inches above grade, per IRC R507.2).
- Install stairs if needed. Standard residential stair geometry: 7-inch risers, 10-inch treads. Handrails required when there are 4 or more risers.
Typical costs and how long it takes
These are DIY material costs and realistic time estimates. Hired labor roughly doubles to triples the total cost in most markets. Permit fees, tool rentals, and disposal costs are additional.
| Method | Materials Cost (100 sq ft) | Tool Rental Estimate | Typical DIY Time | Permit Likelihood |
|---|---|---|---|---|
| Poured concrete (4-inch slab) | $400–$1,000 | $150–$250 (mixer, compactor, float) | 1–2 weekends | Sometimes (depends on jurisdiction) |
| Concrete pavers | $400–$900 | $150–$250 (compactor, paver saw) | 1–2 weekends | Rarely for ground-level |
| Flagstone (dry-laid) | $500–$1,200 | $100–$150 (compactor, angle grinder) | 1–2 weekends | Rarely for ground-level |
| Wood deck addition (attached) | $700–$1,800 | $200–$400 (auger, saw, drill) | 2–4 weekends | Very likely (structural attachment) |
| Retaining wall (4-ft, 20 lin ft) | $600–$1,400 (block + drainage) | $100–$200 (compactor) | 1–2 weekends | Likely (wall height) |
Permit processing times vary enormously. Simple over-the-counter permits for decks under a certain size can be approved the same day in some jurisdictions. Others require a plan review that takes 4–8 weeks. If your project is time-sensitive (you want the patio done before a summer party), apply for the permit as early as possible and do not start excavating until it is in hand.
Common problems and how to fix them
The new section settled but the old one didn't
This is almost always a base compaction problem. The gravel base was not compacted in proper lifts, or organic material was left in the subgrade. For pavers, you can lift the settled section, re-level the base, re-compact, re-screed the sand, and relay. For concrete, it is more work: you can either grind down the high edge of the existing slab (if the old section is higher), apply a self-leveling concrete overlay to the new section, or in bad cases, break out and redo the settled area with better base prep.
Water is pooling at the joint between old and new
This usually means the new section is slightly lower than the old at the joint, or the slope of the new section is not adequate. For pavers, reset the pavers nearest the joint slightly higher to push water away. For concrete, you can apply a concrete feather finish (a very thin polymer-modified topping) to build up the low area, though this is a temporary fix. The real solution is a channel drain (slot drain) installed at the low point to capture the water and route it away.
Cracks appearing in new concrete
Hairline surface cracks within the first few weeks are usually shrinkage cracks from drying too fast. They are mostly cosmetic if they are less than 1/16 inch wide and can be filled with concrete caulk. Wider structural cracks, especially diagonal cracks or cracks that allow vertical displacement between two sections, indicate a base or subgrade failure. Control joints are your prevention tool: cut them at 8–10-foot intervals before the concrete sets, and the slab will crack along those intentional lines rather than randomly.
Pavers shifting or individual units sinking
If individual pavers sink, the bedding sand migrated or was not properly set before compaction. Pull the affected pavers, add or remove sand to re-level, and relay. If whole sections are moving laterally, your edge restraint has failed or was never installed. Reinstall with fresh 12-inch spike anchors every 12 inches. Polymeric sand joints that have washed out should be re-swept and re-activated, this is a normal maintenance task every few years.
Flagstones rocking or uneven
A rocking stone just needs the setting bed adjusted under it. Pull the stone, add a small amount of sand or crusher fines to the low spots, and reset. Check with your foot before moving on. Persistent rocking on a stone with irregular thickness can be fixed by adding mortar dabs under the low corners (even in a dry-laid system, mortar dots under problem stones is a common practical fix).
When to stop DIYing and call a professional
Most patio additions are well within DIY range. But there are specific situations where the stakes are high enough that professional involvement pays off.
- Ledger attachment to the house for a deck: structural failure here can be catastrophic. If you are not confident in identifying the framing, installing flashing correctly, and following IRC R507 fastener schedules exactly, hire a licensed contractor or at minimum have a structural engineer review your plan.
- Retaining walls over 3–4 feet in exposed height: these require engineered designs in most jurisdictions. The lateral soil forces involved are significant and poorly designed walls fail suddenly.
- Unstable soils: if you encounter soft, wet, or highly expansive clay soils during excavation, or if the USDA Web Soil Survey shows poor bearing capacity for your site, get a geotechnical opinion before building on it.
- High groundwater table: if water seeps into your excavation within a few hours, you have a drainage problem that requires professional drainage design, not just a French drain.
- Significant grade changes requiring regrading: moving more than a few hundred cubic feet of soil affects drainage patterns across your whole property. A civil engineer or licensed grading contractor can prevent you from accidentally flooding a neighbor's yard.
- Concentrated loads: hot tub installations (a full hot tub can weigh 6,000 lbs or more), outdoor kitchen islands, and heavy pizza ovens require footings and structural capacity beyond a standard patio. Get this engineered.
- Complex utility relocations: moving or crossing gas, electrical, or water lines always requires licensed tradespeople.
The good news is that for the most common patio additions (a ground-level slab or paver extension in flat or gently sloping yards), you genuinely do not need a contractor. The skills required are within reach of any motivated DIYer who takes the time to plan properly, rents the right equipment, and is willing to do the base work correctly. Take your time on the prep, check your slopes constantly, and the surface installation almost takes care of itself. For another relevant comparison, see how to extend backyard patio.
FAQ
What local permitting and inspection information should I research first?
Check your city/county building department website for patios/decks/patio‑covers permit rules, application checklists, plan submittal requirements, permit triggers (attachment to house, covered structures, stairs/railings, footings below frost, retaining walls, electrical/gas work), fees and expected review times. Use the municipality’s forms and intake checklists as primary references (example: city permit pages).
Which code books and authoritative standards must I consult for structural and safety requirements?
Review the edition of the International Residential Code (IRC) adopted locally (key sections: ledger attachments, guards/rail heights, stairs/handrails, footings) and the American Wood Council DCA‑6 prescriptive deck guide for ledger/joist/footing tables. These govern loads, fastener schedules and when engineering or special details are required.
How do I determine required footing depth and frost protection?
Consult the adopted IRC chapters and local building office for the frost line depth in your jurisdiction. IRC foundation/frost provisions and local code determine minimum footing depths or use of frost‑protected shallow foundations; verify local frost depth and any exceptions with the building department.
What geotechnical/soil information should I obtain for safe subgrade and drainage decisions?
Get site‑specific soil data via the USDA NRCS Web Soil Survey (SSURGO) and local county soil reports to learn bearing capacity, seasonal high water table and infiltration rates. For marginal soils, consider a geotechnical report for bearing values and compaction/spec recommendations.
Which standards govern soil compaction and field acceptance testing?
Consult ASTM standards for compaction (Standard Proctor ASTM D698, Modified Proctor ASTM D1557) and in‑place density tests (ASTM D6938 or sand‑cone/AASHTO methods). Use these to set percent compaction targets and testing frequency or to know when to hire testing.
What concrete design and best‑practice references should I use for slab additions?
Use American Concrete Institute (ACI) guidance—particularly ACI 302.1R—for slab thickness, mix strength, reinforcement, joint layout, curing, and temperature controls. Cross‑check local code and DOT or municipal specs for finishing and repair/tie‑in practices.