You can build a solid, good-looking patio yourself for $3 to $15 per square foot depending on the material you choose, compared to $15 to $35 per square foot when hiring a contractor. The key is planning your layout carefully before buying a single bag of sand, picking a material that matches your skill level and budget, and getting the base prep right. Skipping or rushing the base is how most DIY patios fail within two or three years.
How to Build a Patio on a Budget: DIY Step-by-Step

Nolan Carver
29 May 2026
Plan the layout and budget before anything else
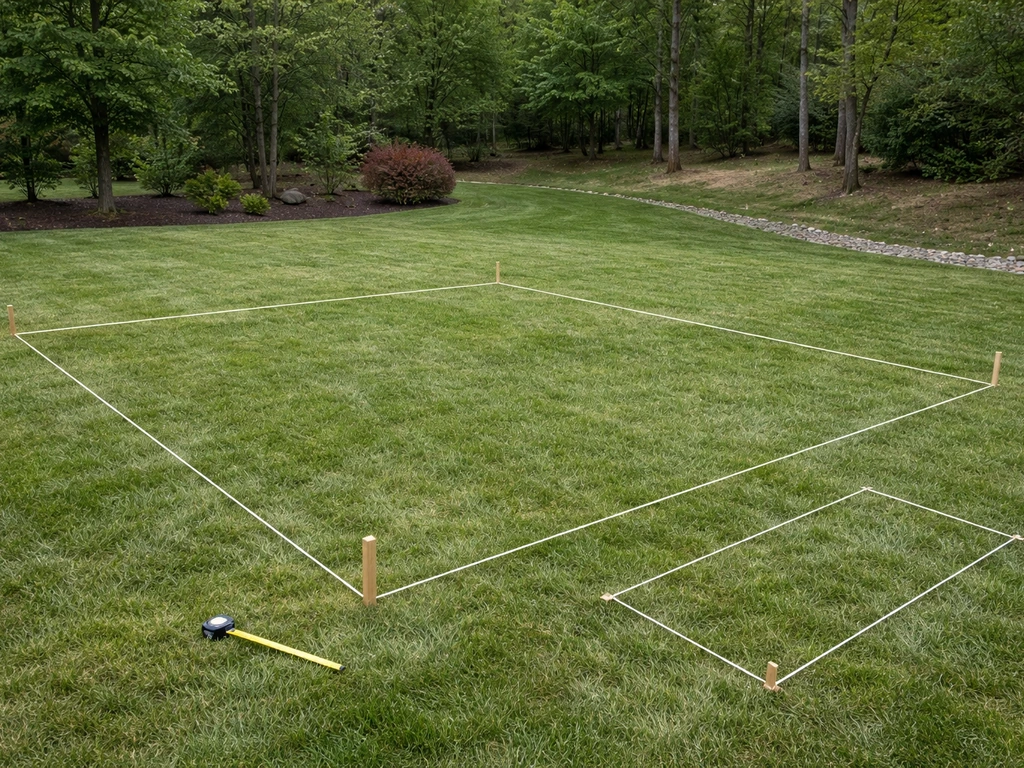
Start by deciding how you'll actually use the patio. A dining set with six chairs needs at least 12x12 feet (144 sq ft). Add a grill station and you're looking at 14x16 or larger. Lounging areas with chairs and a side table need about 10x12 at minimum. Sketch it out on graph paper using 1 square per foot and place your furniture shapes on the drawing before you commit to dimensions. That one step has saved me from building patios that were too small to be useful.
Walk the site and look for three things: slope direction, drainage paths, and nearby structures. A slope greater than 2 inches per 10 feet (2% grade) means you'll need to address drainage in your design, or water will pool against your house foundation. Note any tree roots within 6 feet of the planned area, underground utility lines (always call 811 before digging), and how close you are to the property line, which affects permit requirements.
For a realistic budget, work backward from your square footage. A 12x16 patio (192 sq ft) using concrete pavers at roughly $4 to $6 per sq ft in materials will run $800 to $1,200 in materials alone, plus $100 to $200 for gravel base, sand, and edge restraints. Add $50 to $100 for tools you don't already own (plate compactor rental is typically $60 to $90 per day). Budget a 10% overage for cuts and breakage. If that total feels tight, a gravel or decomposed granite patio can cut material costs to $1 to $3 per sq ft.
Budget-friendly materials compared
There's no single best material for every situation. The right pick depends on your budget, the look you want, and how much work you're willing to do. Here's an honest breakdown of the most common options for DIYers trying to keep costs down.
| Material | DIY Cost (per sq ft) | Durability | Skill Level | Best For |
|---|---|---|---|---|
| Concrete pavers | $4–$8 | Very high (20+ years) | Beginner–Intermediate | Clean look, long-term value |
| Poured concrete slab | $3–$6 | High (15–25 years) | Intermediate–Advanced | Low maintenance, smooth surface |
| Flagstone (irregular) | $4–$10 | Very high | Intermediate | Natural, rustic look |
| Decomposed granite (DG) | $1–$3 | Moderate (refresh every 2–5 yrs) | Beginner | Budget-first, casual spaces |
| Pea gravel | $1–$2 | Low–Moderate | Beginner | Temporary or accent patios |
| Concrete stepping slabs | $2–$5 | High | Beginner | Simple, fast installation |
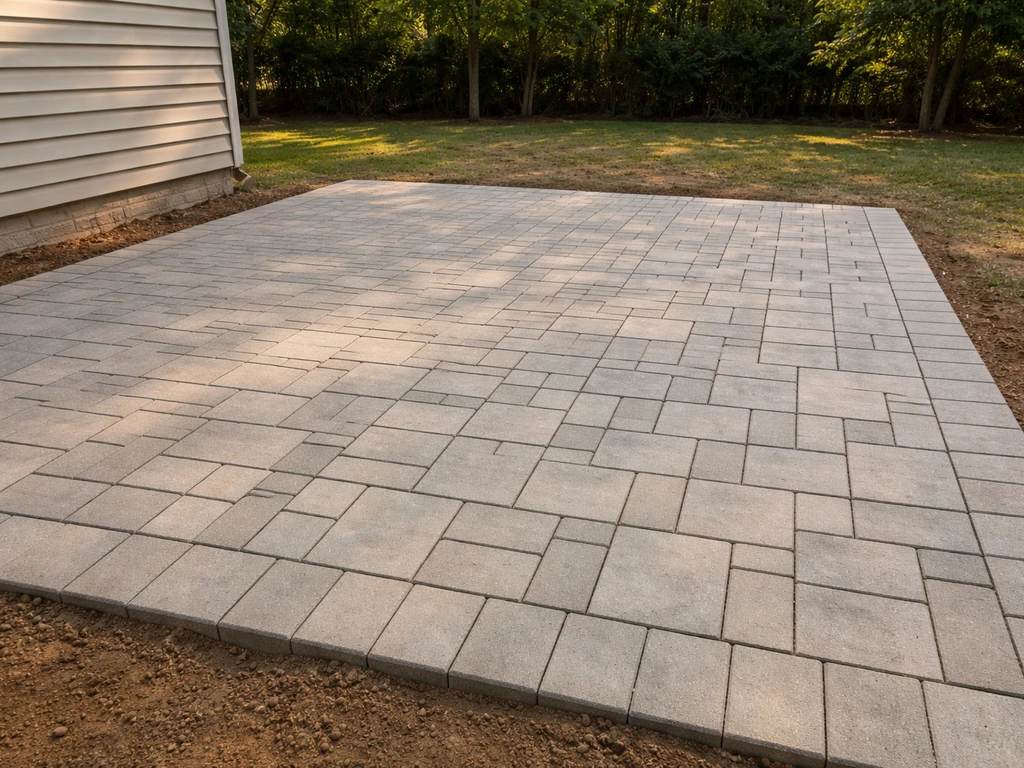
For most beginners wanting a durable patio at a reasonable price, concrete pavers are the sweet spot. They're forgiving because you can pull and reset individual pieces if something goes wrong, they don't crack the way a poured slab can, and they look finished without much effort. Poured concrete costs less per square foot but requires mixing, forming, and finishing skills that take practice to get right.
Decomposed granite and gravel are genuinely cheap and easy, but they need occasional regrading and aren't ideal in areas with heavy rain or foot traffic. If you want more detail on keeping costs absolutely minimal, the same approach used in an inexpensive patio build applies directly here: prioritize base prep over premium surface materials.
Site prep: grading, base layers, and drainage
This is the part most guides rush through, and it's where patios succeed or fail. Do not skip or shortcut the base. A patio is only as stable as what's underneath it.
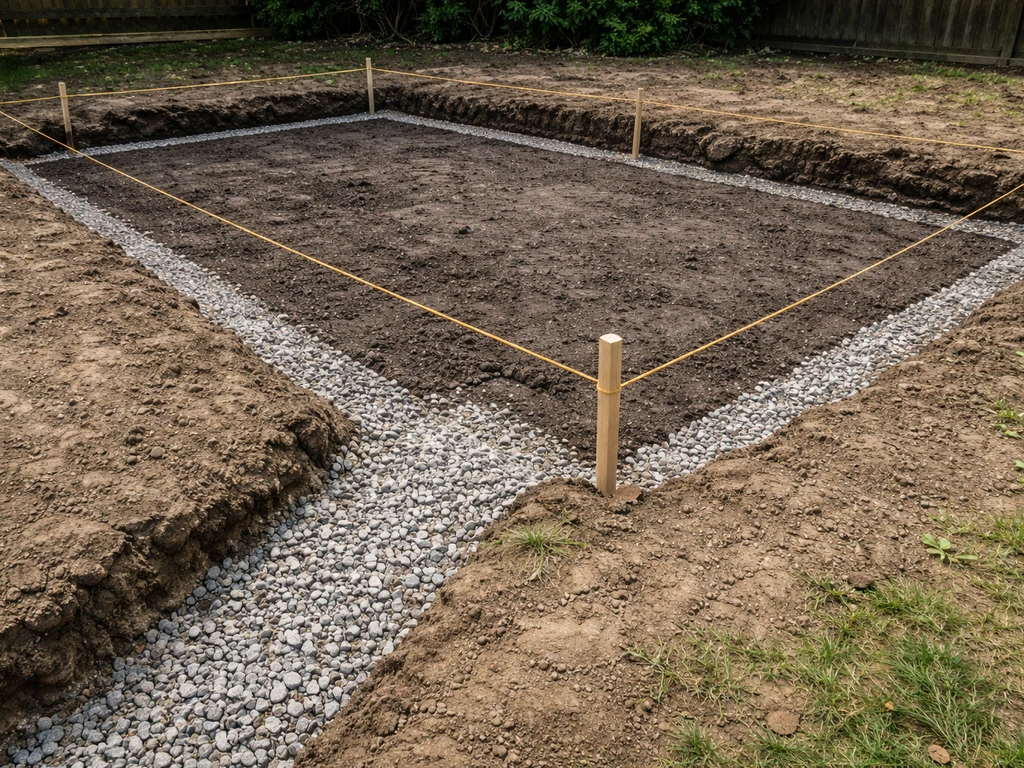
Excavation depth
Mark your patio outline with stakes and string. Excavate the entire area to a depth of 7 to 9 inches below your finished surface height. That breaks down like this: 4 to 6 inches of compacted gravel base, 1 inch of bedding sand, and the thickness of your paver or slab (usually 2 to 2.375 inches for standard pavers). In freeze-thaw climates (anything north of roughly the Tennessee/North Carolina border), aim for the deeper end of that range, or 6 inches of base, to reduce frost heave.
Subgrade and compaction

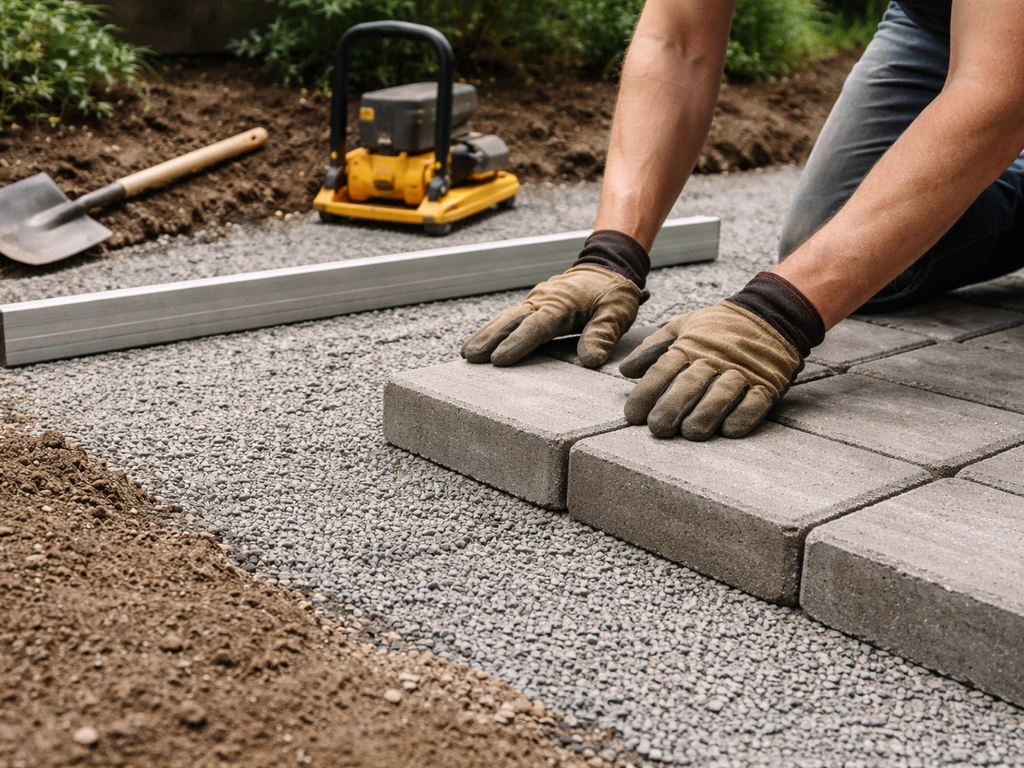
Once you've excavated, compact the native soil with a plate compactor or hand tamper. If the soil is loose, sandy, or organic (lots of roots and dark matter), remove an extra inch and add more base gravel. Fill with crushed angular gravel, often sold as Class II base, road base, or crusher run, in 2-inch lifts, compacting each lift before adding the next. Angular gravel compacts and interlocks; round river gravel does not, so avoid it for base material. The finished base should feel rock solid when you walk on it with no give at all.
Grading for drainage
Set your gravel base with a slope of 1/8 inch per foot (roughly 1% grade) away from your house or any structure. That's enough to move water without being noticeable underfoot. Use a 4-foot level with a small piece of tape marking the 1/8-inch mark to check your slope as you work. Getting this right at the base stage is much easier than trying to correct it at the surface.
Step-by-step construction
These steps follow a sand-set concrete paver installation, which is the most forgiving and recommended method for first-time builders. The same general sequence applies to flagstone and stepping slabs with minor adjustments.
- Lay out and mark the patio boundary with stakes and string lines, confirming square corners with the 3-4-5 triangle method (measure 3 ft along one side, 4 ft along the adjacent side, and the diagonal should equal exactly 5 ft).
- Excavate to the required depth (7 to 9 inches below finished surface), sloping the bottom of the excavation away from the house at 1/8 inch per foot.
- Compact the native subgrade soil with a plate compactor. Make two passes in perpendicular directions.
- Add crushed angular gravel base in 2-inch lifts, compacting each layer. Total compacted base depth: 4 to 6 inches.
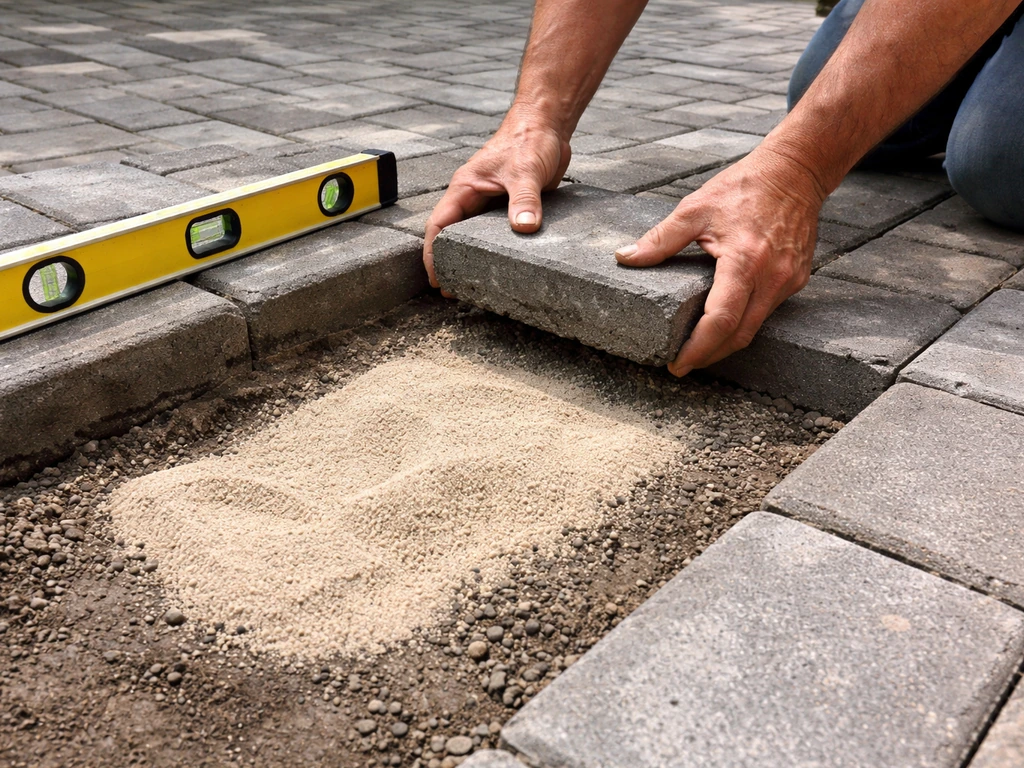
- Screed a 1-inch layer of coarse bedding sand (ASTM C33 concrete sand) over the base. Use two parallel pipes or screed rails set at the right height to pull a straight board across for a flat, consistent surface. Do not compact the sand.
- Lay pavers starting at a corner or straight edge, working outward. Set each paver down without sliding it into place (sliding disturbs the sand). Maintain a 1/16-inch to 3/16-inch joint gap between pavers.
- Use a rubber mallet to tap pavers lightly and keep them flush. Check for level frequently with a straight edge and 4-foot level.
- Cut border pavers with a diamond blade circular saw, angle grinder, or rented paver splitter. Rent a splitter for straight cuts on standard pavers; it's faster and cleaner than scoring with a saw.
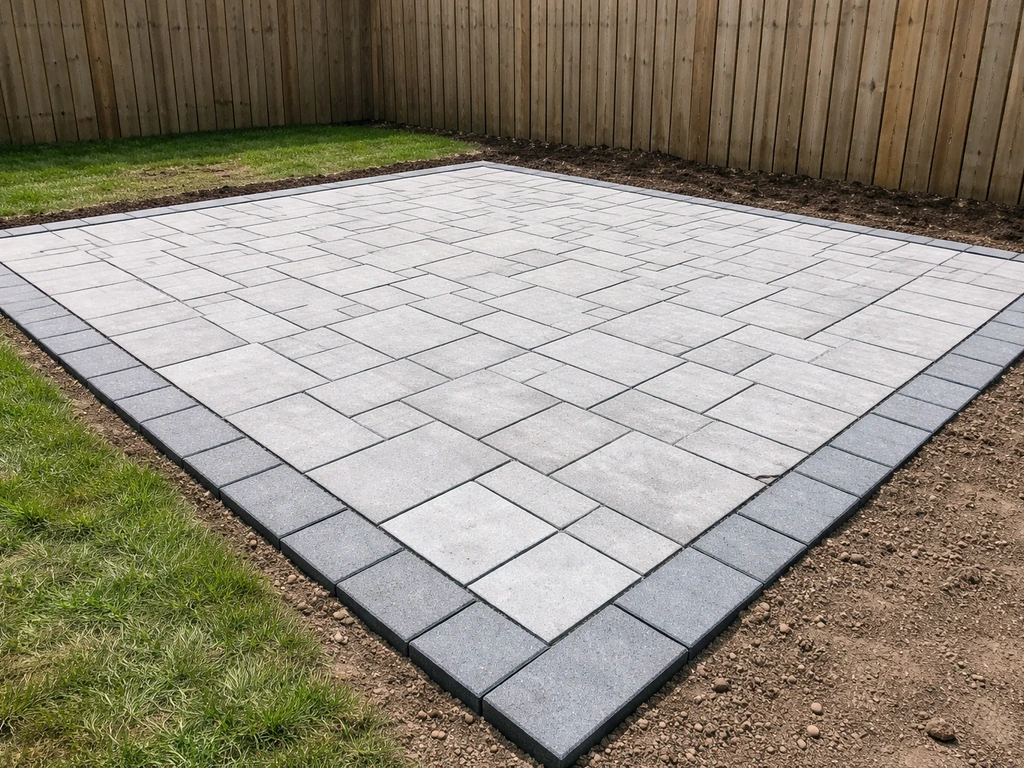
- Once all pavers are set, install edge restraints along all open edges before compacting.
- Run a plate compactor over the entire paved surface (place a rubber mat under the plate if using tumbled or decorative pavers to prevent scratching). Make two or three passes.
- Spread polymeric jointing sand over the surface and sweep it into the joints. Compact again lightly, then mist with water per the manufacturer's instructions to activate the binder. Sweep off excess sand.
Poured concrete slab option
If you're going with poured concrete, the base prep is identical. Form the perimeter with 2x4 lumber staked every 2 feet, set to your finished height with the correct slope. Use 3,000 PSI concrete mix and pour at a 4-inch thickness minimum (5 inches if you expect vehicle traffic). Place control joints every 8 to 10 feet using a groover tool while the concrete is still workable, cutting to 1-inch depth. This controls where the inevitable shrinkage cracks appear. Finish with a broom drag for a non-slip surface. Keep the slab damp for 3 to 7 days after pouring by covering with plastic sheeting or a curing compound.
Edge restraints, leveling, and finishing details
Edge restraints are non-negotiable for sand-set pavers. Without them, the outer rows migrate outward over time, the joints open up, and the whole surface goes wavy. ICPI Tech Spec 3 also specifies proper edge restraint concepts to prevent movement in interlocking concrete pavements installed over bedding sand [ICPI Tech Spec 3 edge restraint technical specification](https://www. angeluspavingstones.
com/wp-content/uploads/2022/01/AngelusCoverSheet-TechSpec3. pdf). The most practical option for DIY budgets is plastic paver edging staked into the base material with 10-inch steel spikes, placed every 12 inches. Anchor the edging before final compaction so the spikes seat fully.
For a cleaner look, you can use a soldier course (pavers set vertically on end) mortared in place, or a concrete curb poured alongside the field pavers. The ICPI recommends that restraints be anchored into the base layer, not just the bedding sand, so that they resist the lateral forces generated when the paver surface is loaded and compacted.
Leveling tolerance for a finished paver surface is no more than 3/8 inch variation under a 10-foot straight edge. If you find a high or low paver after compaction, pull it, adjust the sand underneath, and reset it. This is the great advantage of sand-set pavers over poured concrete: you can always fix individual problem spots. For flagstone set in sand, a slightly looser tolerance of 1/2 inch is acceptable given the natural irregularity of the material.
For finishing, clean any mortar haze or concrete sealer splatter with a mild muriatic acid solution (10:1 water to acid) applied carefully and rinsed thoroughly. If you want to seal the surface, use a penetrating concrete sealer, not a film-forming sealer, for a natural look that doesn't get slippery when wet. Sealing is optional but extends the life of polymeric sand and helps with stain resistance. Apply sealer only after the surface has cured and dried for at least 30 days.
Permits, safety, and troubleshooting
Do you need a permit?
Most ground-level patios under 200 square feet do not require a building permit, but rules vary significantly by municipality. Check with your local building or zoning department before you start. Setback requirements (minimum distance from property lines) commonly range from 3 to 10 feet. If you're attaching anything to the house, such as a pergola or covered structure over the patio, a permit is almost always required regardless of size. Call 811 (in the US) at least 3 business days before digging to have underground utilities marked. This is free and legally required in most states.
Safety basics
- Wear knee pads for laying pavers; you'll be on your knees for hours and the joint pain afterward is real.
- Use safety glasses and hearing protection when cutting pavers with a diamond blade.
- Wear a dust mask (N95 minimum) when cutting concrete or mixing dry concrete products; silica dust is a serious long-term lung hazard.
- Concrete and mortar are caustic; wear gloves and long sleeves when handling fresh mix.
- Plate compactors are surprisingly physical to control. Keep your footing and stay clear of the edges of excavations.
- If you're renting a plate compactor, ask the rental shop for a quick demo if you've never used one.
Common problems and how to fix them
Water pooling on the surface almost always means the slope wasn't set correctly in the base. The fix is to pull the affected pavers, regrade the base and sand, and reset. It's annoying but completely fixable with sand-set pavers. If you poured concrete and it pools, you can grind high spots with an angle grinder or apply a thin self-leveling overlay, but prevention during pour is far easier.
Shifting or sinking pavers in one area usually means inadequate base compaction, organic material left in the subgrade, or a localized drainage problem saturating the base. Pull the problem pavers, dig out and remove any soft spots, refill with angular gravel, compact well, reset sand, and relay the pavers. Don't just add sand over the top of the problem.
Joint sand washing out after rain is the most common complaint with regular sand. Switch to polymeric jointing sand, which contains a binder that hardens when wet and resists washout and weed growth. If you already have regular sand in place, you can blow or sweep it out and replace with polymeric sand without pulling the pavers.
Frost heave causing uneven pavers in cold climates is typically a base depth issue. The base didn't extend below the frost line, or the base material retained moisture and expanded. Going back with 6 inches of compacted crushed stone and ensuring the base drains freely (no clay pockets trapping water) is the long-term fix.
If the patio sits right against your foundation and you notice water running toward the house, regrade the soil around the perimeter to pitch away from the foundation, and check that your patio slope is moving water in the right direction. A simple French drain or gravel-filled trench along the downhill edge of the patio can intercept runoff before it causes problems.
Your next steps
The best time to start is with a sketch, a tape measure, and a shovel test to see what your soil is like. Dig a small hole about 10 inches deep and look at what you find: rock, clay, loose sandy loam, or heavy organic material each affect how you prep the base.
From there, price out materials at two or three suppliers, since big-box store paver prices can be 20 to 40% higher than a local masonry supply yard for the same product. Rent the plate compactor for a Saturday, buy your base gravel in bulk delivery if you need more than half a ton, and treat the base work as the most important part of the job. Get that right and the surface installation is genuinely enjoyable.
The patio building process shares a lot of foundation steps whether you're aiming for something easy and fast or something more elaborate, so the skills you build here carry over to every outdoor project you tackle next. The patio building process shares a lot of foundation steps whether you're aiming for something easy and fast or something more elaborate, so the skills you build here carry over to every outdoor project you tackle next inexpensive patio.
If you want to add water features later, use this patio foundation know-how as the base for your how to make patio pond plans.
FAQ
Can I build a budget patio on clay soil without it shifting or sinking?
Yes, but only if you handle drainage and edges carefully. A patio that drains toward the house can push water against foundations. If you need a level surface, keep the slope away from the structure and add a subsurface interception (for example, a gravel trench along the downhill edge) so the base stays dry.
How do I confirm my patio slope is correct before laying pavers?
Aim for at least a 1% slope away from the house, and verify it after compaction, not just after you place bedding sand. Use a long straightedge or a 4-foot level with a mark, and re-check with strings pulled tight across the whole footprint.
What’s the difference between bedding sand and base gravel for a patio?
Don’t use sand for the base. Bedding sand belongs only under the pavers, while the base should be compactable angular material (often crusher run or road base). If you put loose sand in the subgrade, you can get washout and rapid uneven settling.
How do I prevent polymeric joint sand from washing out right after installation?
If you’re using polymeric jointing sand, you must compact it into joints and then fully activate it with water according to the product label. Under-watering leaves joints soft, over-watering can cause the wrong amount of binder to migrate, and rushing activation often leads to premature washout.
My pavers look uneven in one section, what should I do first?
For minor uneven spots, pull the affected pavers, remove the loosened bedding sand, correct the base with more compacted gravel, then reset sand and pavers. Adding sand on top over a bad base creates a temporary fix and will usually fail again in the same area.
How much extra material should I buy for a budget patio with lots of cuts?
In most DIY patios, you should plan to cut pavers wherever you meet the edges or obstacles, and leave a consistent gap for the edging restraint. A good budgeting move is to add 10% extra for cuts, but also expect more scrap around doorways, corners, and irregular borders.
Will a budget patio hold up if I put a grill or heavy furniture on it?
If you plan to store a hot grill or place heavy loads, treat the patio like a traffic zone. Increase slab thickness (for poured concrete) and focus on a well-compacted, well-drained base. For pavers, ensure restraints are solid and the base is deep enough to prevent settling under concentrated weight.
Do I always need a permit if my patio is under 200 square feet?
Most standard DIY patio projects do not require a building permit under 200 square feet, but conditions change the rule. Anything attached to the house, a covered structure over the patio, or work that alters drainage or height commonly triggers permits, so confirm with your local zoning department.
What’s the safest way to deal with underground utilities while building a patio?
You can, but you should call 811 first and also hand-dig to confirm depth and location once utility markings are in place. Plan the layout to avoid running within utility easements, and don’t assume depth, since lines and conduits can vary.
What changes for a budget patio in cold climates to prevent frost heave?
In freeze-thaw climates, don’t just build the minimum base. Go toward the deeper base depth range, use well-draining angular gravel, and avoid leaving clay pockets that trap moisture. Also confirm the patio slope stays correct after compaction, since water retention drives frost heave.
Should I seal my patio, and what sealer type is best for non-slip performance?
Avoid film-forming sealers on pavers if you’re concerned about slipperiness. Penetrating sealers generally keep the surface texture closer to original, and you should only seal after full curing and drying (often 30 days or more) so you don’t trap moisture.
Where can I realistically cut costs on a patio build without ruining the result?
If you want to keep costs down, the lowest-risk savings usually come from surface material choices, not from skipping base depth or compaction. Price both pavers and gravel options, but always prioritize base prep quality, since the cheapest surface often fails first when the base is wrong.