The cheapest DIY patio you can build right now is a compacted gravel patio, which runs roughly $1 to $3 per square foot in materials. A 12 x 16 ft gravel patio (192 sq ft) can cost as little as $200 to $600 in materials if you do all the work yourself.
How to Make an Inexpensive Patio: DIY Step by Step

Nolan Carver
23 May 2026
If you want something more permanent, a sand-set concrete paver patio is the next step up at around $10 to $18 per square foot DIY, still a fraction of what a contractor charges. Either way, you do not need professional experience to pull this off. You need a weekend, a few basic tools, and a solid plan.
If you want an even simpler plan, start with a compacted gravel or sand-set paver patio and follow the same prep and drainage steps easy patio plan. If you want the full how to make patio process from start to finish, follow the steps in the planning sections next.
Planning and measuring your patio footprint
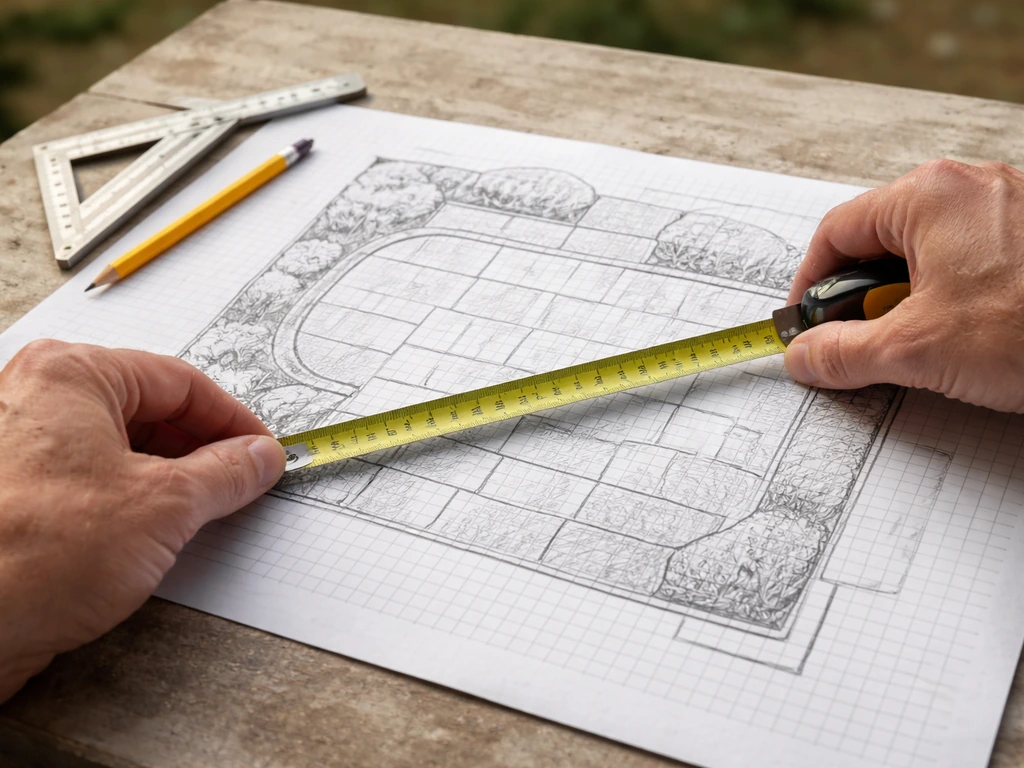
Before you buy a single bag of gravel or a paver, sketch your patio on paper. Figure out how you will actually use the space. A table and four chairs needs at least 10 x 12 ft. A small seating area with two chairs and a side table can work in 8 x 8 ft. Bigger is not always better when budget is the goal, so be honest about what you need.
To calculate materials, multiply length by width. A 12 ft x 16 ft patio is 192 sq ft. Write that number down because you will use it for every material estimate. Add about 10 percent to any order to account for cuts, breakage, and compaction loss.
For a square or rectangular layout, use the 3-4-5 method to make sure your corners are true 90-degree right angles. Measure 3 ft along one edge, 4 ft along the perpendicular edge, and the diagonal between those two points should be exactly 5 ft. If it is not, adjust your layout lines until it is. This works for any multiple of those numbers, so 6-8-10 or 9-12-15 all work the same way and are easier to measure on a large patio.
Mark your layout with batter boards and string lines set outside the actual patio edge. This keeps your reference lines intact while you dig. Use spray paint or marking chalk to transfer the outline to the ground before you start excavating.
Choosing the lowest-cost patio materials
You have three realistic options for a budget patio. Here is how they compare on cost, durability, and effort.
| Material | DIY Cost (per sq ft) | Durability | Skill Level | Best For |
|---|---|---|---|---|
| Compacted gravel | $1–$3 | Good (with edging) | Beginner | Fast, cheapest possible patio |
| Concrete pavers (sand-set) | $10–$18 | Excellent | Beginner–Intermediate | Permanent look, DIY-friendly |
| Poured concrete slab | $12–$18 | Excellent | Intermediate–Advanced | Cleanest finish, harder to DIY |
Gravel is the clear budget winner. Pea gravel or crushed limestone at 3 inches deep is stable, drains well, and looks clean. The trade-off is that it shifts underfoot and needs periodic raking and topping off. It is also not the best surface for outdoor furniture with thin legs.
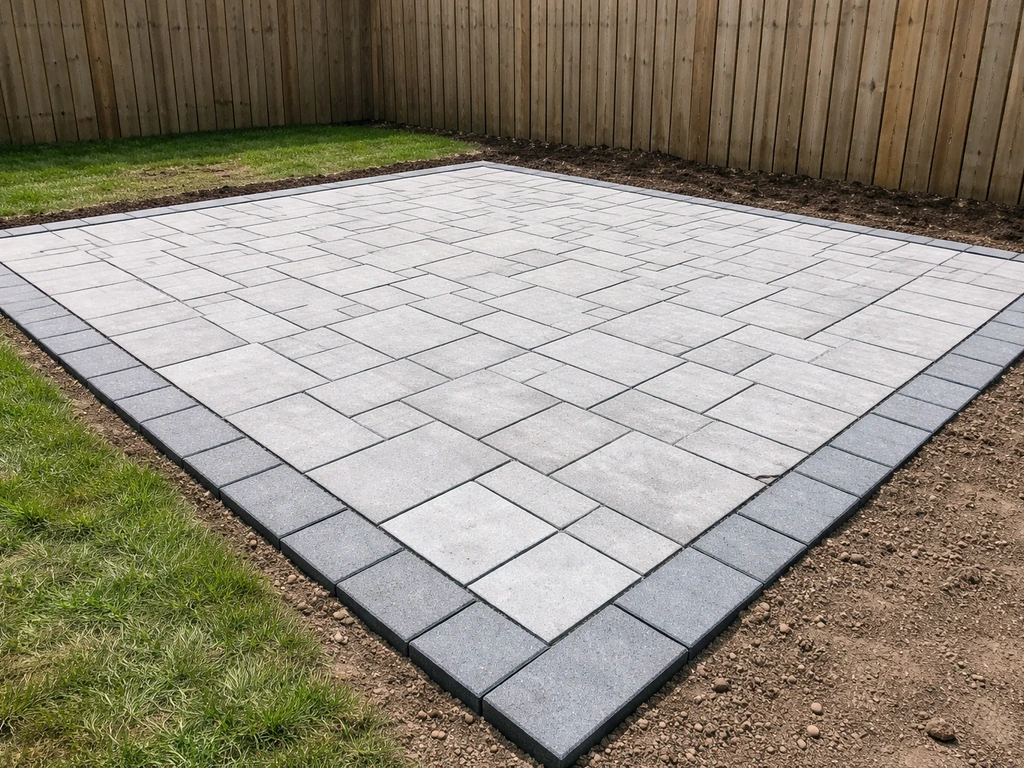
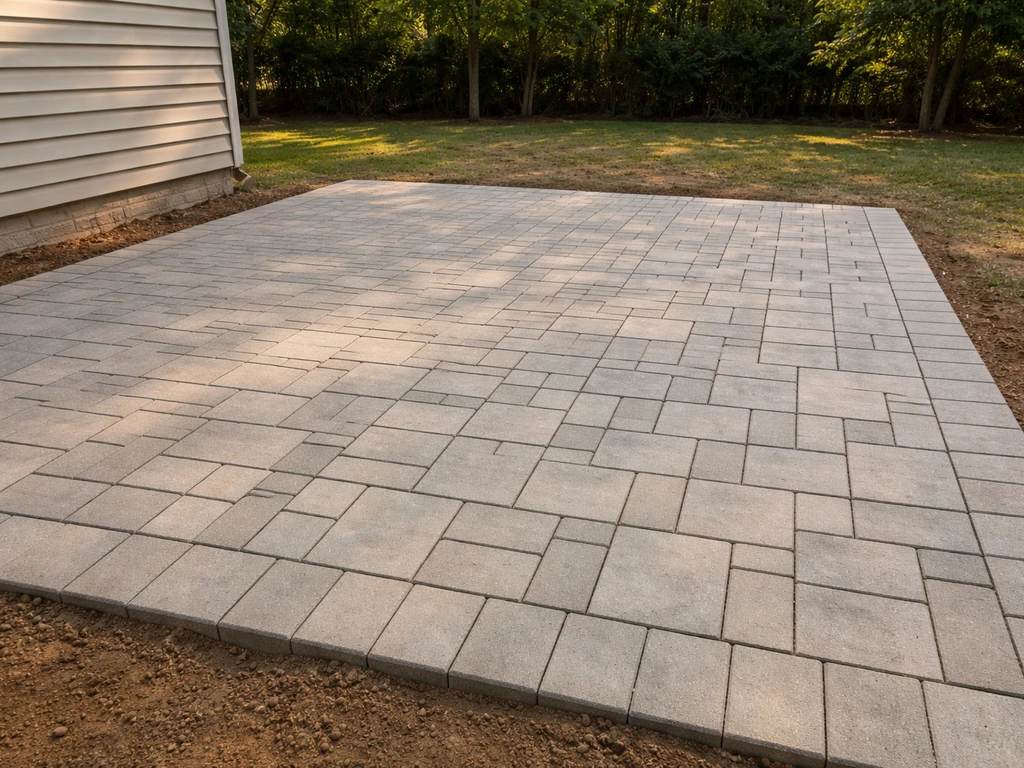
Sand-set concrete pavers are the sweet spot for most DIYers. They are forgiving because you can lift and relay individual pavers if something settles. Concrete pavers run roughly $8 to $12 per square foot for the material alone, and the installation process is beginner-friendly. Poured concrete gives you the most polished result but mixing and pouring a slab is genuinely harder to do well, and mistakes are permanent.
For the cheapest durable result, I recommend going with concrete pavers over gravel if your budget allows. They stay put, look great for years, and you can do the whole thing yourself over a weekend or two.
DIY layout and design basics
Shape and size
Rectangles and squares are the cheapest shapes to build because they minimize material waste and cut complexity. Curved or L-shaped patios look great but require more cutting, more edging, and more time. If this is your first patio or you are on a tight budget, go rectangular.
Base thickness
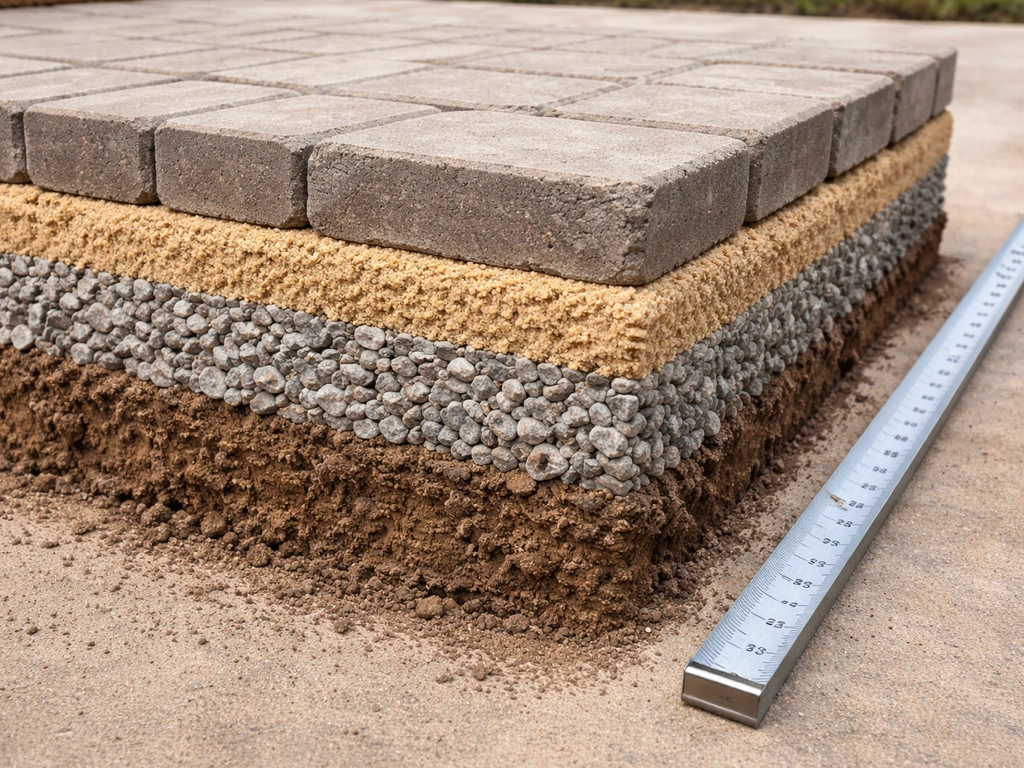
For a paver patio, plan on excavating deep enough to fit 4 inches of compacted crushed stone base, 1 inch of bedding sand, and the thickness of your paver (usually 2. A common slab thickness recommendation for residential patios is a 4 in concrete slab, paired with a properly prepared base. 375 inches for a standard paver). That puts you at roughly 7 to 8 inches of total excavation depth. For a gravel-only patio, you need at least 4 to 6 inches of compacted gravel plus a weed barrier underneath.
Drainage and slope
This is the single most important thing to get right. Add a patio pond by planning its location first, then selecting a liner and filtration setup that fit your available space and water flow needs how to make patio pond. Water that pools on or against your patio will cause settling, frost heave, and foundation damage over time.
The minimum slope away from your house is 1/8 inch per foot, but the better target is 1/4 inch per foot (a 1-inch drop every 4 feet). On a 12-foot-deep patio, that means the far edge should sit 3 inches lower than the edge nearest your house. Set this slope into your base layer, not just the surface, and check it with a 4-foot level and tape measure as you work.
Preparing the site
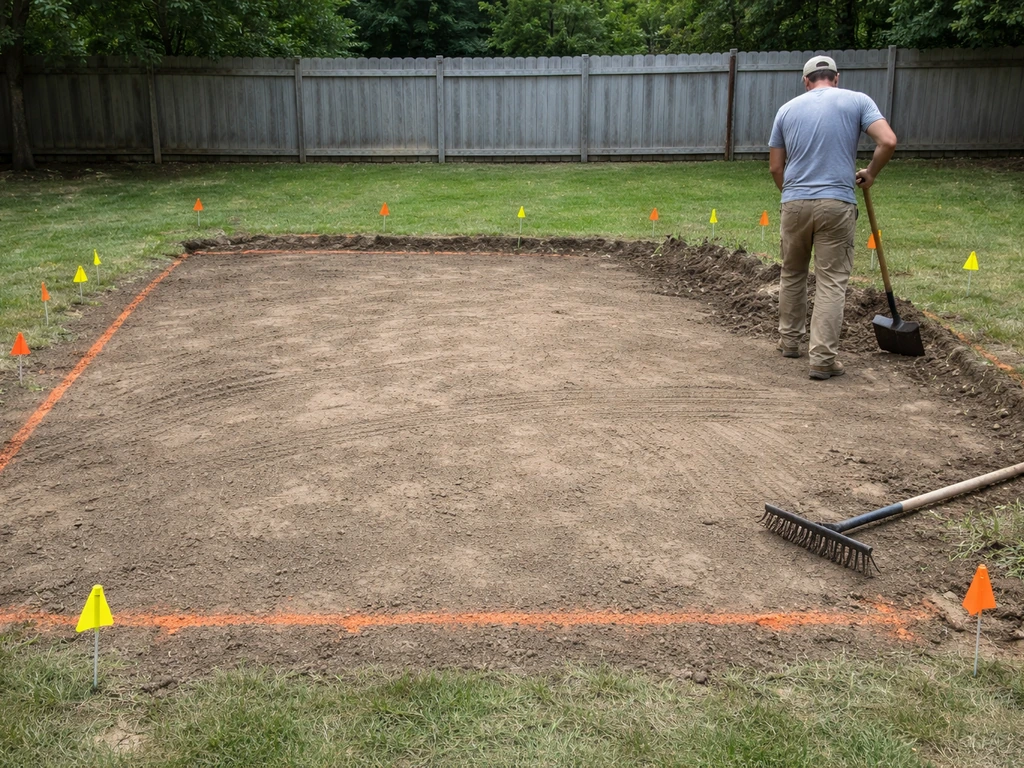
Site prep is boring, unglamorous work, and it is also the reason budget patios fail or last. Do not skip steps here.
- Call 811 (in the US) before you dig to mark utility lines. This is free and required by law in most states.
- Remove all grass, roots, and organic material from the patio area. Organic matter decomposes and causes settling.
- Excavate to your target depth (7–8 inches for pavers, 4–6 inches for gravel). Use a flat-bottom spade to keep the walls clean.
- Grade the subgrade soil so it already slopes away from the house at 1/4 inch per foot. Do not rely on your base layer to fix a flat subgrade.
- Compact the soil with a plate compactor (rent one for about $60 to $90 per day). A hand tamper works for small areas but will not give you the same density.
- Lay landscape fabric (weed barrier) directly on the compacted subgrade. Overlap seams by at least 6 inches. This keeps weeds out from below without blocking drainage.
- Add your crushed stone base in 2-inch lifts, compacting each lift before adding the next. For pavers, build up to 4 inches of compacted base total.
- Check slope at every lift with your level and adjust as you go.
One common mistake: people dig to depth, dump all the gravel in at once, and compact it in one pass. You will not reach the 95 percent compaction density you need that way. Two-inch lifts with full compaction between them is how you build a base that stays solid for years.
Building your patio step by step
This workflow covers a sand-set paver patio, which is the best balance of budget, durability, and beginner-friendliness. For sand-set paver patios, bedding sand is commonly specified as about 1 inch thick after screeding. The steps for a gravel patio are essentially the same through the base prep stage, then you just top off with decorative gravel and install edging.
- Install your permanent edging along two adjacent sides of the patio (usually the edges nearest the house or a fixed reference point). This anchors your layout and keeps everything from spreading. Use plastic or aluminum paver edging and drive steel spikes every 16 to 20 inches and at each end.
- Spread a 1-inch layer of coarse bedding sand (not play sand or fine sand) over your compacted base. Do not compact this layer.
- Screed the sand flat using two parallel pipes or lumber set at your target height as guides. Drag a straight 2x4 across the pipes to level the sand. Pull the guides out when done and fill the channels with sand by hand.
- Start laying pavers from a corner, working outward in a row pattern or your chosen design. Keep joints tight (most pavers have built-in spacer lugs). Use a rubber mallet to tap each paver down gently.
- Check for level and consistent slope every few rows using your 4-foot level. Adjust individual pavers by adding or removing a small amount of sand beneath them.
- Cut pavers for edges and corners using a circular saw with a diamond blade, or rent a wet saw for cleaner cuts. Mark the cut line with a pencil or chalk.
- Once all pavers are laid, install edging on the remaining two open sides to lock everything in.
- Pour fine polymeric joint sand over the entire surface and sweep it into the joints with a push broom. Make multiple passes until all joints are filled to within 1/8 inch of the surface.
- Compact the entire paved surface with the plate compactor (put a rubber pad on the plate to protect the pavers). This seats the pavers into the bedding sand and packs the joint sand.
- Sweep in a second round of polymeric sand to top off any joints that settled during compaction.
- Activate polymeric sand by lightly misting the surface with water per the manufacturer's instructions. It hardens as it dries and locks the joints against weeds and washout.
Troubleshooting common problems

- Uneven pavers: Usually caused by inconsistent sand depth. Pull the paver, add or remove sand, and reset it.
- Water pooling on the surface: Your slope is off. Check your pitch with a level and re-screed the sand in the problem zone.
- Pavers shifting or spreading: Edging is missing, undersized, or not spiked properly. Add or replace edging and re-drive spikes.
- Weeds growing through joints: Polymeric sand was not applied or activated correctly. Clean joints and re-apply.
- Sunken area after the first winter: The base was not compacted thoroughly. Pull the affected pavers, re-compact the base, add sand, and relay.
Finishing touches that actually matter
Good edging is not optional. It is what keeps your patio from slowly spreading apart over years of freeze-thaw cycles and foot traffic. Install aluminum or plastic paver restraint edging on all four sides, with steel spike anchors every 16 to 20 inches. For a 6-foot section of edging, aim for at least four anchoring spikes minimum.
For concrete paver patios, sealing is a smart step but not urgent on day one. Wait until the pavers have gone through a full wet season before sealing so any efflorescence (the white mineral haze that appears on new concrete) can work itself out. For a poured concrete patio, wait at least 28 days, and most sealer manufacturers say to wait a full month before applying any sealer to new concrete. Sealing protects against staining, UV fading, and joint sand erosion.
Ongoing maintenance for a paver patio is minimal. Sweep it occasionally, re-sand joints every few years, and check that your slope is still directing water away from the house. Gravel patios need raking and top-dressing roughly once per year. Neither requires a contractor.
Budget breakdown and where to spend vs. save
Here is a realistic cost breakdown for a 192 sq ft (12 x 16 ft) sand-set concrete paver patio built entirely by yourself in 2026.
| Item | Estimated Cost | Notes |
|---|---|---|
| Concrete pavers (192 sq ft + 10% waste) | $1,650–$2,500 | At $8–$12/sq ft for material |
| Crushed stone base (4 in depth, ~6 tons) | $120–$250 | Bulk delivery is cheaper than bags |
| Bedding sand (1 in, ~1.5 tons) | $40–$80 | Coarse concrete sand, not play sand |
| Polymeric joint sand (2–3 bags) | $40–$70 | $20–$25 per bag |
| Landscape fabric | $20–$40 | Buy commercial grade, not the thin stuff |
| Paver edging + spikes | $50–$100 | Aluminum holds up better than plastic |
| Plate compactor rental (1–2 days) | $60–$180 | Do not skip this |
| Diamond blade for saw | $20–$40 | For cutting edge pavers |
| Total (DIY) | $2,000–$3,260 | Contractor install would be $4,000–$8,000+ |
Where to save money
- Buy pavers in bulk from a masonry supply yard rather than big-box stores. Prices are often 15 to 25 percent lower.
- Order crushed stone and sand delivered by the ton, not in bags. Bagged material costs 3 to 5 times more per ton.
- Choose a simple rectangular shape to reduce cuts and material waste.
- Borrow or rent tools rather than buying them. A plate compactor, tamper, and wet saw are one-time uses for most DIYers.
- Skip decorative borders or accent pavers on your first build. You can always add them later.
- Use a 4-inch gravel base instead of 6 inches if your soil is stable and well-draining clay-free soil.
Where not to cut corners
- Do not skip plate compaction. A hand tamper is not a substitute for a proper compactor on anything larger than 50 sq ft.
- Do not use cheap landscape fabric. Thin, flimsy fabric tears and lets weeds through within a year.
- Do not reduce base depth below 4 inches of compacted stone. This is the minimum for a paver patio that will not settle.
- Do not use fine or play sand as bedding sand. It shifts and migrates. Use coarse concrete sand.
- Do not ignore slope. A flat patio will trap water, and that water will undermine your base and potentially direct moisture toward your foundation.
Your next steps starting today
You do not need to have everything figured out before you start. Here is what to do in the next few days to get real momentum.
- Measure your desired patio area and sketch it on paper. Calculate square footage (length x width) and write it down.
- Decide on your material based on your budget. Gravel if you need under $600. Concrete pavers if you can stretch to $2,000 to $3,000 for a 192 sq ft space.
- Call your local masonry supply yard and ask for current pricing on crushed stone, coarse sand, and concrete pavers by the ton and square foot. Compare to your nearest big-box store.
- Call 811 at least 3 business days before you plan to dig to get utilities marked.
- Build a simple materials and tools checklist: pavers or gravel, crushed stone base, bedding sand, landscape fabric, edging, spikes, plate compactor rental, level, string line, and spray paint for layout.
- Block out your build weekend on the calendar. A 192 sq ft paver patio can realistically be completed in two full days of work with one helper.
If you want a deeper look at the full patio-building process beyond the budget angle, the general patio construction guide on this site walks through material options and base construction in more detail. And if your situation involves a tricky slope or drainage problem, that is worth reading through before you start excavating. Getting the slope right from day one is the single best thing you can do to make a cheap patio last like an expensive one.
FAQ
What’s the best thickness for gravel on a budget patio, and can I go thinner to save money?
For gravel-only patios, aim for 4 to 6 inches of compacted gravel underneath, thinner only if you expect very light foot traffic and you keep the base compacted in lifts. Going too thin usually shows up as shifting, low spots, and faster weed growth even if you add a weed barrier.
Should I use pea gravel or crushed limestone for an inexpensive patio base?
Crushed limestone generally locks together better under compaction and helps the surface stay flatter. Pea gravel looks tidy but tends to shift more over time, so it often needs more raking and topping off.
How do I choose between a gravel patio and a sand-set paver patio if I have uneven ground?
If your yard has noticeable bumps or dips, a sand-set paver patio is usually more forgiving because you can correct minor settlement by lifting and re-laying individual pavers. Gravel can handle minor grading, but uneven areas are more likely to end up as soft spots or humps unless you spend extra time building the base.
Do I need to use a weed barrier under gravel or pavers?
Yes under gravel patios, use it to slow weeds coming up through the rock layer. Under sand-set pavers, most of the weed control comes from proper base depth, tight compaction, edging, and joint sand, but adding a barrier can help in weedy areas if it does not interfere with drainage.
What’s the easiest way to verify slope without fancy tools?
Use a 4-foot level and tape measure, then take repeated readings across the patio to confirm the far edge drops the target amount (1/8 inch per foot minimum, 1/4 inch per foot better). Check while shaping the base, not after the final surface is installed.
Is it better to set the slope by changing the base depth or by sloping the surface only?
Slope the base layer. If you only tilt the final surface, water can still pool within the base, which raises the risk of settling and freeze-thaw damage. The article’s approach works because it builds drainage into the foundation.
How do I prevent pavers from rocking or settling after installation?
Compact the base in lifts, keep the base to the correct total depth, and do not skip the bedding sand layer. After spreading bedding sand, level it and place pavers carefully, then use a plate compactor appropriate for pavers (often with a protective board) so you do not disturb the sand bed.
Can I reuse leftover pavers or gravel to cut costs?
Small leftovers for small infill spots can work, but do not expect matching thickness or clean edges for the whole field. For pavers, mixing batches can cause height differences and visible joints, so it is usually cheaper long-term to buy enough to complete the full layout.
How much sand should I plan for paver joints, and how often will I need to top them up?
Plan for an additional sand sweep after initial compaction and settling, then expect re-sanding every few years depending on freeze-thaw, foot traffic, and whether people wash the patio with water. If joints empty quickly, your edging may be loose or the slope may be draining too aggressively.
What’s the correct way to install edging so the patio does not spread?
Use restraint edging on all sides and anchor it consistently, place spikes closer together at corners, and set the edging so it is firmly backed by the base material. If edging sits too high or not tight to the pavers, it can fail gradually during freeze-thaw cycles.
Do I need to seal sand-set concrete pavers or only concrete slab patios?
For concrete pavers, sealing is optional but helps with stain resistance, and it is best delayed until after the pavers have dried through a full wet season. For poured concrete slabs, wait at least 28 days and often a full month before sealing so efflorescence and moisture have cleared.
How do I deal with the patio area where it meets a driveway or step?
Treat the junction as a drainage and movement problem. Leave appropriate clearance, maintain the same slope direction away from the house, and consider an edging transition so pavers do not migrate into the adjacent area when people cross the boundary.
What’s the most common “cheap patio” mistake that causes premature failure?
Usually it is underbuilding or undercompacting the base, such as dumping all material at once and compacting in a single pass. Proper compaction in 2-inch lifts is what keeps inexpensive materials from turning into soft spots and uneven settling later.