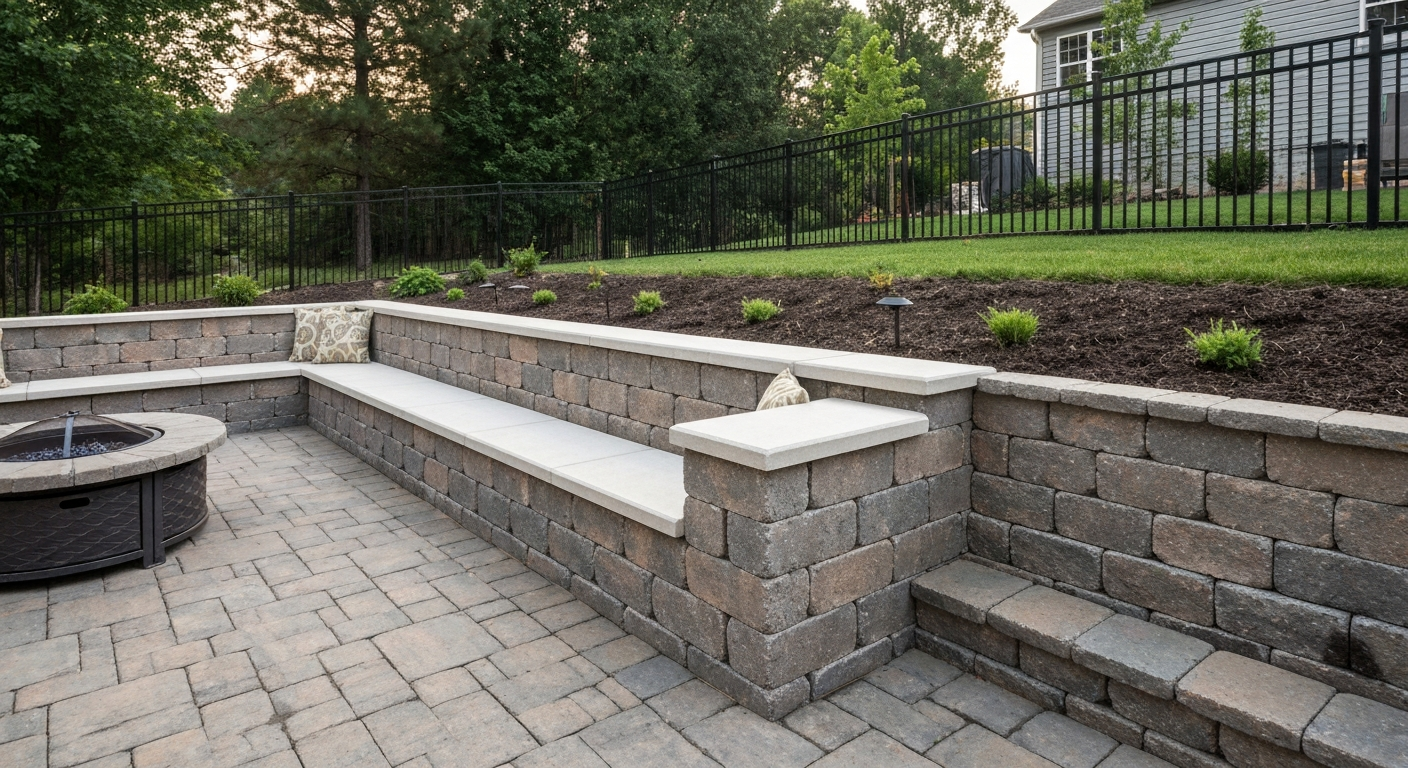
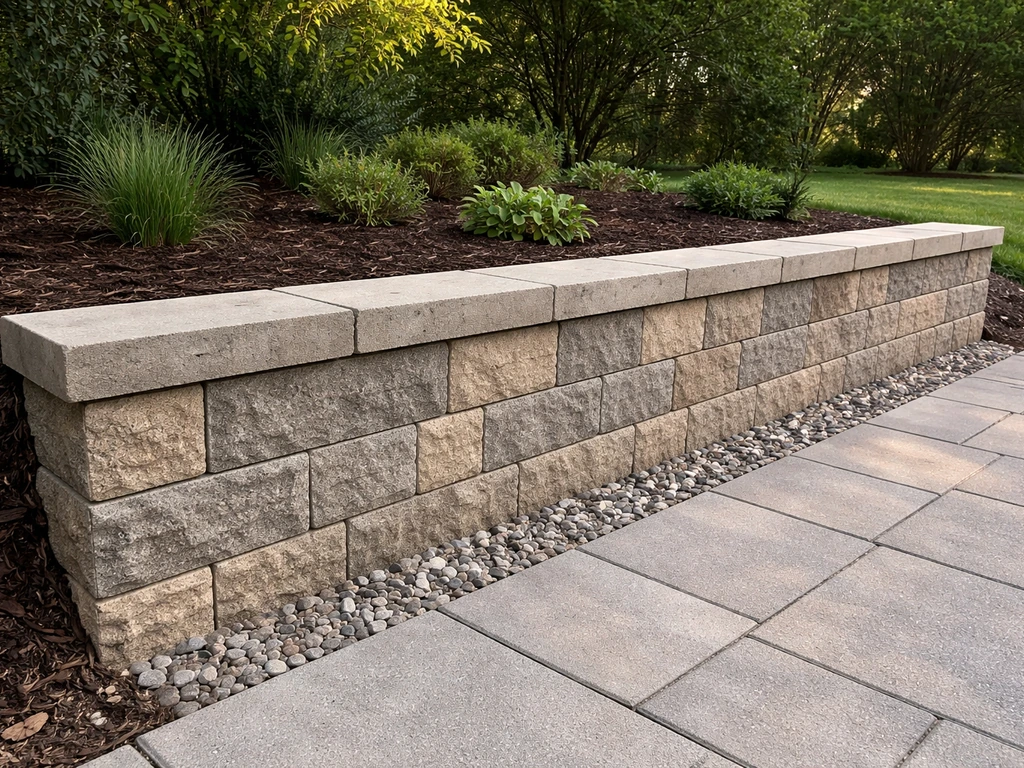
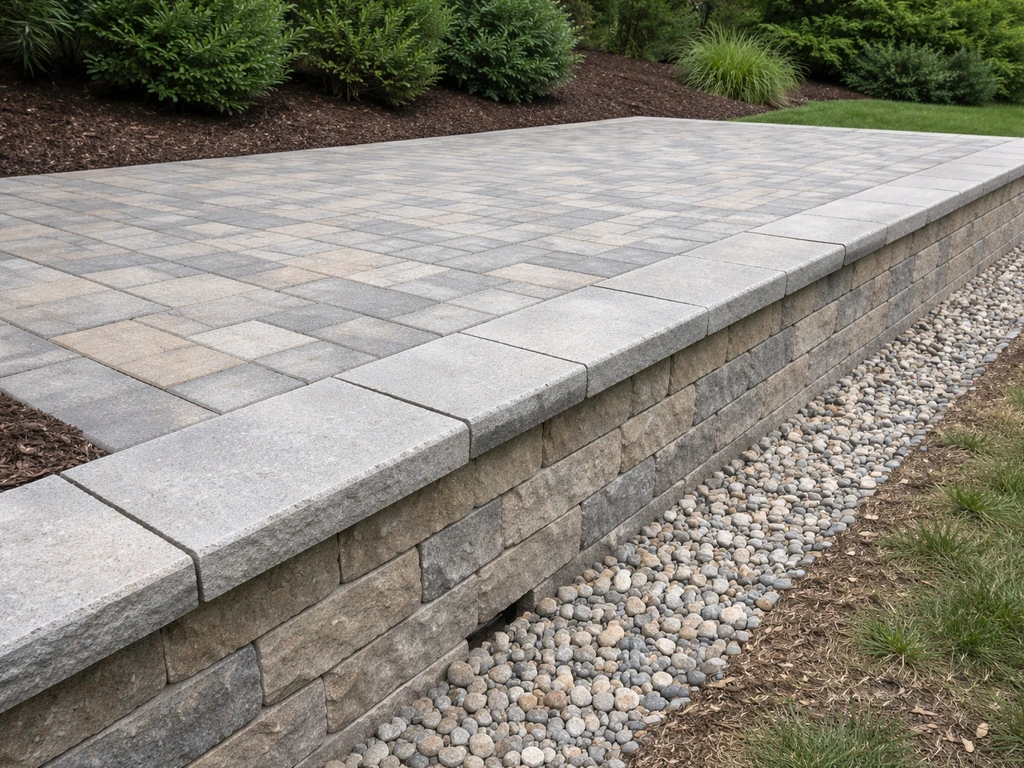
You can build a wood patio wall yourself using pressure-treated lumber rated for ground contact, basic carpentry tools, and a solid understanding of what the wall actually needs to do. Whether you are installing a low decorative edging border, building a seating wall at a comfortable 17–18 inches tall, framing a small retaining wall to hold back a garden slope, or creating a structural retaining wall that supports a patio surface on top, the core principles are the same: a stable foundation, proper drainage behind any wall that holds soil, corrosion-resistant hardware, and treated wood rated for its exposure. This guide walks you through every decision, from site assessment and permits to step-by-step construction, finishing, and maintenance. For step-by-step instructions on how to build a small retaining wall for patio, see our dedicated guide on how to build a small retaining wall for patio.
How to Build a Patio Wall with Wood: DIY Plans & Steps

What kind of wood patio wall are you actually building?
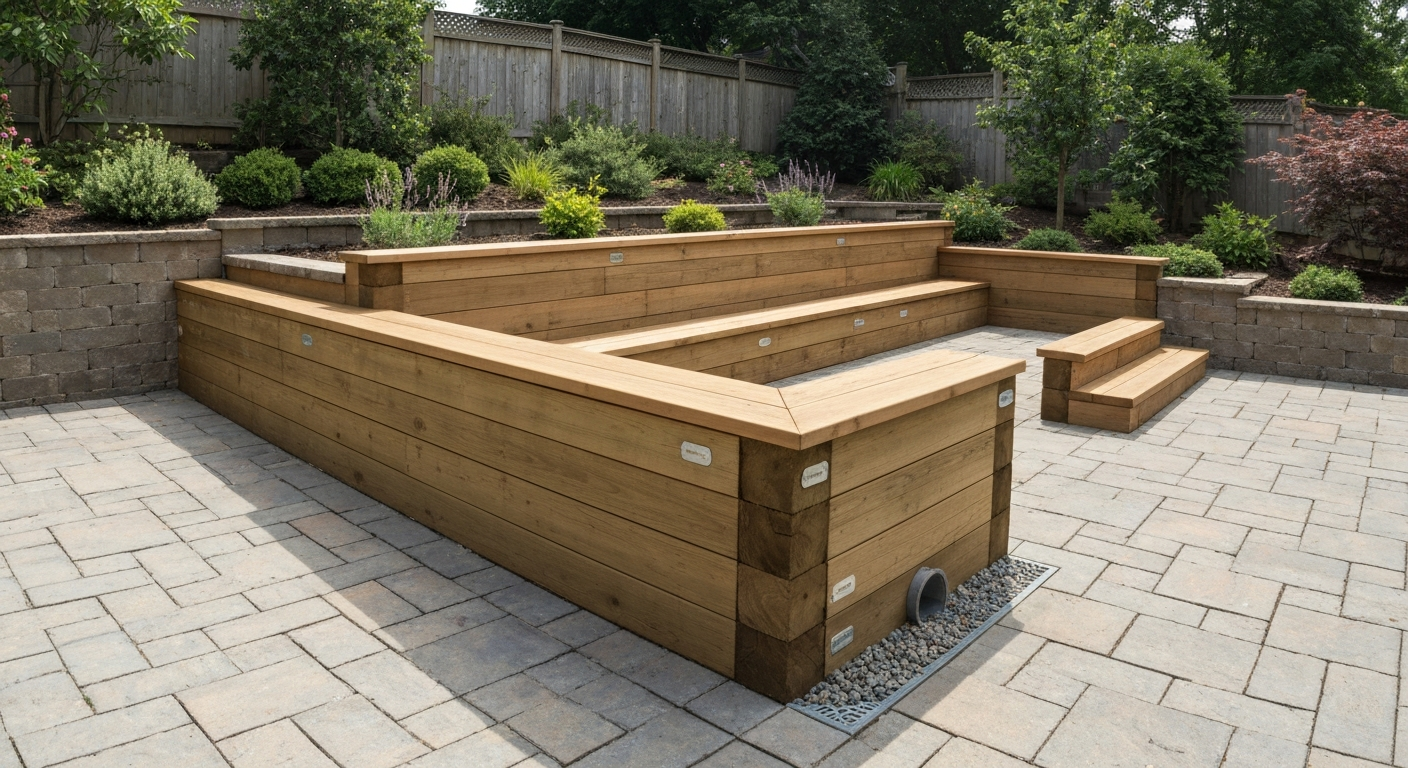
Before you buy a single board, you need to know which type of wall you are building, because each one has different structural demands. A decorative edging border is mostly cosmetic and sits almost entirely above grade. A seating wall doubles as outdoor furniture and needs to be comfortable and stable but does not retain significant soil. A small retaining wall holds back a slope, so drainage and foundation depth become critical. A retaining wall with a patio built on top carries both soil loads and the weight of the patio surface and people using it, which is the most demanding application of the four.
- Decorative edging: low-profile border framing a patio, garden bed, or lawn. Minimal structural requirement. Typically 4–8 inches tall.
- Seating wall: freestanding or semi-retaining wall designed to sit on. Seat height 17–19 inches, seat depth 16–20 inches. Needs stable footing but limited soil retention.
- Small retaining wall: holds back a slope up to about 3–4 feet of retained height. Requires drainage aggregate and a perforated drain pipe behind it.
- Retaining wall supporting a patio: the most structural application. Combines retained soil load with the weight of the patio surface and users above. Often requires engineering at or above 4 feet of retained height.
Knowing which wall type you are building shapes every decision below. The seating wall and retaining wall applications overlap in interesting ways, and if you plan to add a bench seat on top of a retaining wall, the design merges both disciplines. We have separate detailed guides on building a patio seating wall and on building a patio retaining wall if you want to go deeper on either of those specific applications.
Decision checklist before you design anything
Run through this checklist before you commit to a design. I have seen plenty of well-built walls fail not because of bad construction but because of a site condition the builder did not account for before starting. Spend 30 minutes on this and you will avoid most of the expensive rework I see in the field.
- Measure your slope. How much vertical rise does the ground have across the area where the wall will sit? A wall retaining more than 4 feet of fill (measured from the bottom of the footing to the top of the wall) almost certainly needs a permit and an engineered design.
- Check your soil. Dig a small test hole 18 inches deep. Dry sandy or gravelly soil drains well and is easier to work with. Wet, sticky clay or silty soil holds water, increases pressure on the back of any retaining wall, and makes drainage design more critical.
- Look for drainage paths. Where does water go when it rains hard? If it flows toward where your wall will be, you need to intercept it with a drain pipe behind the wall. Walls that trap water fail quickly.
- Identify underground utilities. Call 811 (in the US) before you dig anything. This is free, legally required in most states, and prevents serious injury.
- Check for surcharge loads. Is there a driveway, shed, or heavy garden feature within about 5 feet of the top of the wall? That additional weight adds lateral pressure and changes the design.
- Set your budget. A simple edging project might cost $100–$300 in materials. A 20-foot seating wall runs $400–$900. A small 3-foot retaining wall for a 20-foot run can cost $600–$1,500 depending on lumber choice and drainage materials.
- Decide on DIY scope. Are you comfortable operating a circular saw, digging a trench, and working with heavy framing lumber? If any of those feel uncertain, note them now and plan to learn or hire out just that piece.
Design options and dimension templates
The dimensions below come from landscape architecture standards and ergonomic bench design research. They are not arbitrary. A seat at 17 inches feels natural for most adults; anything much lower and you struggle to stand up, anything much higher and your feet dangle. Use these as your starting templates, not suggestions you can freely adjust.
Seating and bench wall dimensions
| Dimension | Recommended Range | Notes |
|---|---|---|
| Seat height | 17–19 in (43–48 cm) | 17–18 in suits most adults; go 18–19 in for older users |
| Seat depth | 16–20 in (41–51 cm) | 16 in for upright seating; 18–20 in for relaxed/lounge seating |
| Wall width (seat cap) | Minimum 12 in; 14–16 in preferred | Wider cap is more comfortable and weather-sheds better |
| Post or timber section | 4x6 or 6x6 minimum for structural posts | 6x6 preferred for walls taller than 18 in or with soil retention |
| Maximum unsupported height (freestanding wood wall) | 24–30 in without additional anchoring or bracing | Above 30 in, add deadman anchors or cross-bracing |
Retaining wall cross-section and thickness guidelines
For a timber retaining wall, the rule of thumb is that the wall's buried depth (the portion below grade) should be roughly one-eighth to one-sixth of the total retained height, with an absolute minimum of 12 inches of burial. A wall retaining 24 inches of soil should have at least 12 inches buried below grade. Wall thickness, meaning the front-to-back dimension of the timber structure, should be at least 6 inches for walls under 24 inches of retained height, and at minimum 8–10 inches for walls retaining 24–48 inches. For anything approaching 4 feet of retained height, engineering review is the safest path.
| Retained Height | Minimum Wall Thickness | Burial Depth | Drainage Required? | Permit Likely? |
|---|---|---|---|---|
| Under 12 in (edging) | 2x6 face boards sufficient | 4–6 in | No (surface drainage OK) | No |
| 12–24 in | 6 in (single 6x6 or doubled 2x6) | 10–12 in | Recommended | Unlikely (check locally) |
| 24–36 in | 6–8 in (6x6 timbers) | 12–16 in | Yes — 12 in gravel + 4 in drain pipe | Possible |
| 36–48 in | 8–10 in (6x8 or stacked 6x6) | 16–18 in | Yes — required | Likely — check with your building dept. |
| Over 48 in | Engineering required | Engineering required | Yes — engineered drainage | Yes — always |
The 48-inch threshold is not arbitrary. Under the 2018 International Residential Code (IRC Section R404.4), retaining walls that are not laterally supported at the top and retain more than 48 inches of unbalanced fill must be designed in accordance with accepted engineering practice, with a safety factor of at least 1.5 against overturning, sliding, foundation pressure, and water uplift. Many local jurisdictions actually lower that threshold to 4 feet measured from the bottom of the footing, so check your local building department's specific language.
Decorative edging dimensions
Edging walls are simple. A single 2x6 or 2x8 laid flat and staked with 2x2 or 1x2 pressure-treated stakes every 4 feet works well for most borders. Keep total height under 8 inches above grade, make sure the stakes are driven at least 12 inches into undisturbed soil, and you are done with structural concerns. The challenge with edging is keeping it level over time as soil heaves with freeze-thaw cycles. Set the bottom of the board slightly below grade (about 1 inch) so frost push is less dramatic.
Permits, building codes, and inspections
I know permits feel like bureaucratic friction, but skipping this step can cost you far more than the permit fee. An unpermitted retaining wall that fails can damage your property, your neighbor's property, and give your insurance company a reason to deny a claim. Here is how to approach it.
- Call or visit your local building department before you design. Ask specifically: 'I am building a wood retaining wall. At what height does it require a permit and/or an engineered design?' The most common answer is 4 feet (from footing bottom to wall top), but some jurisdictions require permits starting at 24 inches, especially for walls adjacent to property lines or public right-of-ways.
- Ask about setback requirements. Many municipalities require retaining walls to be set back a minimum distance from property lines (commonly 2–5 feet).
- Check HOA rules if applicable. Homeowners associations sometimes restrict wall materials, colors, and maximum heights independently of municipal code.
- Ask whether your project requires an inspection. Even small permitted walls may need a footing inspection before backfill. Find out when to call for inspection before you cover anything up.
- For walls that need engineering: your building department will tell you. You will need to submit engineered drawings stamped by a licensed structural or civil engineer. Factor 2–4 weeks and $500–$2,000 for engineering fees into your budget.
For seating walls, edging, and other non-retaining applications, permits are rarely required unless the structure exceeds a certain height (often 30 inches above grade) or attaches to the house. Still worth a quick phone call to confirm.
When to hire a pro instead of DIYing it
I am a strong advocate for DIY, but I am also honest: some situations genuinely call for a professional. Here are the clear criteria. If any of these apply to your project, at minimum get an engineering consultation before you start.
- Retained height at or above 4 feet (measured from footing bottom to wall top). This triggers code-mandated engineering in most jurisdictions.
- The wall is within 5 feet of a structure (your house, a garage, a neighboring fence or building). Failure could damage those structures.
- The wall is adjacent to a slope where a failure would send soil toward a public road, neighboring property, or lower structure.
- Your soil test reveals wet clay, expansive soils, or organic material. These soil types are unpredictable and dramatically increase lateral pressure.
- There is a surcharge load within the retained-height distance from the top of the wall — a driveway, a large shed, or heavy vehicles.
- You need to retain water or manage significant stormwater as part of the project.
- The wall will support a patio with people on it (retaining wall with patio on top). The combined loads and consequences of failure justify engineering review.
- You are simply not comfortable with the structural concepts involved. There is no shame in this — a competent contractor charging $3,000–$8,000 for a small retaining wall is often money very well spent.
Materials comparison and purchase list
Choosing the right lumber is the most important materials decision you will make. Outdoor wood walls live in a wet, UV-exposed, insect-prone environment. The wrong lumber will begin to rot within 2–5 years. Here is how the main options compare.
Lumber options compared
| Material | Best Use | Expected Lifespan | Cost (per linear ft, approx) | Notes |
|---|---|---|---|---|
| Pressure-treated pine (UC4/UC4A) | Ground contact, retaining walls, structural posts | 20–40 years | $1.50–$4.00 | Most affordable structural choice; requires corrosion-resistant hardware; check end tag for UC4 rating |
| Cedar (Western Red) | Above-grade seating walls, capping, decorative edging | 15–25 years above grade; 5–10 in ground contact | $3.00–$7.00 | Naturally rot-resistant but not rated for sustained ground contact; beautiful look, workable |
| Redwood | Above-grade capping and visible surfaces | 15–25 years above grade | $5.00–$10.00 | Premium look; limited availability outside western US; not suitable for ground contact without treatment |
| Composite lumber (e.g., Trex, TimberTech) | Capping, visible seat surfaces, decorative trim | 25–30 years | $4.00–$12.00 | No rot; no sealing required; heavier and less structural than dimensional lumber; use for caps and faces only |
| Reclaimed/untreated timber | Avoid for structural or soil-contact uses | Unpredictable | Varies | Do not use for retaining or ground-contact applications without verified treatment history |
My recommendation: use pressure-treated lumber rated UC4A or UC4B for any part of the wall that contacts soil or will be continuously wet. If you want the look of cedar or composite on the visible seat cap or face boards, use that material above grade only and fasten it over a pressure-treated structural frame. This hybrid approach gives you the durability of treated lumber where it matters and the aesthetics of nicer materials where people actually see and touch the wall.
Hardware and fasteners
Modern pressure-treated lumber uses copper-based preservatives (ACQ, CA, copper azole). These chemicals accelerate corrosion in ordinary steel fasteners, sometimes visibly within a year or two. You must use corrosion-resistant hardware throughout. For most residential projects, hot-dip galvanized (G185 coating) is the standard minimum. For coastal environments or any location with salt air or spray, specify Type 316 stainless steel hardware. Do not use standard zinc-plated or electroplated fasteners with treated lumber.
- Structural screws: 3-in and 3.5-in exterior-rated structural screws (GRK, FastenMaster, or equivalent) with hot-dip galvanized or ceramic coating
- Through-bolts: 1/2-in hot-dip galvanized carriage bolts with washers and nuts for timber-to-timber connections
- Post anchors: hot-dip galvanized post base hardware (Simpson Strong-Tie CB or ABU series) for any post set into a concrete footing
- Joist hangers (if building a platform-style seat wall frame): hot-dip galvanized, rated for treated lumber
- Deadman anchors (for retaining walls): same treated lumber as the wall, cut to 24–36 in lengths, fastened with 1/2-in galvanized spikes or bolts
- Rebar: No. 4 (1/2-in diameter) rebar for pinning timbers to concrete footings or to each other in stacked-timber walls
Drainage materials for retaining applications
Any wall retaining soil needs a drainage system behind it. Water pressure, called hydrostatic pressure, is the number-one cause of retaining wall failure. The goal is to intercept groundwater and rain infiltration behind the wall and route it away before it builds pressure. UFC 3‑220‑20 / DoD, soil behavior, drainage and design implications for retaining structures notes that poorly draining silts and clays can develop pore‑water pressures that significantly increase lateral loads (and clog drainage), whereas free‑draining granular backfill reduces hydrostatic uplift and lateral pressures, and it recommends geotechnical improvement or geogrid reinforcement where poor soils exist blank" rel="noopener noreferrer">UFC 3‑220‑20 / DoD — soil behavior, drainage and design implications for retaining structures. Here is what you need. Industry-standard practice is to install a 4‑inch‑diameter perforated PVC or HDPE drain pipe within the base drainage stone at the footing, with a continuous positive slope (typically 1–2% or about 1/8–1/4 in per ft) so water gravity-drains to a discharge point away from the wall blank" rel="noopener noreferrer">A 4‑inch‑diameter perforated drain pipe should be installed within the free‑draining material at the base of each wall..
- Crushed angular stone (clean, 3/4-in crushed granite or limestone): minimum 12 inches wide zone directly behind the wall, full height of retained soil. Do not use round pea gravel — angular stone packs and drains better.
- 4-inch perforated PVC or HDPE drain pipe (meeting ASTM F758 for smooth-wall PVC or ASTM F405 for corrugated PE): placed at the base of the drainage stone, sloped at a minimum 1% grade (about 1/8 inch per foot) toward a discharge point. The pipe must daylight — meaning it must exit to open air at a downhill end.
- Geotextile filter fabric: wrap the drain pipe and ideally line the soil side of the gravel zone to prevent fine soil particles from migrating into and clogging the drainage stone over time. Use a non-woven geotextile rated for drainage applications.
- Outlet protection: where the drain pipe daylights, protect the opening with a rodent guard and finish with riprap or gravel apron to prevent erosion at discharge.
Complete purchase list by wall type
| Item | Edging Wall | Seating Wall | Small Retaining Wall | Retaining Wall + Patio |
|---|---|---|---|---|
| PT lumber (UC4A/UC4B) — posts, timbers, frame | 2x6 boards + 2x2 stakes | 6x6 posts, 2x6/2x8 framing | 6x6 or 6x8 timbers | 6x8 or 8x8 timbers |
| Cap/seat material (cedar or composite optional) | Optional trim | 14–16 in wide cap boards or composite | Not required | Composite or cedar cap |
| Concrete (for footings) | Not required | Bags or ready-mix for post footings | Bags for base/footer | Ready-mix recommended |
| Crushed stone (drainage aggregate) | Not required | Optional (base leveling) | 12 in zone behind wall | 12–18 in zone behind wall |
| 4-in perforated drain pipe + geotextile | Not required | Not required | Required | Required |
| Corrosion-resistant screws (3-in, 3.5-in) | Yes | Yes | Yes | Yes |
| 1/2-in galvanized carriage bolts + washers | Not required | For post connections | Required (timber pinning) | Required |
| Rebar (1/2-in, 24-in lengths) | Not required | Optional for post footings | Required (timber stacking) | Required |
| Post base hardware (Simpson or equivalent) | Not required | Optional | Optional | Recommended |
| Landscape stakes (for edging) | Yes | Not required | Not required | Not required |
Tools and equipment checklist
You do not need to own every tool on this list. Most are available at tool rental shops for $25–$75 per day. Rent what you need rather than buying a tool you will use once. That said, a basic circular saw, drill, and level are worth owning if you plan any amount of outdoor building.
Tools for edging and seating walls
- Tape measure (25 ft minimum)
- 4-foot level and 2-foot torpedo level
- Circular saw with a carbide-tipped blade rated for treated lumber
- Drill/driver with bit set (impact driver preferred for structural screws)
- Speed square and layout pencil
- String line and stakes for layout
- Rubber mallet
- Shovel and hand tamper or plate compactor (rentable) for base preparation
- Post-hole digger or power auger (rentable) for post footings
- Safety glasses, hearing protection, work gloves, and dust mask (N95 minimum when cutting treated lumber)
Additional tools for retaining walls
- Plate compactor (rental) for compacting drainage aggregate in lifts
- Reciprocating saw or chainsaw for cutting large timbers
- 1/2-in drill bit (ship auger type) for boring rebar holes through stacked timbers
- Sledgehammer or rotary hammer for driving rebar
- Wheelbarrow for moving gravel and concrete
- Laser level or water level for checking continuous grade along the wall run
- Gravel rake and tamping bar
- Pipe cutter or hacksaw for cutting perforated drain pipe to length
- Concrete mixing tub or access to a mixer (or order ready-mix for larger footings)
Step-by-step construction guide
Phase 1: Layout and excavation
- Mark the wall line using stakes and string. Pull the string tight and level it. This is your reference for the entire build — spend the time to get it right.
- For retaining walls, mark a second line 16–24 inches behind the face of the wall to indicate your drainage aggregate zone.
- Excavate the footing trench. For edging, this is just a shallow 4–6 inch cut. For seating walls with posts, dig 18–24 inch diameter holes at post locations (typically 6–8 feet on center) to below your local frost depth. For retaining walls, excavate the entire base of the wall area plus the drainage zone width.
- Remove any loose, organic, or disturbed soil from the trench bottom. You need firm, undisturbed bearing soil under footings. If the bottom feels soft or spongy, dig down further until you hit firm soil.
- Grade the excavated trench for retaining walls with a slight slope (1% minimum) running toward the discharge end of your drain pipe.
Phase 2: Foundation and footings
- For seating wall posts: pour concrete into each post hole. Set the post base hardware while the concrete is wet and level each one. Let cure 24–48 hours before framing. Alternatively, set the posts directly in concrete (direct burial) using UC4B-rated treated lumber — this is simpler but makes future post replacement harder.
- For timber retaining walls: place a level bed of compacted 3/4-inch crushed stone (2–3 inches) in the trench as a base course. Do not set the first timber directly on bare soil. The stone base helps drainage and prevents the base timber from sitting in standing water.
- Check that the base is level side to side and sloped the correct direction for drainage front to back.
- For edging boards: compact the trench bottom, add 2 inches of crushed stone or coarse sand, tamp flat, then set the edging board. Drive stakes every 4 feet into undisturbed soil behind the board.
Phase 3: Framing and assembly
Assembly methods differ by wall type. For a timber retaining wall, you stack horizontal timbers (typically 6x6) and pin each course to the one below it using 18–24 inch lengths of 1/2-inch rebar driven through pre-bored holes. Space rebar pins every 4 feet along the wall. Every other course, install deadman anchors: timbers cut 24–36 inches long, running perpendicular to the wall back into the retained soil. These T-shaped anchors tie the wall into the backfill and resist overturning. Deadmen should be placed at minimum every 6 feet along the wall horizontally and at every other timber course vertically.
For a post-and-board seating wall, set your posts in their footings, then fasten horizontal 2x6 or 2x8 boards to the posts using structural screws or carriage bolts. Frame a simple flat platform between posts for the seat using 2x6 joists spaced 16 inches on center. The seat cap (your sitting surface) can be pressure-treated decking, cedar, or composite boards. Make the seat cap overhang the face of the wall by 1–1.5 inches for a finished look and to shed water away from the structure.
Phase 4: Drainage installation (retaining walls only)
- Once your first course of timbers is in place, lay your geotextile fabric along the soil side of the wall and up the slope slightly, stapling or pinning it in place.
- Place 4–6 inches of clean 3/4-inch crushed stone at the base of the drainage zone. Lay the 4-inch perforated drain pipe on top of this stone, perforations facing down. Confirm the pipe is sloped at minimum 1% (1/8 inch per foot) toward the discharge end.
- Continue building up the wall while simultaneously filling the drainage zone with crushed stone in 6-inch lifts, tamping gently with a hand tamper. Do not use a plate compactor immediately behind the wall — the vibration can displace uncured or unfastened timber courses.
- Fold the top of the geotextile over the top of the drainage stone and cover it with your final backfill soil. This cap prevents surface runoff from carrying fine particles into the drainage aggregate.
- Make sure the discharge end of the drain pipe daylights completely — it must exit to open air at a location where water can freely drain away from the structure. A drain pipe that terminates in soil is not a functioning drain.
Phase 5: Backfill and compaction
Backfill in lifts no thicker than 6–8 inches of loose material. Compact each lift before adding the next. Use a hand tamper within 3 feet of the wall to avoid over-stressing it. If you can use a plate compactor, keep it at least 3 feet back from the wall face. Do not dump all the fill in at once and compact it once, this is a very common mistake that results in uneven settlement and wall movement. Slope the final grade of the backfill surface away from the wall at a minimum 2% grade (about 1/4 inch per foot) to encourage surface drainage away from the structure.
Phase 6: Capping and finishing
The cap is the finished top surface of the wall. It protects the structure below from rain infiltration and is the part people actually see and touch. For a seating wall, cut your cap boards to a consistent width (14–16 inches is ideal for comfortable seating). Route or sand any sharp edges. Fasten cap boards with two structural screws per joist or timber below, pre-drilling to avoid splitting. Leave a 1/8-inch gap between cap boards for drainage. Apply a penetrating oil-based exterior wood finish to cedar or untreated wood caps annually. Pressure-treated caps can be left natural or stained, but staining does improve longevity and appearance.
Finishing and long-term maintenance
A pressure-treated wood wall with good drainage and corrosion-resistant hardware should give you 20–30 years of solid service with basic annual maintenance. Here is what that maintenance looks like.
- Each spring: walk the wall and check for any movement, leaning, or timber separation. Catch problems when they are small. A wall that has shifted 1/2 inch is easy to correct; a wall that has shifted 3 inches is a major repair.
- Clear the drain pipe outlet annually. Leaf litter and debris can block the daylight end. Flush the pipe with a garden hose to confirm water flows freely.
- Check and re-fasten any loose cap boards. Thermal cycling (hot summers, cold winters) works screws loose over time.
- Inspect all visible hardware for corrosion. Surface rust on galvanized fasteners is cosmetic; through-rust on structural bolts is a repair item.
- Apply exterior wood stain or sealer to any above-grade cedar, redwood, or composite-faced surfaces every 1–3 years depending on sun exposure.
- Trim back any plant material growing against the wall. Vines and roots accelerate moisture retention and decay.
Cost and timeline estimates
| Project Type | Materials Cost (20 ft wall) | Typical DIY Time | Skill Level |
|---|---|---|---|
| Decorative edging (2x6 boards) | $80–$200 | 2–4 hours | Beginner |
| Freestanding seating wall (post and board, no soil retention) | $400–$900 | 1–2 weekends | Beginner-Intermediate |
| Small timber retaining wall (24–36 in retained height, with drainage) | $700–$1,800 | 2–3 weekends | Intermediate |
| Timber retaining wall with patio on top (up to 48 in retained height) | $1,500–$4,000+ | 3–5 weekends | Intermediate-Advanced |
| Any wall requiring engineered design (add to above) | +$500–$2,000 engineering fee | Add 2–4 weeks for permit/review | Hire engineer |
These ranges assume you are doing all the labor yourself and renting any specialty equipment. The low end reflects smaller walls, basic lumber choices, and existing tool ownership. The high end reflects larger walls, composite cap materials, and professional-grade drainage systems. Contractor pricing for the same work typically runs 2.5 to 4 times the materials cost.
Troubleshooting common problems
Wall is leaning or bowing outward
This is almost always a drainage failure, an inadequate deadman count, or both. If you catch it early (under 1 inch of movement), you may be able to add deadmen to the back of the wall and improve the drainage outlet. If the wall has moved significantly, it needs to be taken down, the drainage corrected, and rebuilt. Do not attempt to push a leaning retaining wall back into place, the soil pressure that moved it is still there.
Wood is rotting prematurely
Check two things: the lumber treatment rating and the drainage. If the end tag on your lumber shows anything less than UC4 for ground-contact applications, the lumber was not appropriate for the use. For above-grade rot, check that the cap boards are draining properly and not holding standing water against framing. End cuts on pressure-treated lumber are the most vulnerable spot, treat all field cuts with an approved end-cut preservative immediately after cutting.
Water is pooling behind or against the wall
Your drain pipe is either clogged, not daylighting properly, or was not installed with a positive slope. Start at the discharge end and work backward. Flush the pipe with a hose. If water does not flow out the daylight end under modest pressure, the pipe is blocked or the outlet is covered. This needs to be fixed before the next heavy rain season.
Wall is uneven or out of level after settling
Slight settlement in the first season is normal as backfill consolidates. More than 1/2 inch of differential movement suggests inadequate compaction during backfill or soft spots in the bearing soil. For seating walls, shimming the cap boards is often sufficient. For retaining walls, uneven settlement should be investigated to rule out drainage-related erosion under the base.
A quick note on related wall projects
If this project is evolving into something more specific, we have detailed guides that go deeper on some of these applications. See the how to build a patio wall bench guide for a detailed walkthrough of that hybrid design. If you are building a combined bench-and-retaining structure, the guide on building a patio wall bench covers that hybrid design in detail. For step-by-step plans and measurements, see our guide on how to build a patio seating wall. If you are working on a slope and the wall will need to support a patio surface above it, the retaining wall with patio on top guide walks through the structural layering of that system specifically. See the retaining wall with patio on top guide for a step-by-step walkthrough of the structural layering and load considerations for that specific application. And if your primary goal is a built-in outdoor seat rather than a structural wall, the guide on building a patio bench is worth reading alongside this one for the seating ergonomics and framing detail.
FAQ
What types of wood patio walls can a homeowner build and how do their purposes differ?
Common types: decorative edging (low, <8 in) to define beds; bench/seating walls (seat height 16–18 in, depth 16–20 in); small retaining walls (typically up to ~4 ft of retained height when not engineered); and patio-supporting retaining walls (wall supports a patio surface or structure above). Purpose affects design: edging is lightweight and mostly cosmetic; benches need secure anchoring and comfortable dimensions; retaining walls must resist lateral earth pressure and provide drainage; patio-supporting walls require stronger foundations, anchoring and possibly engineering.
When do I need a permit or an engineer for a wood retaining wall?
Many jurisdictions follow the IRC/standard practice: engineered design and a building permit are generally required for retaining walls 4 ft (48 in / ~1220 mm) or taller measured from the bottom of footing to top of wall, or for walls that support surcharge or structures. Also get a permit if the wall affects drainage, easements, or utilities. If in doubt, contact your local building department before starting.
What are safe dimension templates for seat/bench walls and maximum unsupported wall heights for typical DIY timber walls?
Seat/bench template: seat height 16–18 in (41–46 cm), seat depth 16–20 in (41–51 cm) for comfortable outdoor seating. Wall thickness: use at least 2x8 or 2x10 cap boards over structural framing; for small timber retaining walls, a face built from 2x8–2x12 timbers supported by posts/anchorage works for low heights. Max unsupported (non‑engineered) timber retaining walls are typically kept under ~4 ft; above that, design/engineering is recommended because lateral loads and drainage become critical.
What lumber types and grades should I use for walls that contact soil or face moisture?
Use pressure‑treated lumber rated for ground contact (AWPA UC4/UC4A/UC4B) for any wood in contact with soil or wet conditions. Cedar or redwood can be used above grade for appearance but are less durable in ground contact unless rated; treated wood plus exterior corrosion‑resistant fasteners (hot‑dip galvanized G185 or stainless steel) is standard. Check end tags for UC rating and retention level.
What fasteners and connectors are best with pressure‑treated lumber?
Use hot‑dip galvanized (G185) screws, nails and metal connectors for most exterior use with modern copper‑based preservatives. In coastal or highly corrosive environments, use Type 316 stainless steel. Avoid plain steel; check manufacturer guidance for joist hangers, post anchors and lag bolts rated for treated wood.
What tools and materials will I need for a typical DIY wood patio wall project?
Common tools: tape measure, string line and stakes, level and long straightedge, post‑hole digger or auger, circular saw/mitre saw, drill/impact driver, hammer, masonry bits (if anchoring to concrete), shovel, wheelbarrow, plate compactor (rental) and safety gear. Materials: ground‑contact pressure‑treated lumber (posts, sleepers, caps), galvanized or stainless fasteners and connectors, concrete for post footings, crushed stone for drainage and backfill, geotextile fabric, 4‑inch perforated drain pipe for retaining walls, gravel for base and footing, deck screws/lag bolts, exterior wood sealer or stain.