You can build a private patio yourself in a single weekend or across a few weeks depending on the method and size, no contractor required. The key is working through three things in the right order: decide what privacy actually means for your yard, pick a patio type and material that fits your budget and skill level, and sort out permits and drainage before you dig a single shovelful. This guide walks you through every step of that process, from sketching your first layout to setting the last paver, with real measurements and honest cost estimates at every stage. For a complete step-by-step walkthrough on how to create a beautiful patio, see our detailed guide. For a step-by-step walkthrough on how to build outdoor patio, see this detailed project guide.
How to Create a Private Patio: Plan, Build & Privacy Plans

What makes a patio truly private (and who this guide is for)
Privacy on a patio is not just about blocking a neighbor's view. It covers sightlines from upstairs windows, noise from a nearby road, wind that makes outdoor sitting uncomfortable, and the feeling of being enclosed and relaxed rather than exposed. A patio that checks all those boxes is genuinely more usable than one that just looks nice in photos.
This guide is written for homeowners who want to build the space themselves. If you have never laid a paver before, everything here is explained from scratch. If you have already done some outdoor work and want to tackle something more complex like a raised patio or a deck-style build with built-in privacy screens, the later sections go deep on structure and materials. Either way, you will come away with a clear plan before anything gets ordered or dug.
Set your privacy goals before you design anything
The biggest mistake I see people make is jumping straight to materials and skipping the privacy brief. Spend 20 minutes outside at the times you actually want to use the patio, morning coffee, afternoon grilling, evening wine, and note exactly where you feel exposed. Walk to your neighbor's yard or driveway and look back. Stand at a second-floor window and look down. What you see is what visitors and neighbors see.
Sightline mapping
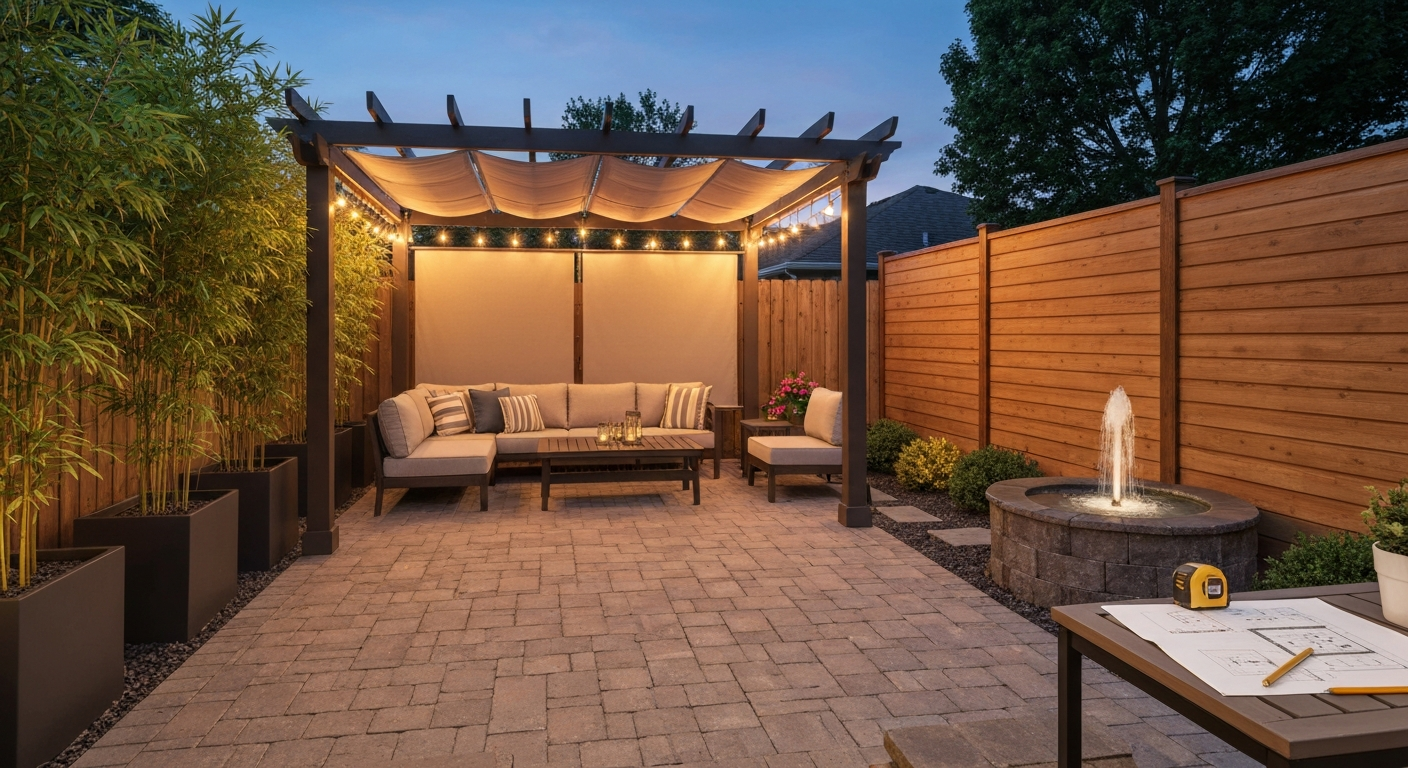
Draw a simple overhead sketch of your yard and mark every sightline that bothers you with an arrow showing the direction. A 6-foot fence or hedge blocks a ground-level view from next door but does nothing about a neighbor's deck or second-story window. For elevated sightlines you need height: pergolas with fabric, tall planters with bamboo, or angled overhead shade panels. Knowing this before you plan saves you from building a beautiful patio that still feels exposed.
Noise reduction
Solid surfaces like masonry walls and dense hedges reduce noise more than open fences do. A 6-inch-thick concrete block wall or a 3-foot-deep row of arborvitae can drop ambient street noise noticeably. Adding a water feature, even a small recirculating fountain, introduces white noise that masks conversations and traffic. Layering hard and soft barriers works better than any single solution.
Privacy solutions at a glance
| Solution | Height range | Blocks sightline | Reduces noise | Permit usually needed | Relative cost |
|---|---|---|---|---|---|
| Wood privacy fence | 4–8 ft | Yes | Partial | Often yes (>6 ft) | Low–Medium |
| Masonry/block wall | 3–6 ft | Yes | Good | Usually yes | Medium–High |
| Pergola with fabric panels | 8–10 ft | Partial | Minimal | Varies | Medium |
| Bamboo or clumping grass screen | 6–15 ft | Yes | Partial | Rarely | Low |
| Trellis with climbing plants | 5–8 ft | Partial (dense) | Minimal | Rarely | Low |
| Vertical garden wall | 4–7 ft | Partial | Minimal | Rarely | Low–Medium |
| Water feature (fountain/rill) | Any | No | Good (masking) | Rarely | Low–Medium |
Project planning: budget, timeline, and skill level
A basic 12x16-foot ground-level paver patio, the most beginner-friendly build in this guide, typically runs $800 to $2,500 in materials depending on paver type, with a one to two weekend timeline for a solo builder. A raised patio with a retaining wall or a deck-style build with a pergola and built-in seating can cost $4,000 to $12,000 in materials and take two to four weekends. Here is a practical breakdown to help you scope your project honestly.
| Project type | Approx. material cost (12×16 ft) | DIY timeline | Skill level | Permit likely? |
|---|---|---|---|---|
| Ground-level gravel patio | $200–$600 | 1 weekend | Beginner | Rarely |
| Ground-level paver patio | $800–$2,500 | 1–2 weekends | Beginner–Intermediate | Sometimes |
| Concrete slab patio | $700–$1,800 | 1–2 weekends + cure time | Intermediate | Sometimes |
| Flagstone dry-laid patio | $900–$2,800 | 1–2 weekends | Intermediate | Sometimes |
| Raised paver patio with retaining wall | $2,500–$6,000 | 2–4 weekends | Intermediate–Advanced | Often |
| Deck-style patio (wood/composite) | $3,000–$10,000 | 2–4 weekends | Advanced | Usually |
Budget tip: the single biggest money-saver in any patio project is minimizing material waste through accurate measurements. Order 10% extra on pavers or flagstone for cuts and breakage, but do not guess your square footage, measure twice and calculate carefully.
Site assessment checklist before you touch the ground
A thorough site check prevents expensive surprises. Go through every item below before finalizing your design or ordering anything.
- Measure the available space: use stakes and string lines to mark the patio footprint. Note exact dimensions in feet and calculate square footage.
- Check slope and drainage: use a line level or a 4-foot builder's level and tape measure. The IRC (R401.3) requires a minimum 6-inch drop within the first 10 feet away from your foundation — about a 5% slope. If your yard slopes toward the house, you will need to regrade or add drains.
- Test the soil: dig a test hole 12 inches deep. Sandy or gravelly soil drains well and compacts predictably. Heavy clay drains poorly and may require deeper base material or drainage improvements before you build.
- Assess existing drainage patterns: after a rainstorm, watch where water flows or pools. Mark problem areas on your sketch. Low spots under a future patio will need French drains or regrading.
- Locate property lines: pull your survey or plot plan from your closing documents. If you are unsure where lines run, hire a surveyor — it is far cheaper than moving a patio later.
- Map sun, shade, and wind: note where shade falls at different times of day and track prevailing wind direction. This affects both privacy screen placement and patio comfort.
- Identify buried utilities: call 811 (in the US) at least three business days before digging. This is free and legally required. Gas, water, electric, and cable lines can all be buried in areas that look open.
- Check access for equipment: if your build requires a plate compactor, concrete mixer, or skid steer, make sure there is a clear path into the yard — typically at least a 36-inch gate opening.
- Evaluate neighboring structures: note the location, height, and orientation of neighboring fences, decks, and buildings. These determine exactly where you need privacy screening.
Permits, property lines, and setback rules: check these first
Permit requirements vary by jurisdiction, and skipping this step can mean tearing out finished work. The Authority Having Jurisdiction (AHJ), almost always your local city or county building department, issues permits, reviews plans, and inspects work. Contact them directly or use an online AHJ lookup tool before you start any structural work, install a fence, or pour concrete.
As a general rule, many jurisdictions treat uncovered, ground-level patios more leniently than raised decks or roofed structures. Ground-level unenclosed patios are often allowed closer to property lines, while raised decks, pergolas, and covered patios usually require larger setbacks, typically anywhere from 3 to 10 feet depending on your local zoning code. For example, Park City, UT specifically permits patios and decks at or under 30 inches above grade with a 5-foot side and rear setback, but that rule exists only there. Your jurisdiction will have its own numbers.
If your patio includes a pergola, fire pit, retaining wall over a certain height (often 30 inches), or any electrical work for lighting, a permit is very likely required. Fences are almost always regulated separately from the patio itself. Before you commit to a design, verify these four things with your AHJ:
- Required setback distance from property lines, rear lot lines, and any easements
- Maximum patio height before structural permits or engineering reviews are triggered
- Whether a pergola, shade sail structure, or roofed cover is classified as an accessory structure
- Fire pit and outdoor fireplace rules, which are sometimes handled by fire marshal codes separately from building codes
Choosing your patio material: honest pros and cons
The five most common DIY patio materials each have a real sweet spot. Match the material to your climate, budget, and tolerance for ongoing maintenance, not just how it looks in a photo.
| Material | Avg. cost (per sq ft, materials only) | DIY difficulty | Durability | Freeze-thaw performance | Maintenance | Best for |
|---|---|---|---|---|---|---|
| Concrete pavers | $3–$8 | Easy–Medium | High | Good (if set correctly) | Low | Most climates, clean look, repairs |
| Poured concrete | $4–$8 | Medium | High | Fair (needs air-entrainment + joints) | Low–Medium | Large flat areas, budget builds |
| Flagstone (dry-laid) | $5–$15 | Medium | High | Excellent | Low–Medium | Natural look, uneven terrain |
| Flagstone (mortar-set) | $8–$20 | Hard | Very high | Fair (cracking risk) | Medium | Formal look, stable climate |
| Wood/composite decking | $8–$20 | Hard | Medium–High | Varies by species/product | Medium–High | Slopes, raised builds, warmth |
| Gravel/decomposed granite | $1–$4 | Very easy | Medium | Good | Low–Medium | Budget builds, permeable drainage |
Concrete pavers
Interlocking concrete pavers are the best all-around choice for most first-time builders. They are forgiving, you can lift and relay individual pieces if something settles or a pipe needs access. The Interlocking Concrete Pavement Institute (ICPI) specifies a 4-inch compacted aggregate base plus 1 inch of ASTM C33 coarse bedding sand for typical residential pedestrian installations. In freeze-thaw climates, bump the base to 6 inches. Edge restraints are not optional: ICPI tech specs require them on every sand-set paver installation to prevent lateral spreading over time.
Poured concrete
Poured concrete is affordable and fast to install once forms are set, but it is unforgiving of mistakes. For a residential pedestrian patio, use a 4-inch slab thickness, target 3,000 to 4,000 psi compressive strength, and specify air-entrained concrete if you are in a freeze-thaw climate. Saw or tool control joints to one-quarter of the slab thickness, for a 4-inch slab, that is 1 inch deep, spaced every 10 to 15 feet to manage cracking. Welded-wire mesh or fiber mesh reduces crack width but is not a structural substitute for rebar where needed. Follow ACI 302.1R for placement and curing.
Flagstone
Dry-laid flagstone on a compacted aggregate base with 1 inch of bedding sand is more DIY-friendly and more tolerant of freeze-thaw cycles than mortar-set flagstone. Use stones at least 1.25 to 1.5 inches thick for dry-laid installations. Mortar-set flagstone over a concrete slab gives a flatter, more formal finish but any slab crack will telegraph through the stone, avoid it in climates with significant ground movement or frost.
Wood and composite decking
Wood and composite deck-style patios are the right call when you are dealing with significant slope or want a raised platform. Pressure-treated lumber is the standard framing material; composite decking on top reduces long-term maintenance. This build type always requires a permit in most jurisdictions because of the structural framing. Plan for footing depths below your local frost line, the IRC (R403.3) requires footings to extend below frost depth unless a frost-protected shallow foundation design is used. Frost depth varies widely by state and region, so check your local building department or a state frost-line table to confirm the required depth for your specific location.
Gravel
A gravel or decomposed granite patio is the fastest and cheapest option, and it is naturally permeable, which helps with drainage. The main downsides are that gravel migrates with foot traffic and is not comfortable for furniture with narrow legs. Contain it with solid edge restraints and apply a landscape fabric layer below it to slow weed intrusion. This is a great entry project if you are completely new to outdoor building, the techniques you learn with gravel prep apply directly to paver and flagstone work.
Structural basics: excavation, base, compaction, and drainage
No matter which surface material you choose, the same structural logic applies underneath it. A solid, well-drained base is the difference between a patio that lasts 20 years and one that heaves, settles, and cracks within five.
Excavation depth
For a typical sand-set paver patio with a 4-inch aggregate base and 1-inch bedding sand layer, you are excavating 6 inches below finished grade, plus the paver thickness (usually 2.375 to 3.125 inches for standard pavers), so roughly 8.5 to 9 inches total from the finished surface down to undisturbed subgrade. Mark your excavation depth on a stake at each corner and string a line level across to maintain consistent depth.
Base material and compaction
Use compactable aggregate (often called crusher run, road base, or Class II base depending on your region) rather than clean crushed stone for the base layer. Clean stone does not compact to a locked surface. Install and compact the base in 2- to 3-inch lifts rather than all at once. ICPI specifications target a compacted density of at least 98% of Standard Proctor density (ASTM D698). See the ICPI Tech Spec (installation and compaction guidance reference), Unilock / ICPI Tech Spec library for the full specification and testing guidance ICPI Tech Spec (installation and compaction guidance reference) — Unilock / ICPI Tech Spec library. For a homeowner without testing equipment, a practical rule is to make at least two full passes with a plate compactor on each lift, the surface should not deflect when you walk on it.
Slope and drainage
Build a minimum 2% slope (about 1/4 inch per foot) into the finished patio surface, sloping away from your house. This satisfies both IRC R401.3 guidance and standard pedestrian slab drainage practice. If your yard naturally drains toward the house or has a low spot at the patio location, address it with one of these approaches: regrade the surrounding soil before compacting the base, install a channel drain at the patio edge closest to the house, or run a French drain alongside the patio. A French drain uses 3- to 4-inch perforated pipe in a gravel-filled trench lined with filter fabric. Slope the trench pipe at a minimum of 1 inch per 10 feet toward a clear outlet that is lower than the trench entry point. Permeable paver systems are another solid option for drainage-challenged sites, they allow water to infiltrate through the base rather than run off the surface, which can also help with local stormwater compliance.
Edge restraints
Edge restraints hold the entire sand-set system together. Without them, the edge pavers gradually migrate outward, causing the entire field to loosen and become uneven. Use spiked plastic edge restraint (common and affordable) or concrete edging, and spike it into undisturbed subgrade every 12 inches. Install edge restraints before you lay bedding sand, and make sure they follow the finished grade so they are hidden below the paver surface.
Step-by-step build: ground-level paver patio
- Stake out the patio footprint with batter boards and string lines. Check for square using the 3-4-5 triangle method: measure 3 feet along one string, 4 feet along the adjacent string — the diagonal between those two points should be exactly 5 feet if the corner is square.
- Call 811 and wait the required clearance period before you dig anything.
- Excavate to the correct depth — paver thickness plus 4 to 6 inches of base plus 1 inch of bedding sand — and remove all sod, roots, and soft organic material. Compact the exposed subgrade with a plate compactor.
- Spread and compact the first 2- to 3-inch lift of compactable aggregate base. Check slope with a level and straightedge — aim for a 2% fall (1/4 inch per foot) away from the house. Add and compact additional lifts until you reach the target base depth.
- Install edge restraints on all sides, spiked into the compacted base at 12-inch intervals.
- Spread a 1-inch layer of ASTM C33 coarse concrete sand over the compacted base. Screed it flat using two 1-inch-diameter conduit pipes as guides and a straight 2x4 pulled across them. Do not compact or walk on the screeded sand layer.
- Lay pavers from a corner or a straight edge, working across the surface. Use a rubber mallet to seat each paver. Check for level frequently with a straightedge — adjust individual stones by adding or removing sand beneath them.
- Cut edge pavers with an angle grinder and diamond blade or a paver splitter. Wear eye protection and a dust mask for all cutting.
- Compact the finished paver field with the plate compactor, making at least two passes in different directions. Place a rubber pad or sheet of plywood on the plate compactor foot to protect the paver surface.
- Sweep polymeric jointing sand across the entire surface, forcing it into the joints. Make a second compactor pass to seat it, then sweep in more sand and repeat until the joints are full to within 1/8 inch of the paver surface.
- Mist the surface lightly to activate the polymeric binder, following the product's directions. Keep foot traffic off for the curing time specified on the product (usually 24 hours).
Raised patio and retaining wall basics
A raised patio changes the structural requirements significantly. Any time you are holding back more than 24 to 30 inches of soil with a retaining wall, most jurisdictions require a permit and some require engineered drawings. Even at lower heights, the wall needs a compacted gravel drainage layer behind it and weep holes or drain pipe at the base to prevent hydrostatic pressure buildup, that trapped water is what causes walls to bulge and fail.
For segmental retaining wall block (the most common DIY-friendly option), follow the manufacturer's batter angle specifications for your wall height. A 1-degree batter per course is typical, each course steps back slightly from the one below. Install a 4-inch perforated drain pipe at the wall base, surrounded by clean crushed stone and wrapped in filter fabric, with a clear outlet at each end of the wall. The surface patio above the wall is then built with the same base-and-paver system described above, but the base extends over and bonds to the top of the wall.
Deck-style patio: the key differences
A wood or composite deck-style patio is essentially a freestanding deck attached to or placed near the house. The structural difference from a paver patio is that all loads transfer through posts into footings, and those footings must extend below the local frost line. Pull a frost-depth table for your state or call your building department for the required depth. In colder northern regions this can be 3 to 4 feet or more. Under-depth footings are the most common cause of deck post heaving.
If your deck attaches to the house (a ledger-attached deck), the ledger connection is critical and is almost always inspected. Use structural screws or through-bolts at the spacing your local code requires. A freestanding deck avoids ledger complications but requires a full perimeter of footings. Either way, get the permit, it protects you when you sell the house and ensures the inspection catches any structural issues while they are still easy to fix.
Adding privacy: screens, fences, plants, and overhead cover
Once the hardscape is in place, privacy elements layer on top. A combination of two or three approaches almost always works better than a single solution. Here is how to think through the layers:
Fences and screens
A 6-foot cedar or pressure-treated privacy fence is the most common solution and works well for most residential sightlines. For a more design-forward look, horizontal board fences with 1/2-inch gaps give privacy while allowing airflow, this also reduces wind load on the fence structure. Remember that most jurisdictions limit fence heights (6 feet in rear yards, 4 feet in front yards is a common pattern, but always check locally). For targeted privacy, blocking just one sightline rather than fencing an entire perimeter, a 4- to 6-foot fence panel or lattice screen placed strategically is both cheaper and more design-flexible.
Pergolas and overhead cover
A pergola does double duty: it creates a sense of enclosure from above and provides a structure to hang fabric panels, shade sails, or growing vines. For immediate privacy, attach outdoor fabric curtains or woven reed panels to the posts. For a living version, plant fast-growing climbing plants like wisteria, clematis, or jasmine at each post, full coverage typically takes two to three growing seasons. If you want instant overhead shade, a high-quality 10x12-foot sail shade costs $150 to $400 and installs in an afternoon using eye bolts in the pergola posts or an adjacent wall.
Hedges, bamboo, and vertical gardens
Living privacy screens soften the look of any patio and add sound absorption. Clumping bamboo (not running bamboo, which is invasive) reaches 10 to 15 feet in two to three years and creates a dense visual barrier. Arborvitae 'Green Giant' is a reliable and widely available choice that grows 2 to 3 feet per year to 20 to 30 feet at maturity. For a smaller footprint, a vertical garden wall, either a freestanding frame with pocket planters or a trellis with climbing plants, creates privacy in 3 to 5 feet of horizontal depth.
Design styles: from beautiful and lush to minimal and zen
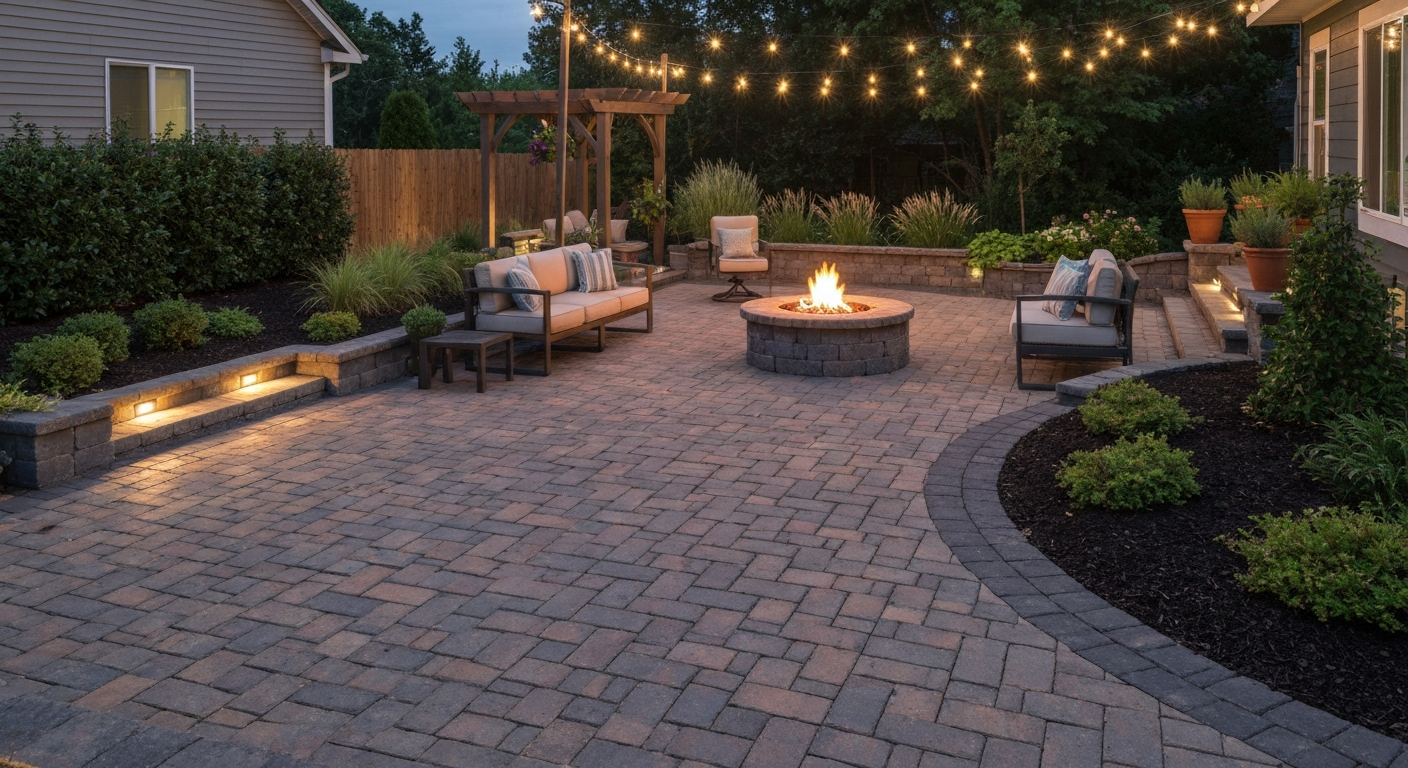
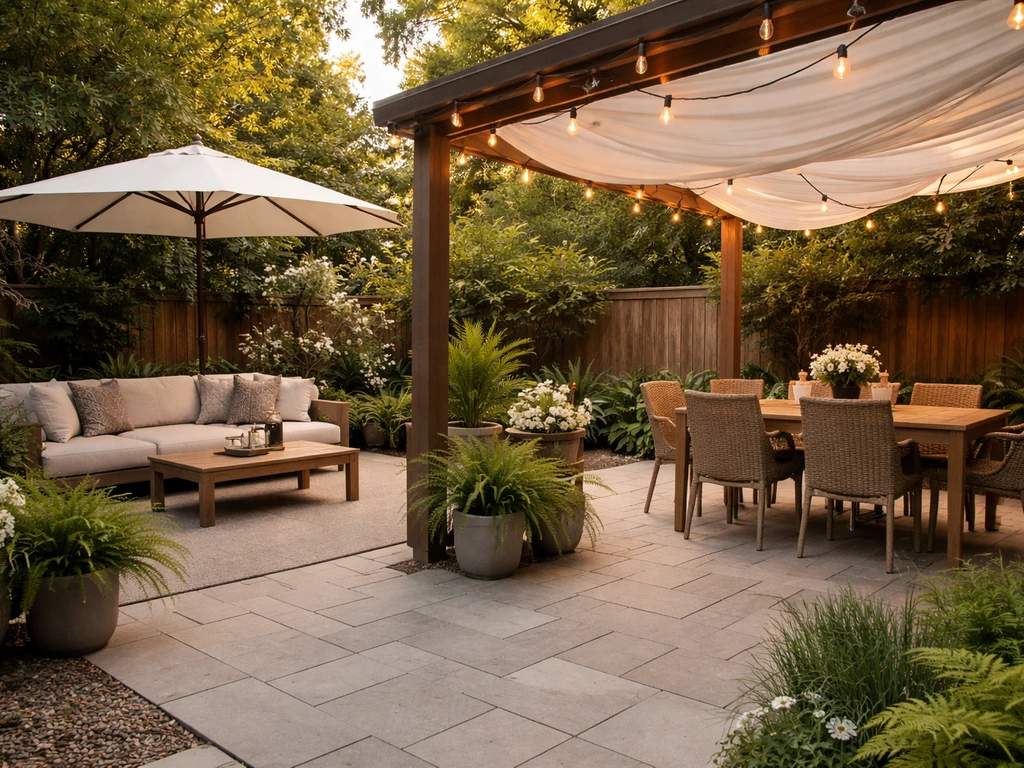
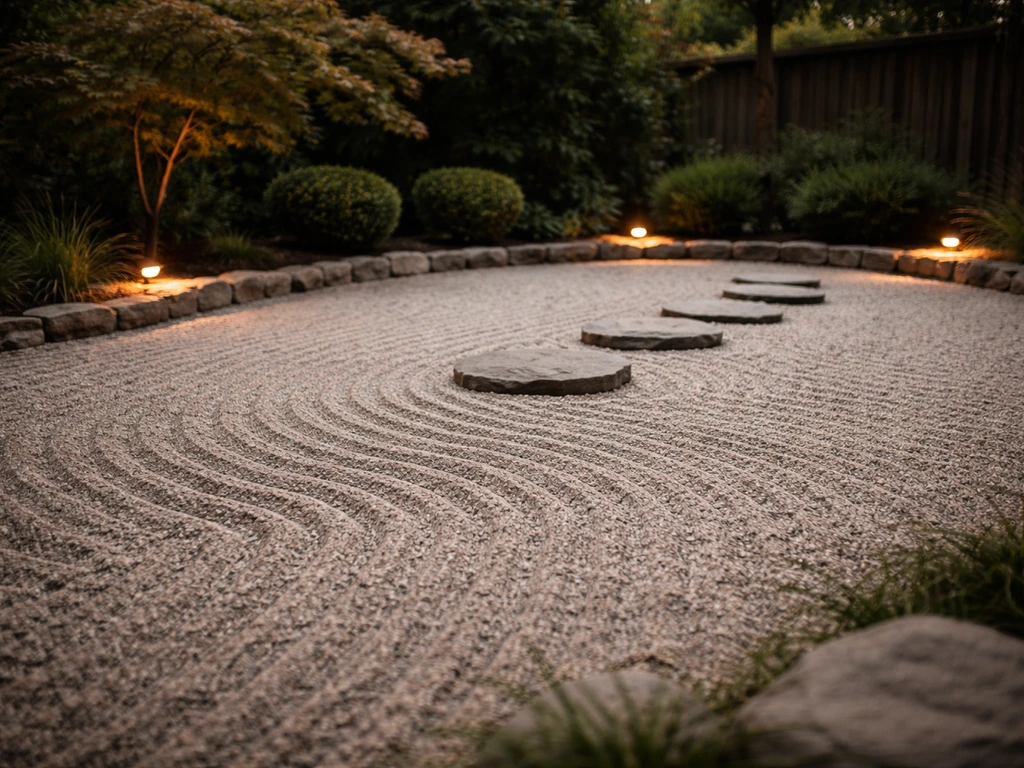
The structure of a private patio is the same regardless of style, what changes is the material palette, plant selection, and finishing details. A lush, resort-style patio oasis leans on generous softscape: container plantings, a water feature, layered lighting, and comfortable upholstered furniture. For a step-by-step walkthrough on how to create a patio oasis, see this guide for practical tips and measured plans. A zen-inspired patio uses restraint, clean lines, gravel or decomposed granite, moss or low ferns, and minimal ornamentation. For step-by-step instructions on how to create a zen patio, see the linked guide (destination ID 0349c87c-439b-4050-a946-73619532b42e) that covers layout, material choices, and planting for a minimalist, calming outdoor space. A beautiful traditional patio balances hardscape and softscape roughly 60/40, with defined garden beds around the perimeter and a focal point like a fire pit or statement planter at the center.
Whatever the aesthetic, function should drive layout decisions first. Place the seating group so it captures the best view (or screens the worst one), orient the cooking area for downwind smoke flow, and make sure there is a clear, direct path between the house door and the patio. Once the functional layout works, the aesthetic fills in around it.
Lighting, shade, and weather protection
String lights at 8 to 10 feet above patio level, hung between pergola posts or a house wall and a tall post, are the most cost-effective way to light a patio for evenings. For path and step lighting, low-voltage LED landscape lighting kits run $100 to $300 and are a genuine DIY-friendly install using a transformer, low-voltage wire, and snap-in fixtures. Avoid solar-only lighting in areas with significant shade, the panels rarely get enough direct sun to keep up with evening use.
For shade, a 10x10-foot market umbrella ($150 to $500) is the most flexible solution. Shade sails work well for larger areas and can be configured to cover irregular shapes. A permanent pergola with polycarbonate roofing panels adds weather protection and is a comfortable intermediate DIY project, it requires the same post-and-footing approach as a deck build, and a permit in most jurisdictions.
Furniture, fire pits, and finishing touches
Choose outdoor furniture that matches your climate: powder-coated aluminum and all-weather wicker hold up well in most regions, while teak requires annual oiling to maintain its appearance. For a fire pit, check your local ordinances first, many municipalities restrict open burning within certain distances of structures and property lines, and some require permits for natural gas fire features. A wood-burning fire pit should sit at least 10 feet from any combustible structure, though your local fire code may specify more. Gravel or concrete under and immediately around the pit prevents ember ignition of the patio surface.
Built-in seating walls are one of the best long-term investments you can add to a patio. A simple concrete block or natural stone bench wall, 18 inches high and 16 to 18 inches deep, costs relatively little in materials, adds permanent seating without furniture expense, and doubles as a privacy screen or retaining element. Build it at the same time as the patio perimeter so the base and drainage are integrated.
Tools and materials lists
Universal tools (all patio types)
- Tape measure (25 ft minimum), stakes, and string line
- Line level or builder's level
- Flat spade and round-point shovel
- Wheelbarrow
- Plate compactor (rent if not owned — approximately $75 to $150 per day)
- Rubber mallet
- 4-foot level and 8-foot straightedge
- Safety glasses, work gloves, steel-toed boots
- Dust mask/N95 respirator (for cutting and compaction work)
- First-aid kit
- Marking paint or chalk line
Additional tools and materials: paver patio
- Angle grinder with diamond blade (or paver splitter rental)
- Two 1-inch-diameter conduit pipes for screeding bedding sand
- Compactable aggregate base (4–6 inches depth x patio square footage ÷ 12, calculated in cubic feet, converted to tons — 1 ton covers approx. 80–100 sq ft at 4 inches deep)
- ASTM C33 coarse bedding sand (1-inch depth)
- Concrete pavers of your chosen style
- Spiked plastic edge restraint and galvanized spikes
- Polymeric jointing sand
- Rubber pad or plywood sheet for plate compactor (protects paver surface)
Additional tools and materials: poured concrete patio
- Concrete forms (2x4 or 2x6 lumber)
- Ready-mix concrete or bags (6 to 7 bags of 80-lb concrete per cubic foot for small pours — use ready-mix truck for anything over 1 cubic yard)
- Fiber mesh or welded-wire reinforcement
- Bull float and hand float
- Edging tool and jointing tool (or circular saw with diamond blade for cut joints after cure)
- Concrete curing compound or plastic sheeting
- Air-entrained concrete specified if in freeze-thaw climate
Additional tools and materials: flagstone patio (dry-laid)
- Flagstone (1.25–1.5 inch minimum thickness for dry-laid; order 15–20% extra for cuts and fitting)
- Compactable aggregate base
- ASTM C33 bedding sand (1 inch)
- Angle grinder with diamond blade or chisel and hammer for shaping irregular stones
- Rubber mallet
- Polymeric sand or fine crushed stone for joints
Safety equipment checklist
- Safety glasses or goggles (required for all cutting and compaction work)
- N95 or better dust respirator (silica dust from cutting concrete, pavers, or flagstone is a serious health hazard)
- Work gloves (leather or cut-resistant)
- Steel-toed boots
- High-visibility vest if working near street or driveway
- Hearing protection when using plate compactor or angle grinder
- Knee pads for paver laying work
- Sunscreen and hydration — outdoor builds in summer heat carry real heat-illness risk
Maintenance, seasonal care, and long-term durability
Most paver patios need very little maintenance in the first few years. Sweep polymeric sand back into joints annually, especially after winter frost cycles lift and disturb joint material. Re-apply a paver sealer every two to four years if you want to maintain color and reduce staining, this is optional but does extend the life of the surface. For concrete patios, fill any control joint cracks with self-leveling polyurethane sealant before they widen and allow water infiltration.
At the start of each season, check for heaved or settled sections by walking the surface slowly and noting any rocking pavers. Individual pavers can be lifted, base material adjusted, and reinstalled in about 20 minutes, this is a normal, manageable part of paver patio ownership in freeze-thaw climates, not a sign of failure. Wood deck patios need an annual inspection of fasteners for corrosion, and decking boards should be cleaned and re-sealed or stained as recommended by the lumber or composite manufacturer.
Troubleshooting common problems
Standing water on the patio surface
If water pools on a finished patio, the surface slope is either insufficient or was not maintained consistently during installation. For paver patios, the fix is often straightforward: lift the affected section, add or remove base material to correct the grade, and relay. For concrete, grinding a shallow swale or adding a channel drain at the low point is the more practical repair. Preventive fix: always check slope with a level during base compaction, before you lay bedding sand.
Uneven or rocking pavers
Rocking pavers almost always mean either insufficient base compaction or the bedding sand layer was disturbed before pavers were fully installed. To repair, pull the affected pavers, check the base depth and compaction, add compactable base where needed, compact again, re-screed 1 inch of fresh bedding sand, and relay. Do not just add sand on top of existing sand, the layers need to be consistent to stay stable.
Settling and sinking sections
A section of patio that gradually sinks over one to two years usually means the subgrade was not stable, either soft organic-rich soil was left under the base, or a buried drainage path (old pipe, root channel, etc.) collapsed. The repair is excavating the affected area, removing unstable material, replacing with compactable aggregate in properly compacted lifts, and relaying the surface. It is frustrating work but entirely doable as a DIY repair.
Cracking concrete
Concrete cracks. The goal with control joints is to make cracks happen where you want them rather than randomly. If cracks appear outside the control joints in a new slab, the joints were likely spaced too far apart, cut too shallow, or the mix had too much water. Fill hairline cracks promptly with penetrating concrete sealer before freeze-thaw cycles widen them. Structural or displacement cracks (where one side is higher than the other) indicate a base or drainage problem that needs to be addressed from below.
When to call a professional
Most of what is covered in this guide is genuinely within DIY reach, but a few situations call for professional help. If your site has significant drainage issues that require engineered grading or storm connections, a grading contractor or civil engineer will save you from expensive failure. If a retaining wall exceeds 30 to 48 inches in height (check your local code for the exact trigger), structural engineering is usually required. Any electrical work beyond low-voltage landscape lighting needs a licensed electrician in most jurisdictions. And if you are working on expansive clay soils, steep slopes, or ground that has a history of movement, a geotechnical consult before you build is money well spent.
Getting a second opinion on your permit application is also smart for any project that involves structures, elevated surfaces, or connections to the house. A permit tech at your local building department will often tell you exactly what they need to approve a project, that conversation is free and can save weeks of back-and-forth.
FAQ
What are the primary privacy-first goals I should set before designing a patio?
Define clear goals: desired level of visual screening (complete, partial, or occasional), sound reduction targets, preferred sightlines (what you want to see or hide), usable hours (day/night lighting needs), flexibility for guests, and maintenance tolerance. Prioritize safety and code compliance (setbacks, egress). Turn goals into measurable requirements (e.g., 6–8 ft screen on south side, 80% visual blockage at sitting height, buffeting reduction via softscape).
How do I perform a site assessment (size, slope, soil, sun/shade, neighbors)?
Measure available area and setbacks, map property lines and neighbor windows, note slope (rise over 10 ft), locate utilities and drainage paths, test soil by digging a small hole (texture, drainage), observe sun/shade through the day and seasonal angles, and record prevailing wind and noise sources. Photograph the site and make a simple site sketch with dimensions and constraints.
When do I need permits and how do I check local setback rules?
Contact your local building department/AHJ or use their online lookup for permit triggers. Common triggers: raised patios/decks, structures over a height threshold, electrical/roofed coverings, or large-area impervious surfaces. Ground‑level, uncovered patios are often permitted closer to property lines, but rules vary—confirm numeric setbacks for low-height patios and required inspections. Always get clearances before construction.
Which patio material should I choose? (pavers vs concrete vs flagstone vs wood vs gravel)
Pavers: pros—durable, repairable, permeable options; cons—higher material/cost and need edge restraints. Concrete: pros—affordable, smooth, versatile finishes; cons—can crack, needs control joints and good drainage. Flagstone: pros—natural look, flexible install methods; cons—unevenness and higher labor. Wood/decking: pros—raised options, warm aesthetic; cons—rot, maintenance. Gravel: pros—very budget friendly and permeable; cons—migration, less formal seating surface. Choose by budget, slope, drainage, desired look, and maintenance tolerance.
What are the structural basics every patio installer must follow?
Excavate to remove organic topsoil, install a compacted aggregate base (typical 4–6″ for patios; more in weak/frost areas), use bedding sand (1″ for pavers), provide edge restraint, ensure compaction in lifts to target density, slope patio surface for positive drainage (≥2% for slab surfaces; IRC requires 6″ drop in first 10′ from house), and include drainage features (French drain, dry well) where needed. In freeze‑thaw regions increase base depth and use air‑entrained concrete.
Step-by-step: how do I build a ground-level paved patio?
1) Mark and excavate to required depth. 2) Install subgrade fabric if needed. 3) Place and compact aggregate base in 2–3″ lifts to design depth. 4) Add and screed 1″ bedding sand (for pavers). 5) Lay pavers in chosen pattern, maintain joint spacing. 6) Install edge restraints and compact pavers with a plate compactor using protective mat. 7) Spread polymeric or jointing sand and compact again. 8) Clean and seal if desired. Include drainage slope away from structures throughout.