You can build a patio seating wall yourself in a weekend or two, using concrete block, natural stone, or timber, depending on your budget and skill level. A basic seating wall sits 17 to 19 inches tall, 16 to 20 inches deep, and can double as a low retaining wall if you build it right. This guide walks you through every step, from reading your slope and pulling permits to laying the last capstone and troubleshooting frost heave after the first winter.
How to Build a Patio Seating Wall: Complete DIY Guide, Plans & Finishes

Nolan Carver
29 Jul 2026
What this guide covers and who it is for
This article is written for homeowners at every skill level. If you have never mixed a bag of mortar, you will find the planning and material sections useful before touching a shovel. If you have already built a patio slab and want to frame it with a wall-bench or add a small retaining wall to hold back a slope, the step-by-step sections will get you moving fast. The scope intentionally covers four closely related project types: freestanding patio benches, integrated wall-benches built into a patio edge, small retaining walls that support a raised patio, and the combination project where you build a retaining wall with a finished patio surface on top. Each of those variations involves the same core skills, and the differences come down to footing depth, drainage, and whether you need a permit.
Freestanding bench, wall-bench, or retaining wall: what is the difference?
These three project types are easy to confuse because they look similar, but they work very differently structurally. Understanding the distinction before you start planning will save you from under-building something that needs to hold back soil, or over-engineering a simple garden bench.
| Type | Primary function | Holds back soil? | Typical height | Footing required? | Permit likely needed? |
|---|---|---|---|---|---|
| Freestanding patio bench | Seating only | No | 17–19 in. | Compacted gravel base usually sufficient | Rarely |
| Integrated wall-bench | Seating + patio edge definition | Minimal / incidental | 17–24 in. | Compacted base or shallow footing | Sometimes (surcharge triggers) |
| Small retaining wall | Hold back soil, support raised patio | Yes | Up to 4 ft (DIY limit) | Compacted aggregate pad or concrete footing | Often (check local code) |
| Retaining wall with patio on top | All of the above | Yes | 2–4 ft wall + patio surface | Concrete footing recommended | Usually yes |
A freestanding bench just needs a stable, level base and does not carry lateral soil load. A wall-bench sits at the edge of a patio and may hold back a few inches of grade change, but its primary job is seating. A retaining wall is engineered (even informally) to resist the horizontal pressure that soil pushes against it. Once you add a patio surface on top, you are dealing with all three functions at once, and that is when foundations and drainage become non-negotiable.
Planning your project and reading your site
Choosing the right location
Walk your yard at different times of day before you commit to a location. Morning sun on a east-facing seating wall is pleasant in summer but cold in spring. A wall that faces south or southwest gets afternoon sun and stays warm later into the evening, which most people prefer for entertaining. Also consider traffic flow: a seating wall should leave at least 36 inches of clearance behind chairs for people to walk past comfortably, and 48 inches is better near a grill or door.
Evaluating slope, soil, and drainage
Slope is your biggest variable. A gentle grade of 1 to 2 percent away from the house is ideal and easy to work with. Once you get beyond a 3 to 4 percent cross-slope, you will be cutting into the hill on one side and building up on the other, which is exactly where a small retaining wall becomes necessary. Dig a test hole 12 to 18 inches deep where your wall footing will sit. Sandy gravel and gravel soils have presumptive bearing capacities around 3,000 psf under the IRC, which is plenty for a seating wall. Soft clays and silts drop to about 1,500 psf, meaning a wider, deeper footing. If your hole fills with water within a few hours, you have drainage issues to solve before you build anything. Mark where water naturally flows after rain and keep that drainage path clear. Blocking it behind a wall without installing drain pipe is the single most common DIY retaining wall mistake, and it causes walls to lean and fail within a few years.
Load limits and surcharge
Surcharge is the extra lateral pressure applied to a retaining wall by anything sitting above or behind it: a driveway, a shed, a hot tub, or even a large deck. If your seating wall or retaining wall will have any of those within 5 to 10 feet behind the top, that counts as surcharge and changes your design requirements significantly. Most non-engineered DIY retaining walls are designed only for normal soil pressure. Adding surcharge without accounting for it is a structural risk and in many jurisdictions it triggers a permit and engineered plans regardless of wall height.
Dimensions, seating ergonomics, and clearances
Getting the dimensions right is what separates a comfortable seating wall from one nobody actually sits on. These numbers come from decades of outdoor furniture standards and are worth treating as fixed targets rather than rough guides.
- Seat height: 17 to 19 inches from finished grade to top of capstone. 18 inches is the sweet spot for most adults. Go lower and it feels like a curb; go higher and shorter people's feet dangle.
- Seat depth: 16 to 20 inches from front face of wall to back. 18 inches is functional; 20 inches fits better for lounging and accommodates cushions.
- Backrest height (if adding one): 12 to 18 inches above the seat surface gives good lumbar support. A full back adds structural complexity, so many builders skip it or add a separate planter wall behind.
- Wall thickness: At minimum, 8 inches for a freestanding seating wall; 12 inches is more stable and needed for any wall holding back soil.
- Front circulation clearance: 36 inches minimum between the front face of the wall and any obstacle; 48 inches near cooking or serving areas.
- Corner radius: If your wall wraps a corner, a minimum inside radius of 24 inches prevents the seating from feeling cramped.
For a wall-bench that is part of a larger patio, think about how it interacts with the patio surface. The top of your capstones should sit at the same finished elevation you planned for the patio, or the seating height calculation gets messy. Sketch this out on paper first, working backward from your desired seat height to figure out how many courses of block you need and how deep your base needs to sit.
Permits, building codes, and when to call an engineer
This section is not here to scare you. The permit process for a simple seating wall is usually straightforward and sometimes not required at all. But skipping it when it is required can mean being ordered to tear down your finished wall, so it is worth five minutes on the phone with your local building department before you dig.
The most common threshold across U.S. jurisdictions is 4 feet, measured from the bottom of the footing to the top of the wall. Walls at or below 4 feet are often exempt from permits under local codes that mirror the International Residential Code and International Building Code. Many municipalities, including those in Pierce County, Washington, and cities like Redding and Santa Clara in California, use this 4-foot rule. However, two important exceptions override it almost everywhere: first, any wall supporting surcharge (a structure, driveway, or significant slope above it) usually requires engineered plans regardless of height; second, walls in seismic zones D, E, or F face additional lateral pressure requirements under IBC Section 1807.2.2 that apply when more than 6 feet of backfill is involved.
For retaining walls that do require a permit, the IBC specifies a minimum safety factor of 1.5 against both sliding and overturning. That is not something you calculate by hand on a napkin for anything more than a trivial wall. Hire a structural or geotechnical engineer if: your wall will exceed 4 feet in height, it sits near a building foundation or property line, the soil is soft clay or you see signs of perched groundwater, there is surcharge from any structure above it, or you are in a moderate-to-high seismic zone. Engineering fees for a small residential retaining wall typically run $500 to $1,500, which is cheap compared to rebuilding a failed wall.
Choosing your material: what each option is actually like to work with
Every material on this list works. The right choice depends on your budget, your tools, how much time you have, and honestly how much you enjoy working with it. Here is an honest breakdown.
| Material | DIY difficulty | Approx. material cost per linear ft | Durability | Best for | Watch out for |
|---|---|---|---|---|---|
| Concrete segmental block (SRW) | Beginner-friendly | $20–$45 | Excellent, 50+ years | Retaining walls, wall-benches, beginners | Heavy units; needs precise leveling pad |
| Concrete pavers (stacked/mortared) | Easy to moderate | $15–$35 | Very good | Low seating walls, decorative looks | Not ideal for tall retaining walls alone |
| Natural stone (dry-stack) | Moderate | $25–$60 | Excellent if well-built | Rustic aesthetic, good drainage naturally | Time-intensive; requires skill to batter correctly |
| Natural stone (mortared) | Moderate to hard | $30–$70 | Excellent | Formal look, permanent construction | Mortar cracks if footing shifts; needs frost footing |
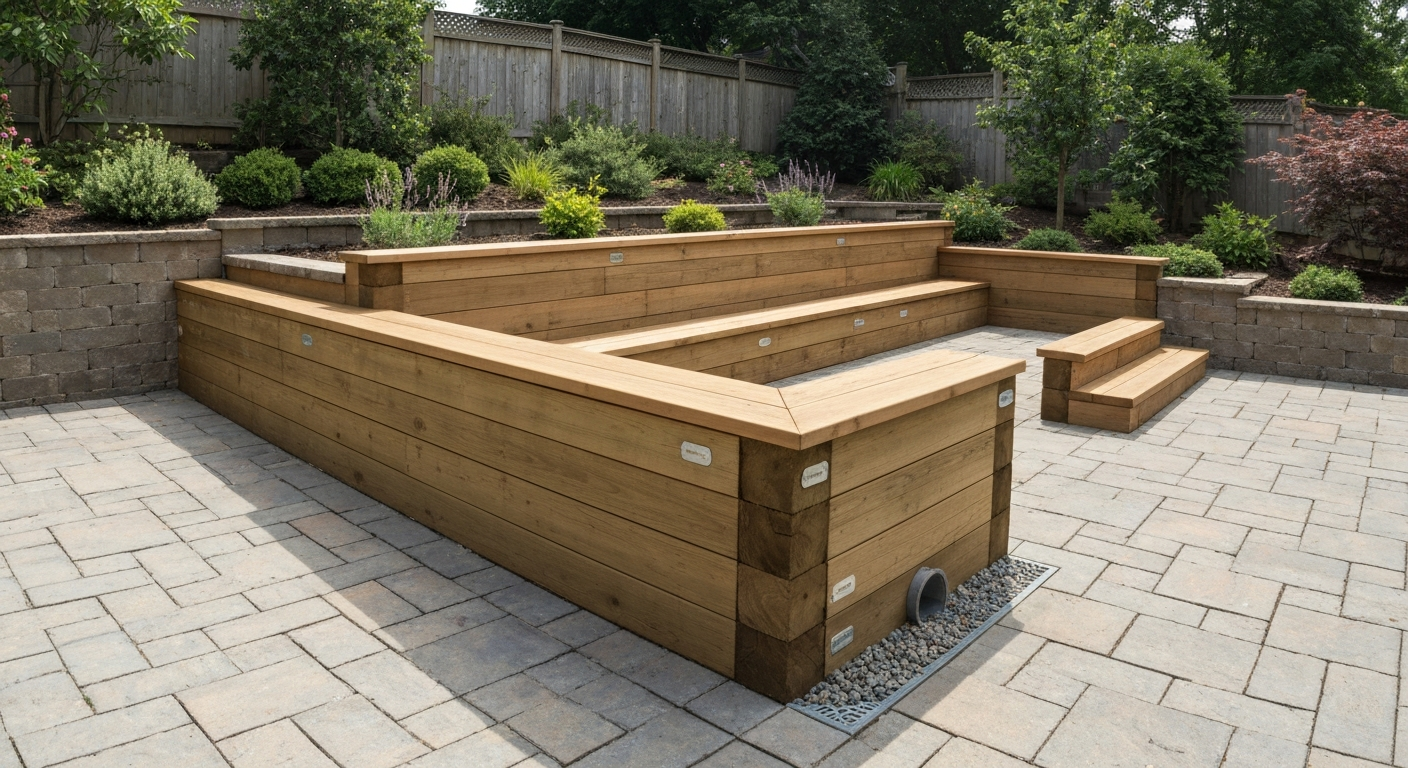
| Timber / pressure-treated wood | Easy to moderate | $10–$25 | 15–25 years (treated) | Patio wall benches, informal borders | Rot risk; needs drainage behind; replace eventually |
| Manufactured wall systems (Allan Block, Keystone, Belgard) | Beginner-friendly | $25–$55 | Excellent | Retaining walls, consistent look | Manufacturer specs must be followed exactly |
| Veneer over CMU or block core | Moderate | $35–$80 (combined) | Very good | Premium finish over structural core | Two-step process; adds cost and time |
Dry-stack versus mortared construction
Dry-stack means units are placed without mortar or adhesive, relying on weight, interlocking geometry, and proper batter (the slight backward lean of the wall) for stability. It is faster, more forgiving of mistakes, and allows water to drain through the wall face. Manufactured SRW block is designed for dry-stack and works extremely well. Natural stone dry-stack takes more skill because you are fitting irregular shapes. Mortared construction uses Type S mortar to bond units and creates a stiffer, more finished-looking wall. The tradeoff is that mortar cracks if the footing moves even slightly, so mortared walls need a proper concrete footing that extends below the frost line. For a seating wall that will never hold back more than a few inches of grade, dry-stack with construction adhesive on the cap is a perfectly valid and durable approach.
Tools, fasteners, and materials: what to gather before you start
Universal tools for every build
- Mason's line and line pins or stakes
- 4-foot and 2-foot levels
- Tape measure (25 ft minimum)
- Rubber mallet
- Plate compactor (rent for $60–$90/day) or hand tamper for small areas
- Wheelbarrow
- Shovel (flat spade and pointed)
- Hand tamper
- Safety glasses, work gloves, and steel-toed boots
- Knee pads (you will thank yourself)
Additional tools for concrete block and manufactured SRW builds
- Block splitter or angle grinder with diamond blade for cutting
- Construction adhesive (polyurethane-based, compatible with masonry)
- Torpedo level
- Broom for sweeping drainage aggregate
- Caulk gun for adhesive application
Additional tools for natural stone builds
- Brick hammer and cold chisel for shaping stones
- Angle grinder with diamond blade for precise cuts
- Pointing trowel (for mortared builds)
- Margin trowel and mortar hawk
- Type S mortar (for mortared builds) or dry-stack with no binder
- Jointing tool for finishing mortar joints
Additional tools for wood and timber builds
- Circular saw or miter saw
- Drill/driver with long auger bits
- Timber screws or carriage bolts (hot-dipped galvanized or structural-grade stainless)
- Deadman anchors or geogrid strap material for taller timber walls
- Post hole digger or auger for vertical post footings
- Wood preservative for cut ends of pressure-treated lumber
Drainage materials needed for any wall holding back soil
- Clean crushed stone, #57 or 1-inch size (12-inch column behind wall face minimum)
- 4-inch perforated PVC or corrugated drain pipe with sock filter
- Non-woven filter fabric (geotextile) to wrap drainage stone
- Gravel or coarse sand for leveling pad
Foundations and footings: getting this right is everything
No matter what you are building, a stable, level, well-compacted base is the single most important part of the job. More walls fail because of a bad base than for any other reason. The good news is that for seating walls and low retaining walls, getting the base right does not require exotic skills or equipment.
Excavation depth and base preparation
For a freestanding seating wall or integrated wall-bench using manufactured SRW block, excavate deep enough to bury the first course of block below finished grade. A standard rule is to bury one course (typically 6 to 8 inches) for every 1 foot of exposed wall height. So a wall with 3 courses exposed (about 18 inches, which is your seating height) should have at least one full course buried. That means digging down 24 to 26 inches below finished grade, setting a 6-inch compacted aggregate base, and starting your first course at the bottom of the trench.
For the aggregate base itself, use crushed stone, Class II road base, or concrete sand. Spread it in 3-inch lifts and compact each lift thoroughly with a plate compactor. Do not try to compact 6 inches in one pass; you will get a solid surface with loose material underneath and the wall will shift later. The finished base surface should be level across its width (check with a level every few feet along the trench) and compacted to feel like packed earth, not like loose gravel you can kick around with your boot.
When you need a concrete footing versus a compacted aggregate base
Manufactured SRW block systems, including major brands like Allan Block, Keystone, and Belgard, are specifically designed to work on a flexible compacted aggregate leveling pad. This is one of the major advantages of these systems: because the base is flexible, minor frost movement gets absorbed rather than cracking the wall. Per NCMA installation guidance, SRW systems do not require the footing to extend below the frost line as long as the bearing capacity and frost protection criteria are satisfied. This makes them significantly easier and cheaper to install in cold climates than mortared masonry walls.
Mortared natural stone or brick walls are a different story. Once you use mortar, the wall becomes a rigid structure. If the base moves with frost or settlement, the mortar joints crack. For mortared construction, you need a poured concrete footing that extends below the local frost depth. Frost depth ranges from 0 inches in southern states to 60 inches or more in northern Minnesota, so check your local code or ask your building department. The footing should be at least 12 inches wide and 8 inches thick for a seating wall. For a mortared retaining wall, size the footing to at least twice the wall's base width, with the bottom bearing on undisturbed soil or well-compacted fill.
Timber and wood wall footings
Timber walls use a different approach. The base timbers sit in a level trench on compacted gravel, and vertical deadman timbers or tiebacks extend back into the hillside every 4 to 8 feet to resist overturning. For walls over 2 feet tall using timber, you typically need vertical posts set in concrete-filled post holes that extend below frost depth. Pressure-treated lumber rated for ground contact (UC4B or UC4C designation) is required for any timber in contact with soil or aggregate. Always treat cut ends with end-cut preservative; a cut through the wood exposes unprotected fiber and dramatically accelerates rot.
Frost depth, heave, and what to do in cold climates
Frost heave happens when saturated soil freezes, expands upward, and pushes your wall out of alignment. The fixes are the same whether you are building in Minnesota or Massachusetts: drain the soil behind and under the wall aggressively so there is no water to freeze, set concrete footings below the frost line, and use free-draining aggregate as backfill rather than clay or silt. If you already have a wall that heaves every spring and settles back down in summer without cracking, it is usually a sign that the base and drainage are marginal but functioning. If it heaves and does not come back, or if courses start separating, you have a drainage or footing problem that needs to be corrected rather than watched.
Step-by-step: building a concrete block or manufactured SRW seating wall
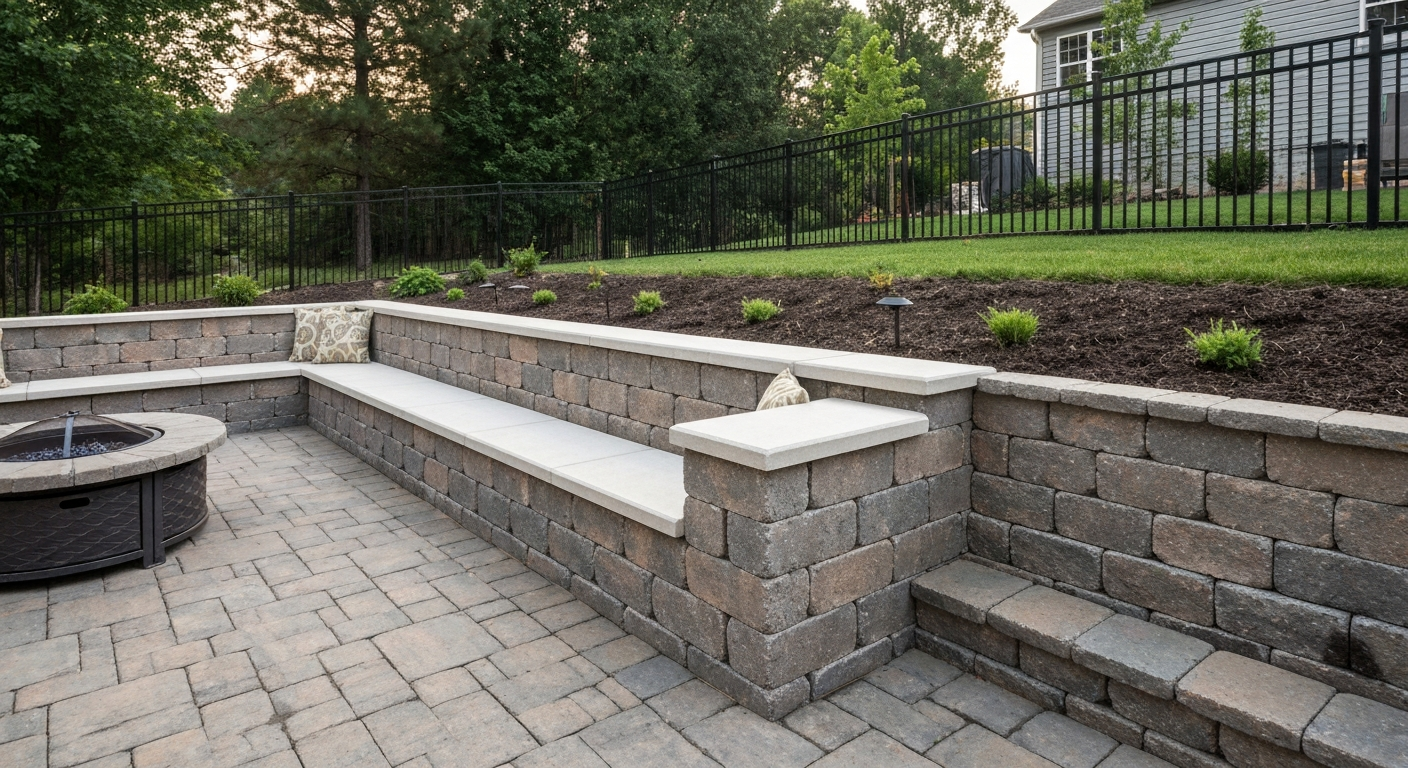
This is the most beginner-friendly method and the one I recommend for first-time builders. See our step-by-step how to build patio bench guide for detailed plans, material lists, and photos. Manufactured SRW block is purpose-built for this application, consistent in size and strength (ASTM C1372 units typically meet a minimum 3,000 psi compressive strength), and designed to be installed without mortar, special forms, or masonry experience. For a complete step-by-step tutorial on how to build a patio wall bench, see our dedicated guide for detailed plans, materials, and pacing. Allan Block, Keystone, and Belgard all make residential units that work well for seating walls under 4 feet, and their installation manuals include design charts for gravity walls that do not require engineering.
- Mark your wall layout with stakes and mason's line. Check for square at corners using the 3-4-5 triangle method: measure 3 feet along one line, 4 feet along the perpendicular, and the diagonal between those points should be exactly 5 feet.
- Excavate the base trench to the required depth (buried course depth plus 6 inches for aggregate base). Remove all organic material, roots, and soft spots.
- Spread and compact a 6-inch layer of crushed stone or Class II base in 3-inch lifts. Screed it level using a board and check with a 4-foot level every 4 to 6 feet along the trench.
- Set the first (buried) course of block on the leveling pad. Use a level to check each unit both along its length and across its width. Tap down high spots with a rubber mallet. This course sets everything that follows, so take your time.
- Check the first course for alignment with your mason's line. The front face should follow your layout line consistently. Small adjustments are easy now; they are impossible later.
- Continue laying courses, staggering vertical joints by at least half a block width on each row. Most SRW units have a setback built into the design (typically 1/4 inch per course), which automatically creates the batter the wall needs for stability.
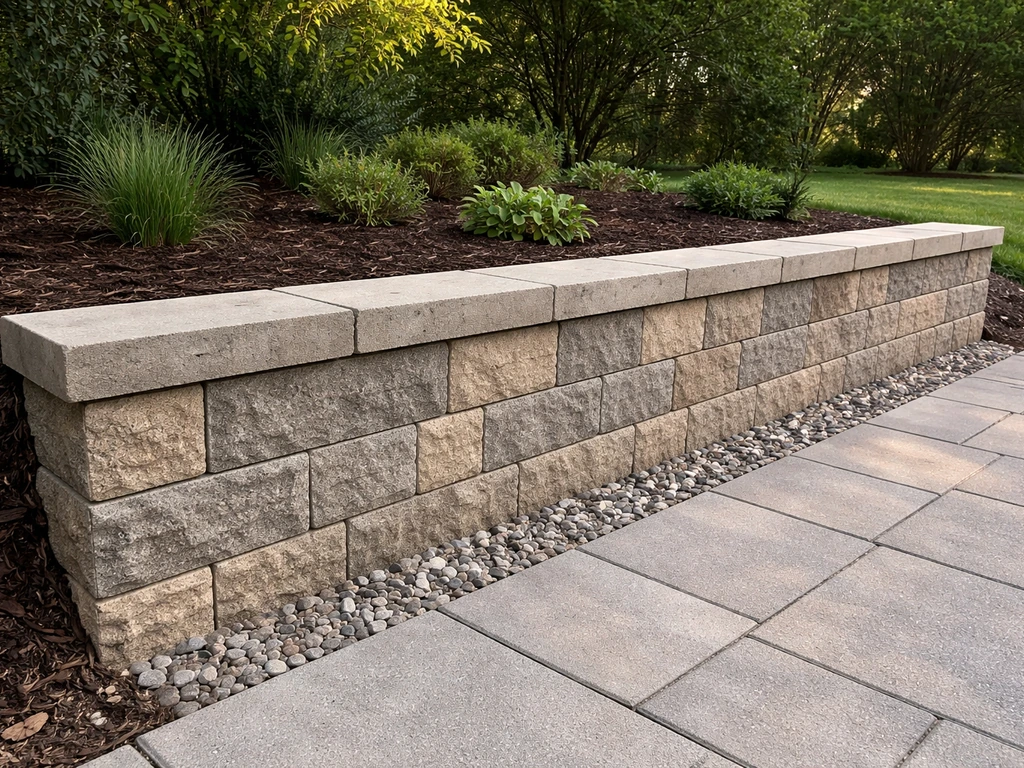
- Backfill behind each course as you go with clean #57 crushed stone (12-inch minimum depth behind the face). Do not allow native soil or clay directly behind the wall. Compact backfill in 6 to 8-inch lifts with a hand tamper or plate compactor, keeping the compactor at least 3 feet from the wall face to avoid lateral pressure.
- Install the 4-inch perforated drain pipe at the base of the drainage column, perforations facing down, sloped at 1 to 2 percent toward a daylight outlet. Wrap the pipe and surrounding drainage stone in non-woven filter fabric before covering with fill.
- For walls taller than about 3 feet using geogrid-reinforced systems, install geogrid layers at the vertical spacing specified in the manufacturer's charts. NCMA guidance calls for geogrid embedment length of at least 60 percent of total wall height, with an absolute minimum of 4 feet. Follow the specific manufacturer's design chart for your unit and wall height.
- Place the capstones as the final course and secure them with polyurethane construction adhesive rated for masonry. Apply adhesive in a continuous bead, set the cap, and press firmly. Allow 24 hours to cure before people sit on the wall.
Step-by-step: natural stone seating wall (dry-stack and mortared)
Dry-stack natural stone
Dry-stack stone is slower to build than block because you are fitting irregular pieces together without any binder to hide gaps. The reward is a wall that looks completely natural and actually drains better than a mortared wall. Good fieldstone or quarried flat stone (flagstone, bluestone, limestone) in 3 to 6-inch thick slabs works best. Avoid round river rock; it is nearly impossible to stack stably.
- Excavate and prepare a 6-inch compacted aggregate base, same as for block construction.
- Sort your stone before starting: biggest and flattest pieces for the base course, medium pieces for the body, flattest pieces for the cap.
- Lay the base course with the longest stones, placed perpendicular to the wall face when possible. This ties the wall together. The front face should be as plumb or slightly backward-leaning (battered) as you can manage. A 1-inch setback per foot of height is a good target.
- Build two faces with rubble fill in the middle, or build a single-face wall with backfill. Two-face construction is stronger and looks better from both sides.
- Follow the 'one over two, two over one' rule: each stone should bridge the joint below it. Running vertical joints straight up the wall is called a 'fault line' and it will eventually crack apart.
- Use smaller stones to shim and wedge larger ones into a stable position. A stone that rocks should be shimmed until it is completely stable before the next course goes on top.
- Continue building up, maintaining your batter, and backfilling with drainage stone as you go.
- For the cap, select your flattest, widest stones and dry-fit them before setting. You can use a bead of landscape adhesive under caps if you want them to stay put without mortar.
Mortared natural stone
Mortared stone is for when you want a formal, permanent look and you are willing to invest time in proper preparation. The key difference from dry-stack is that you must pour a concrete footing below frost depth before any stone goes in. Without it, the first deep frost will crack your mortar joints within a year or two.
- Excavate below frost depth and form a concrete footing at least 12 inches wide and 8 inches thick. Use 3,000 psi ready-mix or site-mixed concrete. Let it cure for at least 3 days before setting stone.
- Mix Type S mortar (stronger and more weather-resistant than Type N) to a peanut butter consistency. Do not use pre-mixed all-purpose mortar for structural applications.
- Set the first course on a 1/2 to 3/4-inch mortar bed. Press each stone firmly into the mortar and check level as you go.
- Fill head joints (vertical joints between stones) with mortar after setting each stone. Do not leave voids.
- Rake joints to a depth of about 3/4 inch before the mortar fully sets (typically within 30 to 45 minutes depending on temperature and humidity). This creates a shadow line and prevents water from sitting on flat joint surfaces.
- Cure the mortar slowly. In hot or windy conditions, mist the wall lightly and cover with burlap for the first 24 hours.
- Tool and point any low spots or gaps after the mortar stiffens. A good pointing job doubles the lifespan of a mortared wall by keeping water out of the joints.
Step-by-step: wood and timber patio wall bench
A timber wall bench is the fastest project on this list and the most budget-friendly entry point. It works well as a standalone garden bench or as a low border wall that defines a patio edge without holding back significant soil. For anything holding back more than 18 to 24 inches of soil, timber construction gets complicated fast, and most builders are better off switching to block or stone for walls in that range. For step-by-step instructions and a materials list, see our guide on how to build a patio wall with wood.
- Use pressure-treated lumber rated for ground contact. For horizontal timbers sitting on or in soil, UC4B is the minimum. Standard framing lumber will rot within 2 to 5 years in ground contact.
- Excavate a level trench 6 inches deep and 4 inches wider than your timber on each side. Fill with 6 inches of compacted gravel for drainage.
- Set the first timber (base course) in the trench on the compacted gravel. Check for level along its length and shim with gravel as needed.
- Drill pilot holes and connect stacked timbers using 10-inch galvanized timber screws or 1/2-inch carriage bolts every 24 to 36 inches. Stagger the fasteners so they do not split the wood.
- For walls over two courses tall, install deadman timbers: perpendicular timbers that extend at least 4 feet back into the slope, fastened to the face course. Space deadmen every 4 feet along the wall. This is what keeps the wall from tipping forward under soil pressure.
- Backfill behind the wall with crushed stone, not native soil. Native clay or silt holds water against the wood and dramatically accelerates decay.
- For a wall-bench, add a top rail or cap board of 2x6 or 2x8 pressure-treated lumber (or cedar for better appearance), fastened with exterior deck screws from above. Sand the top surface smooth to prevent splinters.
- Apply an exterior wood sealer or stain to all exposed surfaces every 2 to 3 years to extend the life of the timber.
Step-by-step: small retaining wall for a raised patio
A small retaining wall that supports a raised patio combines the structural demands of a retaining wall with the finishing requirements of a patio edge. If you are building a retaining wall with a patio on top, the wall and the patio are really one system and need to be planned together. For detailed guidance on designing a retaining wall with a patio on top, consult the dedicated guide on retaining wall with patio on top. For step-by-step instructions on how to build a patio retaining wall, see our detailed guide on that process. The wall has to handle the lateral pressure from the retained soil AND support foot traffic and furniture above. Think through the drainage detail before any block gets placed, because drainage aggregate behind the wall and the patio base material above it need to connect properly. For a detailed step-by-step walkthrough on how to build a small retaining wall for a patio, see our guide on how to build a small retaining wall for a patio.
- Plan your wall height so the finished top of the wall matches the finished patio elevation. Work from the finished grade at the bottom of the wall upward, accounting for buried courses, base aggregate, and capstone thickness.
- Excavate the base trench below finished grade by the required buried course depth plus 6 inches for the aggregate leveling pad. On the retained side, excavate back at least 3 feet to allow for drainage aggregate installation.
- Set a 6-inch compacted aggregate leveling pad and start the first buried course of block, same as the standard seating wall procedure.
- Build the wall up in courses, backfilling with #57 crushed stone in 6 to 8-inch compacted lifts as you go. Install the perforated drain pipe at the base of the drainage column, wrapped in filter fabric, sloped to outlet.
- For walls approaching 4 feet (measured from footing bottom to wall top), review the manufacturer's design charts for your specific block. At or near this height, most manufacturers call for geogrid reinforcement. Install geogrid at the specified vertical spacings, extending back into the retained area at least 60 percent of wall height (and not less than 4 feet) per NCMA guidance.
- Once the wall reaches the design height, install capstones with construction adhesive. Let the adhesive cure for 24 hours.
- Transition from drainage stone to road base or compacted aggregate on the retained side, bringing it up to the elevation required for your patio base. The patio base should slope very slightly (1 to 2 percent) away from the house and toward the wall to promote drainage.
- Install your patio surface (pavers, concrete, flagstone) on top of the compacted base. Keep paver and stone joints tight near the wall edge to prevent erosion of the base material.
Finishing touches: caps, backrests, cushions, and veneer
The capstone is the most visible part of your wall and the surface people actually contact. Budget for quality caps. Bullnose or tumbled capstones with a rounded front edge are more comfortable to sit on than square-edged caps. Standard capstone thickness is 1.5 to 3 inches; thicker caps feel more substantial and are less likely to chip. Set caps in a continuous bead of polyurethane adhesive and press firmly. Tap with a rubber mallet to seat them and check level across the top surface.
If you want to add a backrest, the simplest approach is to build a second, shorter wall 16 to 18 inches behind the seating wall, creating a planting bed or gravel fill between them. The back wall serves as the backrest, typically 12 to 18 inches above seat height. This is essentially a double-wall bench design and is worth exploring in more detail if you want a fully integrated outdoor seating system.
Outdoor cushions transform a masonry wall into comfortable seating. Standard outdoor seat cushions are 2 to 3 inches thick, which should be factored into your seating height calculation. If you plan on using cushions, build your wall 2 to 3 inches lower than the target sitting height so the final cushion height lands in the 17 to 19-inch ergonomic zone. Use cushions with marine-grade or solution-dyed acrylic fabric rated for outdoor use; they will last 5 to 10 years in most climates without fading or mildewing significantly.
Veneer is a thin layer of decorative stone or brick applied to the face of a concrete block or CMU core. It gives you the look of natural stone at a lower cost than building the entire wall from solid stone. Apply veneer with polymer-modified mortar or stone adhesive to a clean, damp block surface. The combined wall cost with veneer runs $35 to $80 per linear foot in materials, but the result is hard to distinguish from a full-stone wall.
Typical project costs and time estimates
| Project type | Wall length | Estimated material cost | Typical DIY build time | Notes |
|---|---|---|---|---|
| Concrete block seating wall | 10 ft | $300–$550 | 1–2 days | Includes block, base aggregate, caps, adhesive |
| Manufactured SRW seating wall | 10 ft | $350–$650 | 1–2 days | Includes drainage stone and drain pipe |
| Dry-stack natural stone wall | 10 ft | $400–$800 | 2–4 days | Stone sourced locally cuts cost significantly |
| Mortared stone seating wall | 10 ft | $500–$900 | 3–5 days | Includes concrete footing materials and mortar |
| Timber wall bench | 10 ft | $150–$300 | 1 day | Pressure-treated 6x6 or 8x8 timbers |
| Small retaining wall (3–4 ft) | 10 ft | $500–$1,200 | 2–3 days | Includes geogrid, drainage, caps; permit may add $200–$500 |
| Retaining wall with patio on top | 10 ft wall + 150 sq ft patio | $2,000–$5,000+ | 3–7 days | Highly variable by patio material and wall height |
These cost estimates cover materials only and assume a DIY labor approach. Tool rental (plate compactor, block splitter) adds $100 to $200 for a typical weekend build. If you need a concrete footing poured by a ready-mix truck, budget an additional $300 to $600 depending on quantity and local pricing. Permit fees vary widely by jurisdiction, from $50 for a simple over-the-counter permit to $500 or more for plans review.
Maintenance and common problems to watch for
Settling and shifting
Some minor settling in the first year is normal, especially in cold climates with frost cycles. If a course shifts by an eighth of an inch and then stays put, that is usually fine. If a wall continues to shift year after year, the base was not compacted well enough or the drainage behind the wall is failing. The fix is to remove the affected section, recompact the base, improve drainage, and rebuild. It is tedious but not complicated.
Frost heave
If your wall heaves up in winter and comes back down in spring, the soil behind the wall is staying wet. Add or improve drainage: extend the perforated pipe outlet to daylight, check that the filter fabric has not clogged with silt, and make sure no surface water is draining toward the top of the wall. In severe cases, you may need to excavate and rebuild with better drainage aggregate. Switching from native soil backfill to clean crushed stone resolves most frost heave problems permanently.
Mortar joint cracking
Hairline cracks in mortar joints are common and usually cosmetic. Fill them with a matching exterior mortar mix or elastomeric caulk rated for masonry. If joints are cracking open by more than 1/4 inch or if large sections of mortar are falling out, the footing moved and you need to investigate the base. Repointing over a moving footing is a temporary fix at best.
Leaning or bowing
A wall that is visibly leaning toward you has a soil pressure or drainage problem. Do not ignore it. A leaning retaining wall is under stress and can fail suddenly, especially after heavy rain saturates the soil behind it. Take out the leaning section, identify whether the base shifted or drainage failed, fix the underlying cause, and rebuild. This is one of those moments where the wall is telling you something, and listening saves a lot more work later.
Capstone adhesive failure
Caps that work loose over time are almost always caused by using the wrong adhesive (standard construction adhesive instead of polyurethane), applying it to a dirty or wet surface, or not pressing the cap firmly enough before the adhesive skins over. Remove loose caps, clean both surfaces, let them dry completely, apply fresh polyurethane adhesive, and reset. This is an easy fix and a totally normal maintenance task every 5 to 10 years.
A few honest notes before you start
The first course of block takes three times as long as every course after it. That is normal and expected. Nail the base course and the rest of the wall goes fast. Budget an extra half-day for layout and base prep, especially on your first build. Every experienced builder spent their first project wondering if they had made a mistake somewhere, and most of them built something they were genuinely proud of by the end. The skills you develop laying a simple 10-foot seating wall translate directly to more ambitious projects like full patio retaining walls or raised patios with walls on top, so it is worth starting clean and getting the fundamentals right.
FAQ
What key building codes and official references should the article cite for patio seating walls and small retaining walls?
Cite the International Residential Code (IRC) provisions on foundations and geotechnical evaluation (e.g., R401.4.1 allowable bearing capacities table), the International Building Code (IBC) Chapter 18 requirements for retaining wall stability (overturning, sliding, foundation pressure, water uplift) and seismic provisions (e.g., Section 1807.2.2), and relevant municipal permit thresholds (many jurisdictions trigger permits/engineering at 4 ft wall height or when supporting surcharge). Also reference NCMA/industry SRW guidance, FHWA/MSE design manuals, and major manufacturers’ installation manuals (Allan Block, Keystone, Belgard) for product‑specific requirements.
What soil and geotechnical data must be gathered and reported in the article for safe DIY designs and when to recommend a geotechnical report?
Required soil/geotech data: soil type/classification (sand, gravel, silt, clay, rock), estimated allowable bearing capacity (cite IRC R401.4.1 presumptive values as guidance), groundwater depth and seasonal high water table, presence of fill or organic layers, slope stability and angles, evidence of previous movement or erosion, and frost depth for the site. Recommend a licensed geotechnical report when soils are unknown/poor, water is shallow, site is on a steep slope or landslide‑prone, wall height exceeds typical non‑engineered limits (commonly >4 ft), walls support surcharge (driveways, structures), walls are adjacent to foundations, or local code requires engineering.
What structural design parameters and safety criteria must the article include for retaining/seating walls?
Include the following: maximum non‑engineered gravity/freestanding heights per manufacturer guidance (typical residential SRW gravity limits), fact that many municipalities allow un‑engineered walls ≤4 ft (check local code), stability checks required for engineered walls (factors of safety: ≥1.5 for sliding and overturning per IBC/industry practice), bearing pressure limits based on soil data, requirements for resisting water uplift and hydrostatic pressure (drainage), seismic surcharge considerations for certain seismic design categories (IBC Section 1807.2.2), and geogrid/reinforcement embedment rules of thumb (≥60% of wall height and minimum embedment typically ≥4 ft as NCMA suggests). Advise consulting a licensed engineer for walls that do not meet non‑engineered limits or that support surcharge.
What manufacturer and product specifications should be summarized for block/paver/segmental retaining wall (SRW) systems?
Summarize SRW specs: ASTM C1372 for dry‑cast SRW unit performance (compressive strength targets ~3000 psi average with no unit <2500 psi), manufacturer‑stated gravity height limits and when engineering is required, recommended leveling pad and base materials (open‑graded aggregate leveling pad vs. concrete footing depending on product), required drainage stone (commonly #57 / 1" crushed stone) and 12" drainage column behind face, 4" perforated drain pipe at base with holes down wrapped in filter fabric/pre‑socked, backfill compaction lifts (6–8 in. per NCMA) and geogrid embedment/spacing charts from suppliers. Note that manufacturer installation manuals (Allan Block, Keystone, Belgard) give step‑by‑step details and design tables—follow them or hire an engineer for departures.
Which material properties and pros/cons should the article compare (concrete block, natural stone, pavers, timber, dry‑stack vs. mortared)?
Provide material comparisons including: concrete block/paver (pros: modular, consistent dimensions, manufacturer support and engineered systems; cons: visible joints, color fading, need for proper drainage/backfill); natural stone (dry‑stack pros: aesthetic, flexible, good drainage; cons: variable sizes, more skill/time; mortared pros: stable and formal look; cons: require good footing, frost/thermal cracking concerns and mortar maintenance); timber/wood (pros: warmth, ease of installation; cons: rot, limited lifespan, pressure‑treated or structural timbers required, expect periodical replacement); dry‑stack vs. mortared (dry‑stack allows drainage and slight movement, easier to repair; mortared is rigid and requires good foundations and freeze/thaw considerations). Include typical durability, load capacity differences, and freeze‑thaw/durability expectations.
What foundation/footing and drainage details must the article present for each wall type?
Give explicit guidance: for SRW/segmental walls use a compacted open‑graded aggregate leveling pad (depth per manufacturer; some allow not extending below frost line if properly frost‑protected and designed) or concrete footing for taller/engineered walls; for mortared stone or poured concrete walls use a continuous concrete footing sized per load and frost depth. For timber walls specify treated timber footings buried to or below local ground/frost level on compacted fill or concrete footing. Drainage details: provide a continuous vertical drainage column of clean, open‑graded stone (commonly 12" behind the face), install a 4" perforated drain pipe at base with holes down, wrap pipe/stone in nonwoven filter fabric or use pre‑socked pipe, slope the pipe 1–2% to daylight or storm system, and avoid fine backfill directly against drainage stone. Stress compaction specs (6–8" lifts in reinforcement/backfill zones) and filter fabric placement to prevent fines migration.