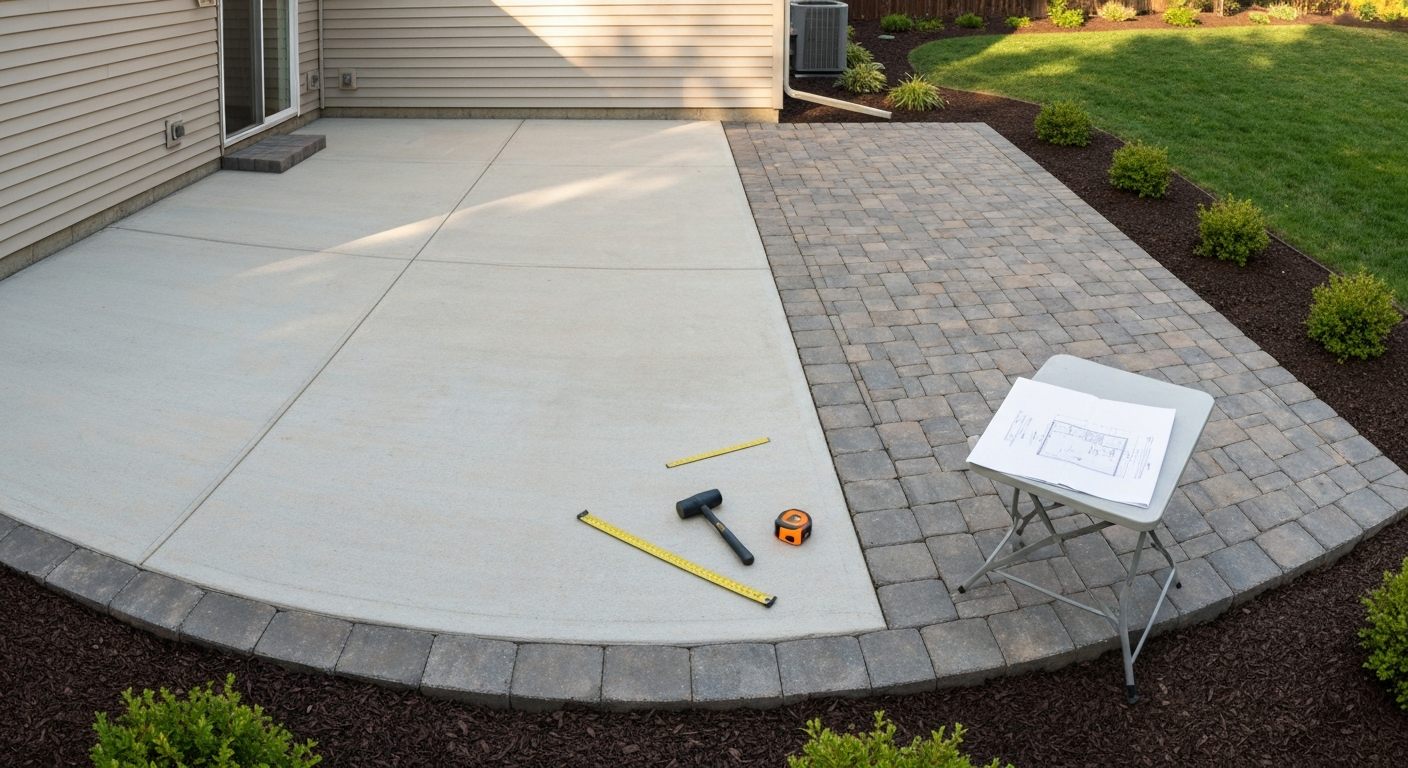
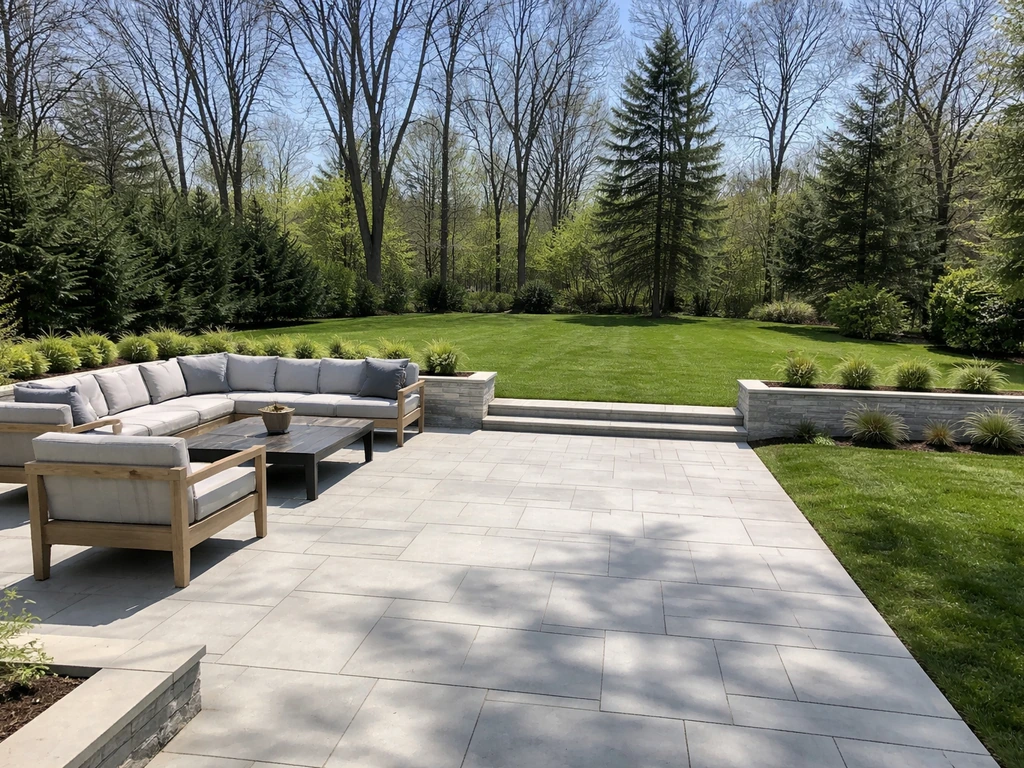
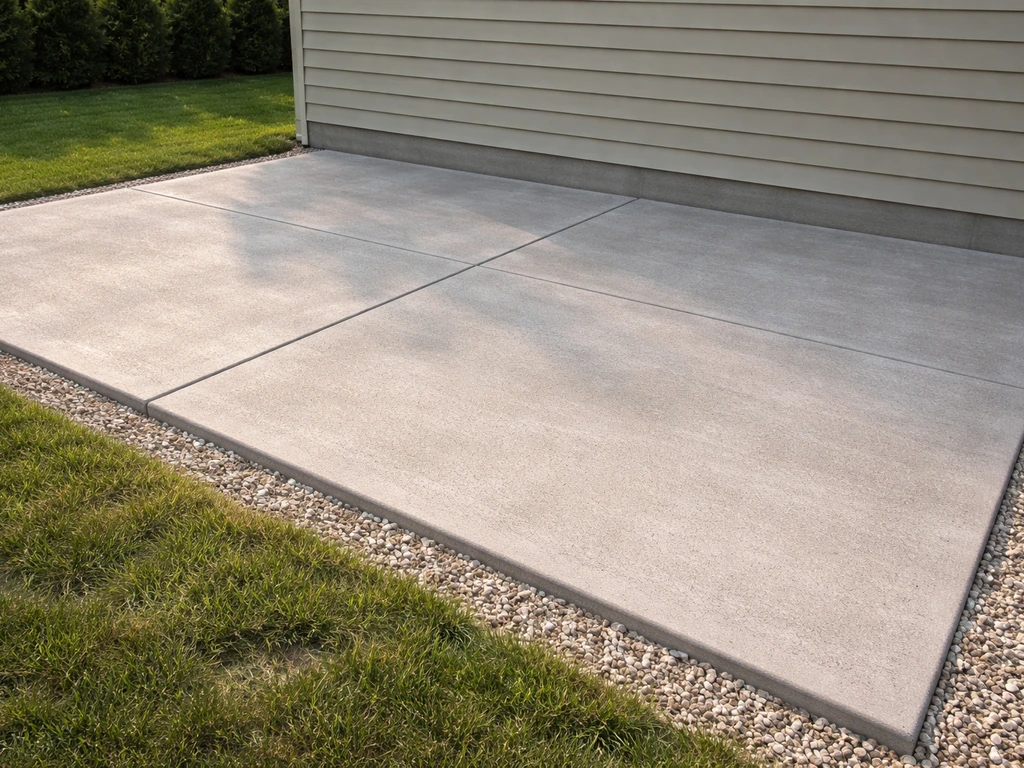
You can extend a raised patio by tying a new structure directly onto the existing one, building out at the same elevation with matching materials, or dropping a step or two to a lower platform that meets your yard. The right approach depends on how high your existing patio sits above grade, what the soil and slope look like beyond it, and whether you want a seamless flush extension or a tiered outdoor space. Most homeowners can tackle this as a DIY project over a long weekend or two, provided they plan carefully, pull the right permits, and choose a foundation method that matches their site conditions. For step-by-step guidance on how to make patio bigger, see our detailed guide. For step-by-step guidance and planning tips, see how to extend a backyard patio. For step-by-step guidance on how to add on to existing patio, consult a dedicated how-to guide that walks through planning, foundation options, and connection details. For step-by-step guidance on how to add a patio to your house, consult this detailed guide.
How to Extend a Raised Patio: DIY Plans, Foundations & Costs

Extending vs. Adding On: What's the Difference and Why It Matters
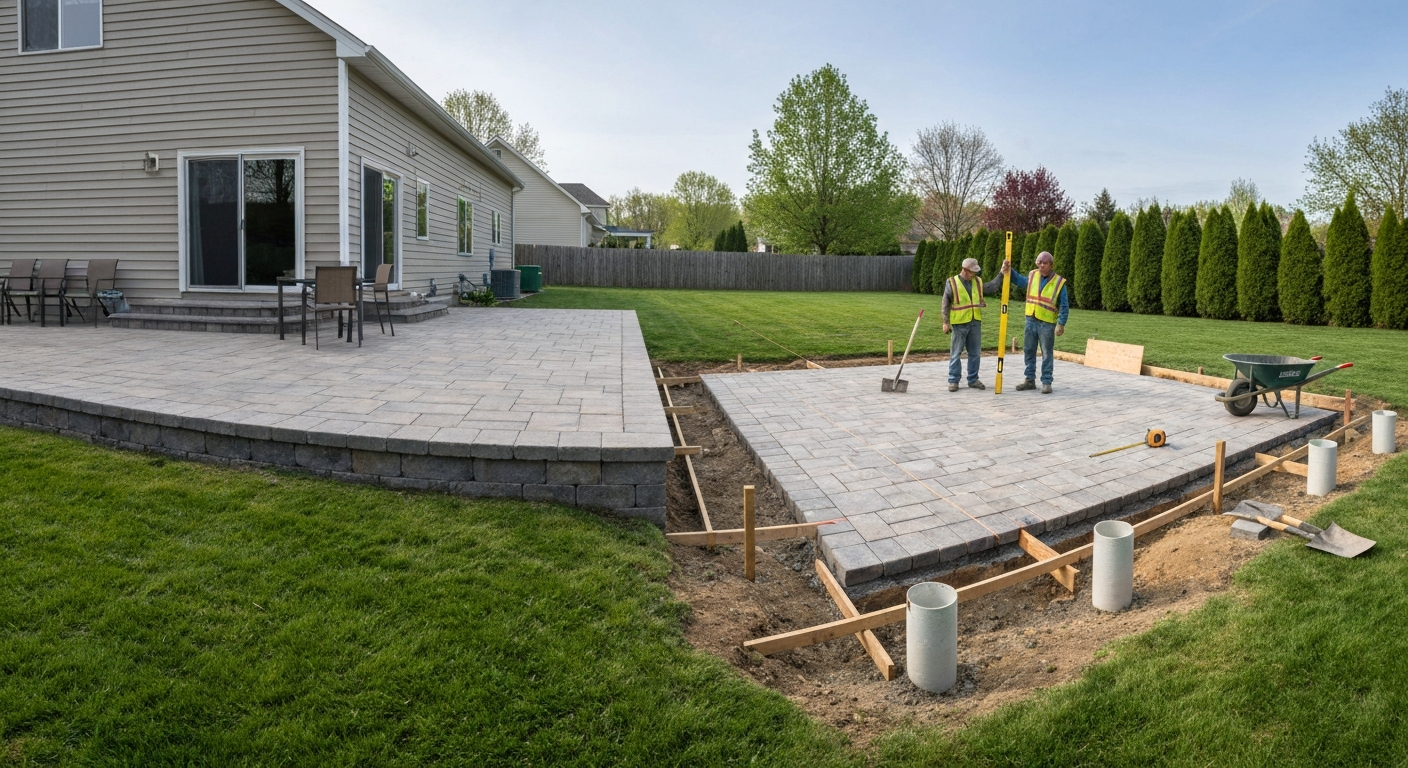
These two phrases get used interchangeably, but they describe slightly different outcomes. Extending a raised patio means enlarging the footprint at roughly the same elevation, you're making the platform bigger. Adding on usually implies attaching a new surface area that may sit at a different height, use different materials, or serve a different function (think a gravel lounge area adjacent to a concrete patio, or a wood deck platform that steps down from a stone surface). Both are valid, and many projects combine them.
Before deciding, think about your goals. Do you need more square footage for furniture, a dining table, or a grill station? Are you trying to connect the patio to a specific landscape feature like a pool, garden, or fire pit area? Is the main constraint your budget, the slope of your yard, or the height of the existing patio edge? Your answers will steer you toward a flush extension, a stepped platform, or a ground-level add-on. A raised patio sitting 18 inches above grade, for example, usually works best extended on piers or a stem wall at the same height, rather than trying to pour a new concrete slab against it.
Choosing the Right Approach for Your Situation
Run through this decision logic before you commit to a method. It will save you a lot of re-planning later.
| Scenario | Best Approach | Why |
|---|---|---|
| Existing patio is 0–6 in above grade | Floating slab or compacted aggregate extension | Ground-level match is easy; minimal structure needed |
| Existing patio is 6–18 in above grade | Poured concrete footing with block stem wall or piers | Manageable height; frost depth usually determines footing type |
| Existing patio is 18–36 in above grade | Pier-and-beam wood framing or poured concrete with retaining wall | Height requires real structure; wood framing is faster for DIY |
| Existing patio is 36 in+ above grade | Engineered pier-and-beam or poured concrete; likely needs permit review | At this height, guard rails are required and loads demand engineered footings |
| Sloped yard dropping away from patio | Tiered platform or stepped add-on | Trying to match height across a slope creates drainage problems |
| Want accessible (wheelchair/walker) route | Flush concrete or paver extension with controlled slope | Ramps require precise slope; piers and wood framing make this harder to achieve |
One thing I've learned from building and rebuilding patios: the height of your existing edge dictates nearly everything downstream, your foundation method, whether you need permits, whether guards or handrails are required, and how you'll manage drainage. Figure that number out first, before you sketch anything else.
Planning Checklist Before You Touch a Shovel
Good planning is how you avoid expensive surprises mid-project. Work through each item below and write the answers down, you'll reference this constantly during the build.
Measurements and Layout
- Measure the existing patio footprint precisely (length x width in feet) and note the surface elevation at the edge where you plan to extend.
- Measure from the existing patio edge to any property line, setback boundary, easement, or structure — most jurisdictions require a minimum setback of 5–10 feet from property lines for accessory structures.
- Determine how much square footage you want to add. Sketch it to scale on graph paper first, even a rough sketch, because size affects permit requirements.
- Mark underground utilities before digging. Call 811 (the free U.S. dig-safe hotline) at least 3 business days before any excavation.
- Check for tree roots, buried drainage lines, or irrigation systems within the extension footprint.
Height, Access, and Usability
- Measure the height of the existing patio surface above the adjacent grade at the lowest point — this determines whether guards and handrails are code-required (IRC requires guards at 30 inches or more above grade for decks; local codes for patios may differ).
- Plan for at least one primary access point with proper stairs if the extension will be more than one step above the yard. IRC stair minimums: maximum riser height 7-3/4 inches, minimum tread depth 10 inches.
- If anyone in the household uses a wheelchair, walker, or has mobility challenges, design for accessible slope. The ADA standard (used as a best-practice target for private homes) sets maximum running slope at 1:20 (5%) and maximum cross slope at 1:48 (roughly 2%). A ramp at 1:12 (about 8%) is the ADA maximum for wheelchair access.
- Handrails are required by IRC on any stair with 4 or more risers; height should be between 34 and 38 inches above stair nosing.
- Think about furniture layout now. A typical 4-person dining set needs about 12 x 12 feet of clear space; a 6-person set needs roughly 12 x 16 feet. Add at least 3 feet of clearance around any table for chair pull-out and foot traffic.
Connection to the Existing Structure
- Identify the existing patio's construction type (poured concrete slab, paver-on-base, stone, wood deck). This determines how the new section ties in.
- Check the condition of the existing patio edge — cracked, spalled, or frost-heaved edges need repair before extension, not after.
- Note whether the existing patio connects to the house with a ledger board or simply abuts the foundation. Any new structure tying into the house needs proper flashing to prevent water intrusion.
Permits, Codes, and Site Evaluation
I know permit talk makes eyes glaze over, but skipping this step is genuinely risky, not just for resale, but for safety. Here's how to handle it efficiently.
When You Likely Need a Permit
Many U.S. jurisdictions use the IRC as a baseline and exempt small freestanding patios and decks under about 200 square feet that sit no more than 24–30 inches above adjacent grade. But that exemption is not universal, your city or county may have different thresholds. The only way to know for certain is to call your local building department or check their website. Tell them the square footage of the addition and the height of the surface above grade. That conversation takes 10 minutes and can prevent a stop-work order later.
As a general rule: if your extension is over 200 square feet, sits more than 24–30 inches above grade, attaches to the house structure, or includes electrical or gas lines, plan on pulling a permit. For raised patios that need engineered footings, most departments will also require stamped drawings.
Setbacks, HOA Rules, and Easements
- Check your property survey for easements (utility, drainage, or access) — no structure can be built over most easements.
- Confirm setback requirements for your zoning district. Accessory structures typically need to be 5–15 feet from rear and side property lines, but this varies.
- If you're in an HOA, submit plans for approval before breaking ground. Many HOAs have specific material and color restrictions.
Soil and Site Assessment
Walk the extension area after a rain and look for standing water, soft spots, or areas where the ground feels spongy. These signal poor-draining or organically weak soil that will need to be excavated and replaced with compacted gravel. For a preliminary look at your soil type, the USDA NRCS Web Soil Survey is a free online tool that maps soil units by location, it's a good first step, not a substitute for digging a test pit and looking yourself.
Order a formal geotechnical report if: your yard has a slope steeper than about 15%, you suspect expansive clay or organic fill, you're planning a hot tub or spa on the extension (concentrated point loads), you're building a retaining wall over about 4 feet, or the building department asks for one. Geotech reports typically cost $500–$2,000 depending on scope, but they're far cheaper than a failed foundation.
Frost Depth
Footings must extend below the local frost line to prevent heave. Frost depth varies enormously across the U.S., from about 12 inches in mild coastal climates to 48 inches or more in northern states. Your local building department publishes the required footing depth; don't rely on a general map. Regional frost depth maps such as the blank" rel="noopener noreferrer">NWS / NCRFC frost depth mapping (regional frost depth resources) provide observed frost penetration data that designers and inspectors use to estimate local frost action, but code‑mandated footing depth remains a local permitting question. This is one number worth confirming before you pour a single bag of concrete.
Drainage, Slope, and Water Management
Water is the single biggest enemy of any patio extension, raised or otherwise. Get drainage wrong and you'll be dealing with puddles, heaving, eroded soil, and eventually structural damage. The good news is that managing drainage on a raised extension is actually more straightforward than on a ground-level slab, because you have elevation to work with.
Surface Slope
Industry practice (based on ACI 302.1R guidance) calls for roughly 1/4 inch of slope per foot of run, that's about 2%, to shed water off a patio surface without it feeling tilted. A minimum of 1/8 inch per foot (about 1%) is sometimes accepted, but I wouldn't go below that. Slope the surface away from the house and toward the yard or a designated drain point. On a 10-foot-deep patio, 1/4 inch per foot gives you 2.5 inches of total drop, enough to move water quickly without feeling like a ramp.
For accessible routes, target a cross slope no steeper than 1:48 (about 2%) per ADA guidelines, which conveniently aligns with the drainage slope recommendation. That's one of the few cases where accessibility and drainage goals line up perfectly.
Subsurface and Edge Drainage
- Under any compacted aggregate base, install a 4-inch perforated drain pipe at the low edge if the surrounding soil drains slowly. Wrap the pipe in filter fabric to prevent clogging.
- For raised pier-and-beam structures, make sure the area under the deck has positive drainage so water doesn't pool against the footings.
- On sloped sites, a French drain or swale uphill of the extension will intercept groundwater before it reaches the structure.
- If you're extending into a lawn area, remove the sod and 4–6 inches of topsoil before placing any base material. Topsoil compresses and holds moisture — it's not a suitable base for a patio.
- Permeable pavers and permeable concrete are excellent options for extensions where stormwater runoff is a concern or local codes require it. The EPA classifies permeable pavement as a stormwater Best Management Practice; ICPI publishes design guides covering the required layered aggregate reservoir and underdrain configurations.
Managing Water at the Connection Joint
The joint between your existing patio and the new extension is where water will always try to sneak in. If the new section is poured concrete abutting an existing slab, install a control joint (a saw cut or tooled groove 1/4 the depth of the slab) at the junction to give the inevitable movement a place to go. Fill control joints with a flexible polyurethane caulk rated for exterior concrete use. For pavers butting a concrete edge, a soldier-course border and flexible polymeric sand in the joints handle movement without cracking.
Foundation and Structure Options: What Works Where
This is where a lot of DIYers get paralyzed by choices. Prescriptive foundation options commonly used for raised patios/decks include pier‑and‑beam on isolated footings (prescriptive sizes in IRC R507 and the AWC DCA‑6 Prescriptive Residential Wood Deck Construction Guide (prescriptive footing/post guidance)), shallow poured concrete footings with posts, and 4″–6″ floating slabs on compacted aggregate for ground‑level patios; engineered alternatives include cast‑in‑place reinforced slabs, grade beams, or deep foundations where soil or loads demand. Here's a plain-language breakdown of the five main options, with honest pros and cons for each.
| Foundation Type | Best For | Typical DIY Skill Level | Relative Cost | Key Limitation |
|---|---|---|---|---|
| Pier-and-beam (wood framing) | Raised extensions 12–48 in above grade; sloped yards | Intermediate | $ to $$ | Requires precise footing layout; wood needs protection from ground contact |
| Poured concrete footing + slab | Flush or low-raised extensions; high-traffic areas | Intermediate to advanced | $$ to $$$ | Formwork and concrete work is labor-intensive; curing time adds days |
| Block/retaining wall with fill | Extensions on sloped sites needing fill retention | Intermediate | $$ to $$$ | Block walls over ~4 ft may need engineering; fill must be compacted in lifts |
| Timber framing (posts and beams) | Rustic aesthetic; extensions over landscaping | Intermediate | $$ to $$$ | Regular sealing/staining maintenance; susceptible to rot if not detailed properly |
| Floating slab on compacted aggregate | Ground-level or very low-raised extensions (under 6 in) | Beginner to intermediate | $ to $$ | Not suitable for raised applications; vulnerable to frost heave without proper base |
A Note on IRC Prescriptive Limits
The IRC Section R507 prescriptive deck provisions cover wood-framed structures with a design load of 40 psf live load plus 10 psf dead load, that's the standard residential occupancy assumption. The American Wood Council's DCA-6 guide expands on this with span tables, ledger fastener schedules, and footing size tables that most building departments accept without additional engineering. Stay within DCA-6's scope (single-level, residential, standard loads) and you're working in well-charted territory. Add a hot tub, heavy planters, or a pergola structure on top, and you've stepped outside prescriptive limits, get an engineer involved.
How to Build a Pier-and-Beam Raised Patio Extension: Step by Step
This method is my go-to recommendation for most raised patio extensions because it works on sloped sites, handles frost heave better than a slab, and is manageable for a determined DIYer with basic carpentry skills. For a full step-by-step guide on how to build extended patio, see the linked detailed walkthrough. For a full step-by-step procedure, see how to build a patio extension. The sequence below assumes you're extending an existing raised patio or building a new raised platform adjacent to it, using pressure-treated lumber on concrete piers.
- Lay out the extension footprint with batter boards and string lines. Batter boards are simple 2x4 frames set back 2–3 feet beyond each corner so you can re-string the lines after digging. Use the 3-4-5 rule (or its multiples) to confirm square corners: a 3-foot leg and a 4-foot leg should have a 5-foot hypotenuse if the angle is exactly 90 degrees.
- Mark footing locations. Refer to the IRC R507 tables or the AWC DCA-6 guide for minimum footing diameter based on tributary area and your local soil bearing capacity. A common residential assumption is 1,500 psf soil bearing capacity; if you're on soft or sandy soil, increase footing size or confirm with your building department. Typical footing diameters run 10–18 inches for most residential spans.
- Dig footing holes below the local frost line (confirm depth with your building department). Use a hand auger for holes up to about 12 inches in diameter; rent a one-person power auger for larger or more numerous holes. Keep hole walls clean and undisturbed — a loose, crumbly hole bottom creates a weak bearing surface.
- Pour concrete footings. Set a tube form (Sonotube or equivalent) in each hole so the top of the form is at the height you want the footing top — typically 2–4 inches above finish grade to keep the post base out of standing water. Mix concrete to a stiff consistency (not soupy) and fill the tube, tamping with a rod or stick to eliminate voids. Set a post anchor hardware into the wet concrete while it's still workable, using your string lines to position it precisely. Let footings cure for at least 48 hours before loading.
- Install posts. Use pressure-treated lumber rated for ground contact (UC4B or UC4C per AWPA standards) even though the post isn't technically touching the ground — moisture splashback is real. Set posts plumb using a level on two adjacent faces. Brace them with temporary 2x4 braces staked to the ground while you work.
- Install the beam. The beam (doubled or tripled 2x lumber, or engineered LVL) spans between posts and carries the joists. Beam size depends on span and load — the DCA-6 span tables are your reference. Secure beam to posts with structural post caps (Simpson Strong-Tie LPC or equivalent) rated for the load, not just toenails.
- Install rim joists and field joists. The rim joist forms the perimeter; field joists span between the beam and the rim or between beams. Check the DCA-6 joist span tables for your lumber size and spacing. Standard residential framing uses 2x8 or 2x10 joists at 16 inches on center for most spans under 12 feet. Use joist hanger hardware at every connection — hanger-supported joists are far stronger than toenailed ones.
- Connect to the existing patio structure (if applicable). If you're tying into an existing wood deck, remove the existing rim joist on the connection side and install a new doubled rim or ledger, then hang the new joists off it. If connecting to a concrete patio edge, use a ledger board anchored with concrete wedge anchors (minimum 1/2-inch diameter, embedded at least 1-1/2 inches into solid concrete) spaced per IRC Table R507.9.1.3(1). Flash the top of the ledger with Z-flashing lapped over the siding above — missing or improper ledger flashing is one of the leading causes of ledger rot and structural failure.
- Install the decking surface. Pressure-treated 5/4x6 decking (actual 1 inch thick) or composite decking boards run perpendicular to the joists, with 1/8-inch gaps between boards for drainage. Face-screw or use hidden fasteners per the manufacturer's specs. Maintain a 1/4-inch gap between the decking and any wall or structure to prevent water trapping.
- Install stairs, guards, and handrails as required. If the surface is 30 inches or more above grade (IRC threshold for deck guards), guards are required on all open sides — minimum 36 inches high with balusters spaced no more than 4 inches apart. Stairs: maximum 7-3/4-inch risers, minimum 10-inch treads. Handrails are required on stairs with 4 or more risers.
Material Notes for Pier-and-Beam
- Use pressure-treated lumber rated at minimum UC4A for above-ground framing, UC4B for posts close to grade or in contact with concrete.
- For a more finished look, composite decking (Trex, TimberTech, Fiberon) eliminates annual staining and splinter concerns; it costs roughly $4–$8 per linear foot for materials vs. $1.50–$3 for pressure-treated 5/4x6.
- All hardware (post bases, joist hangers, beam caps) must be rated for use with treated lumber — use hot-dip galvanized (HDG) or stainless steel. Standard zinc-plated hardware corrodes rapidly with modern ACQ-treated lumber.
How to Pour a Concrete Extension: Step by Step
Poured concrete is the right call when you want a seamless, solid extension to an existing concrete patio, or when you're building a low-raised extension (under about 12 inches) where a wood structure feels like overkill. It's more labor-intensive than wood framing, but a concrete slab will outlast just about any other material with minimal maintenance.
Formwork
- Excavate the extension area to a depth of at least 8 inches below finish grade (4 inches of compacted gravel base plus 4 inches of concrete is the practical minimum for a residential patio slab). In cold climates or poor soil, go deeper.
- Compact the subgrade soil with a plate compactor. Rent one — it's not optional. Uncompacted subgrade is the primary cause of slab cracking and settling. Make 2–3 passes in perpendicular directions.
- Install 4 inches of crushed stone base (3/4-inch clean crushed stone or compactable gravel). Compact this layer as well. The gravel base provides drainage and a stable bearing surface.
- Build the form from 2x4 or 2x6 lumber (2x4 gives a 3.5-inch slab; 2x6 gives a 5.5-inch slab — the thicker option is better for anything that will see vehicles or heavy loads). Drive 1x4 or 2x4 stakes every 2 feet on the outside of the forms, screwed flush to the top of the form boards. The top of the form sets your finish grade, so set it at the right height and slope (1/4 inch per foot away from the house) before adding any concrete.
- At the joint with the existing slab, do not tie the new concrete rigidly to the old. Instead, butt the form against the existing slab edge and plan to fill the joint with a backer rod and flexible polyurethane caulk after the new slab cures. Two independent slabs that can move slightly will outperform a rigid bond that cracks as the slabs settle differently.
Reinforcement
- Install #3 rebar (3/8-inch diameter) in a grid pattern at 18 inches on center in both directions, or use 6x6 W1.4/W1.4 welded wire mesh as a minimum. Rebar is more effective for crack control.
- Support the rebar 1.5–2 inches off the gravel base using plastic or concrete rebar chairs — the steel needs to be in the middle third of the slab depth to do its job. Rebar sitting on the ground provides almost no structural benefit.
- For extensions adjacent to the house, install a 1/2-inch expansion joint material (premolded foam board) against the house foundation to isolate the slab from the structure. This prevents the slab from transferring loads into the foundation as it moves.
Pouring and Finishing
- Order ready-mix concrete rated at minimum 3,500 psi compressive strength, with air entrainment (4–7% air) if you're in a freeze-thaw climate. Air entrainment is critical for durability in cold regions — it creates micro-bubbles that give water room to expand when it freezes.
- Have your crew ready before the truck arrives. Concrete waits for no one. You need at least two people: one directing the chute and spreading, one screeding.
- Pour the concrete into the form and spread with rakes or shovels. Don't overwork it — excessive working brings water and cement fines to the surface, which weakens the top layer.
- Screed the surface level with the top of the forms using a 2x4 or magnesium screed board pulled in a sawing motion across the forms. Check your slope as you go with a level.
- After screeding, wait for the bleed water sheen to disappear from the surface before finishing — this usually takes 20–60 minutes depending on temperature and humidity. Finishing over bleed water seals it in and causes surface delamination.
- Float the surface with a bull float (long-handled magnesium float) to embed aggregate and smooth the surface. For a broom finish (recommended for exterior patios — it's slip-resistant), drag a stiff-bristle broom across the surface in one smooth direction after floating.
- Cut control joints within 24 hours of the pour using a circular saw with a diamond blade, or use a jointing tool while the concrete is still plastic. Cut joints at 8–12 foot intervals in both directions (for a 4-inch slab, cut to 1-inch depth). Control joints give the slab a weak plane to crack along — a straight crack in a control joint is invisible; a random crack across your patio is not.
Curing
Curing is as important as any other step and gets skipped more than any other. Concrete gains strength through a chemical reaction (hydration) that requires moisture. If the slab dries out too fast, the surface weakens and dusts. Cover the finished slab with plastic sheeting or burlap kept wet for at least 7 days. Avoid heavy foot traffic for 24–48 hours; keep furniture and vehicles off for at least 7–10 days. Full design strength (typically 28-day strength) develops over about a month, though the slab is usable well before that.
Connecting the Extension to the Existing Patio and House
The transition between old and new is where most extensions look sloppy or fail prematurely if you don't think it through. Here are the key connection details for common scenarios.
Concrete-to-Concrete
As noted in the pouring section: don't bond new concrete rigidly to old. Let both slabs move independently and seal the joint with a flexible caulk. For a more finished look, saw-cut a clean, straight line in the existing slab edge before pouring the new section so the joint is crisp and straight. Fill with a color-matched polyurethane sealant.
Paver-to-Paver or Paver-to-Concrete
Match the base depth and compaction of the existing installation. If the existing pavers are on 4 inches of compacted gravel, your extension needs the same base or you'll get differential settling at the joint. At the transition, install a rigid plastic or aluminum edge restraint on both sides of the joint to prevent the existing pavers from spreading into the new section. Use polymeric sand in all joints, including the transition joint.
Wood Deck Ledger to House
If the new structure attaches to the house, the ledger connection is your most critical detail. The ledger must be bolted through the house rim joist or band joist, not just screwed into siding. Use 1/2-inch lag screws or carriage bolts at spacing per IRC Table R507.9.1.3 or the DCA-6 tables (spacing varies by joist span and lumber size, typically 16–24 inches in a staggered pattern). Flash the ledger with metal Z-flashing that directs water out over the siding below the ledger and away from the band joist. This detail is non-negotiable: unflashed ledgers are a documented leading cause of deck collapse.
Material Comparison: Patio Extension Surface Options
| Material | Installed Cost (per sq ft) | Lifespan | Maintenance | Best Application | DIY Friendliness |
|---|---|---|---|---|---|
| Concrete (poured) | $6–$12 | 30–50+ years | Seal every 2–3 years | Flush or low-raised extensions | Moderate — requires formwork and pour coordination |
| Concrete pavers (ICPI/interlocking) | $8–$18 | 25–50+ years | Re-sand joints every 3–5 years | Any height; flexible base allows adjustment | Beginner-friendly once base is compacted |
| Natural stone (flagstone, bluestone) | $15–$35 | 50+ years | Seal periodically; re-set shifted stones | Premium look; irregular or formal layouts | Moderate — cutting and setting is labor-intensive |
| Pressure-treated lumber decking | $10–$18 | 15–25 years | Stain/seal annually to every 2 years | Raised pier-and-beam structures | Intermediate — straightforward carpentry |
| Composite decking | $18–$35 | 25–30 years | Low — annual cleaning only | Raised structures; low-maintenance priority | Intermediate — same skills as PT wood |
| Modular/floating deck tiles | $4–$12 | 10–20 years | Moderate — individual tiles can be replaced | Low-raised or ground-level over existing surface | Beginner — snap-together installation |
If you're extending a small patio and want the most beginner-friendly path, interlocking concrete pavers on a compacted gravel base are hard to beat. They're forgiving, adjustable, and you can DIY the entire project with basic tools. If durability and zero-maintenance are the priority and you don't mind the more involved installation, a poured concrete extension with a broom finish is the most cost-effective long-term choice.
Tools and Estimated Project Costs
Tools You'll Need
- Tape measure, string line, and line level (essential for layout and slope)
- Batter boards (2x4 lumber and stakes — make them yourself)
- Plate compactor (rent — roughly $75–$125/day)
- Post hole digger or one-person power auger (rent for $75–$150/day)
- Circular saw and miter saw for lumber cuts
- Drill/driver and impact driver
- Level (4-foot and torpedo levels)
- Concrete tools if pouring: bull float, screed board, margin trowel, magnesium hand float, edger, jointing tool, broom
- Safety gear: gloves, safety glasses, knee pads (concrete work), dust mask when cutting concrete
Rough Cost Ranges by Project Type
| Project Type | Size Example | DIY Material Cost | Hired-Out Total |
|---|---|---|---|
| Paver extension on compacted base | 10 x 12 ft (120 sq ft) | $600–$1,200 | $1,800–$3,500 |
| Poured concrete extension | 10 x 12 ft (120 sq ft) | $700–$1,500 | $2,000–$4,500 |
| Pier-and-beam wood deck extension | 12 x 16 ft (192 sq ft) | $1,500–$3,000 | $5,000–$12,000 |
| Composite deck extension | 12 x 16 ft (192 sq ft) | $3,500–$6,000 | $8,000–$18,000 |
| Tiered raised platform (two levels) | 10 x 20 ft total | $2,500–$5,500 | $10,000–$22,000 |
Permit fees typically add $100–$500 for smaller projects, more for engineered plans. These ranges reflect 2025–2026 material prices and can vary significantly by region. The biggest variables are lumber prices (which have been volatile), labor rates in your area, and how much site prep work the ground needs.
Finishes and Landscape Integration
The extension itself is just a platform. What makes it feel like a finished outdoor space is how it transitions into the surrounding landscape. A few details go a long way.
- Edge the new patio perimeter with a soldier-course border (pavers set vertically or on-end), metal landscape edging, or a planted bed to create a visual boundary between hardscape and lawn.
- If the raised extension has visible piers or framing underneath, consider lattice panels, stacked-stone skirting, or planted shrubs to conceal the understructure and prevent debris buildup.
- Where the extension meets a step down to grade, plant low-growing ground cover (creeping thyme, sedum, or ajuga work well) between stepping stones for a soft transition.
- Lighting transforms a patio extension from a daytime space to an evening destination. Low-voltage LED path lights, post cap lights, and string lights are all DIY-friendly; in-deck recessed lights need a bit more planning for wiring conduit during framing.
- If the extension sits over soil (pier-and-beam), lay weed fabric under the structure and top it with river gravel to prevent vegetation growth, reduce moisture, and improve drainage.
Troubleshooting Common Problems
Settling and Uneven Surfaces
If your paver extension starts developing low spots or rocking pavers within a year or two, the most common culprit is an inadequately compacted base. Remove the affected pavers, add and compact additional base material, and reinstall. This is one of the honest advantages of pavers over poured concrete, they're correctable. With a concrete slab, settling usually means grinding down high spots or living with trip hazards until the slab is eventually replaced.
Drainage Problems
Persistent ponding on or around a new extension almost always traces back to insufficient surface slope or blocked subsurface drainage. Check your surface slope with a level and straightedge, if it's less than 1/8 inch per foot, water will pond in dead-level areas. For concrete slabs where the slope is already set, a channel drain (linear trench drain) installed at the low edge is often the most practical retrofit solution.
Frost Heave
Frost heave happens when water in the soil freezes, expands, and pushes up whatever's above it. On floating slabs, it shows up as cracking and lifted sections. On pier-and-beam structures, it can push footings up if they weren't poured below the frost line. The fix for footings is unfortunately a dig-out and repour. For floating slabs in frost climates, make sure the gravel base (which is free-draining and doesn't hold moisture well) is at least 4–6 inches deep; some builders in cold climates go 8–12 inches of base for a better frost buffer.
Ledger Rot and Connection Failures
If you notice the ledger board feels soft or the house siding behind the ledger is staining and deteriorating, water is getting behind the ledger. This is a repair-now situation, don't delay on ledger issues. Remove the ledger, replace any rotted framing, install proper Z-flashing, apply a flexible waterproof membrane behind the ledger, and reinstall with appropriate hardware. It's a significant amount of work, but a failed ledger connection can cause partial deck collapse.
Maintenance and Safety Checks
A raised patio extension is a structure that deserves an annual inspection, especially if it's wood-framed. Walk through this checklist every spring.
- Probe wood framing members with a screwdriver at posts, ledger connections, and beam ends — a screwdriver should not penetrate more than a few millimeters. Soft spots mean rot.
- Check all hardware connections (joist hangers, post bases, beam caps) for rust, corrosion, or loosened fasteners.
- Test guards and handrails by applying 200 pounds of lateral force — this is roughly the code-required design load. Any wobble means a connection needs to be re-evaluated.
- Inspect control joints and perimeter caulk on concrete patios; reapply flexible caulk wherever it's cracked or missing.
- Clear debris from under the structure and from drainage channels or French drains.
- For sealed concrete or natural stone, check sealer condition — water should bead on a properly sealed surface. Re-seal when beading stops.
When to Hire an Engineer or Contractor
I'm a strong believer in DIY, and I genuinely think most homeowners can build a straightforward raised patio extension themselves. But there are situations where bringing in a structural engineer or licensed contractor is the right call, not because you can't handle the tools, but because the stakes of getting it wrong are too high.
- The extension will be more than 36 inches above grade on one or more sides — this height increases fall risk and structural loads significantly.
- You're building on a slope steeper than about 15%, near a hillside, or on soil that shows signs of instability (erosion channels, previous landslide scarring).
- A hot tub, spa, or large planter (hundreds to thousands of pounds of point load) will be placed on the extension.
- The building department requires stamped engineering drawings for your permit application.
- You're attaching to a house and you're uncertain about the construction of the existing band joist or rim board — older homes sometimes have non-standard framing that doesn't match prescriptive code assumptions.
- A retaining wall taller than about 3–4 feet is involved — most jurisdictions require engineering above this height.
- You suspect expansive clay, organic fill, or high groundwater under the site.
A structural engineer consultation (not a full report, just a 1–2 hour paid consultation) typically costs $200–$500 and can give you exactly the footing sizes and connection details you need to build confidently within code. It's money well spent when the alternative is guessing on a structure that people will stand on every day.
FAQ
What are the first planning steps before extending a raised patio?
Start with site measurements and goals: measure existing patio dimensions, desired new footprint, clearances, and elevation changes. Sketch a layout showing property lines, setbacks, utilities, house openings, gates, and existing grades. Record height differences and access points; note any required ADA or universal‑access routes. Check local zoning setbacks, easements, and homeowners association rules. Do a soil/visual site evaluation for drainage, trees, and slope. Assemble photos and measurements for permit research or contractor quotes.
How do I know if I need a permit to extend a patio or build a raised extension?
Check your local building department; permit requirements vary. Common rules: small, freestanding ground‑level patios under certain size/height are sometimes exempt, and decks less than ~24–30 inches above grade or under 200 sq ft may be treated differently under the IRC, but local thresholds vary. Any ledger attachment to the house, structural posts/footings, retaining walls above code thresholds, or changes to egress typically trigger a permit. When in doubt, call your local plan reviewer with your sketch and elevations.
What site evaluation and soil checks should I do before designing the foundation?
Do a visual soil inspection (drainage, organic topsoil, ponding, high water table) and consult USDA NRCS Web Soil Survey for soil types. Look for expansive clay, peat/organic soils, shallow bedrock, or known fill — these often require a geotechnical report. Check frost depth for required footing depths. If you plan concentrated loads (hot tub) or retaining walls, arrange a soils report. For typical small raised patios on good soils, a prescriptive footing design (IRC/AWC DCA‑6) may suffice.
What drainage and slope solutions should I use to avoid ponding and water problems?
Provide positive drainage away from the house: slope flat finished surfaces about 1/8–1/4 in/ft (≈1–2%) minimum (ACI and ADA guidance target ~2% for reliable runoff). Include perimeter grading, linear drains or slot drains at the house, and downspout extensions away from the patio. For permeable surfaces, design a layered aggregate reservoir and underdrain per EPA/ICPI guidance. On raised patios, flash the ledger and include flashing/drip edges to keep water off structure.
What foundation and support options exist for raised patio extensions?
Common options: 1) Pier‑and‑beam (isolated footings with posts) — economical and prescriptive under IRC/R507/AWC DCA‑6; 2) Poured concrete footings and posts — good for heavier loads; 3) Concrete block/retaining walls — for terraced/raised edges and grade retention; 4) Timber framing on concrete piers — traditional deck approach; 5) Floating slab (4–6 in on compacted aggregate) for ground‑level patios — not suitable where frost heave is a concern unless designed for freeze; 6) Engineered reinforced slab or grade beam for large/heavy projects or poor soils. Choose per soil, frost depth, loads, and local code.
What are typical step-by-step construction sequences for common methods?
General sequences: 1) Plan/permit/locate utilities and mark layout; 2) Excavate and set grades; 3) Install footings/piers or compacted base for slab; 4) Install posts/frames or formwork and reinforcing for slab; 5) Attach ledger to house with proper flashing or tie frame freestanding; 6) Install joists/decking or pour concrete and finish surface; 7) Build steps/guards, install railings and handrails to code; 8) Grade and integrate landscaping/drainage. Follow method‑specific details (e.g., DCA‑6 for wood decks, ACI for concrete).